

There are three main types of peas: English peas, snow peas, and sugar snap peas. In today's lesson, we will learn how to grow sugar snap peas.
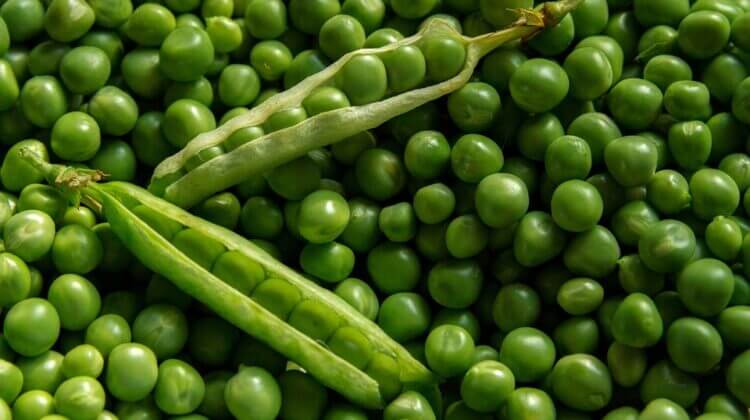
Sugar snap peas are a type of bean that is grown in the United States and Canada. They are known for their sweetness and for being a healthy option. Sugar snap peas are similar to snow peas in that the entire pod is eaten.
The main difference between these two types of peas is the shape of their pods. Snow peas have flat pods, while sugar snap peas have round pods.
Most cultivars are climbing vines that need support from a trellis. Sugar Snap peas are a vegetable that can grow in colder temperatures.
One of the most enjoyable aspects of spring and summer gardening is gardening with sugar snap peas.
Snap peas are meant to be eaten with both the pods and the peas. This is why they are grown in pods.
Whether you eat them raw or cooked, snap peas make a great addition to any dish.
When to Plant Sugar Snap Peas?
You can plant sugar snap peas as early as February if the soil temperature has risen sufficiently to allow the ground to have thawed and become workable.
Peaks are typically one of the first crops to be planted in the spring. The pea planting schedule in the US is often timed to correspond with Saint Patrick’s Day.
You need a short growing season for sugar snap peas. The season begins in the early spring and ends in the late summer. An optional early fall window may be available in some locations.
Youthful pea plants can manage a last frost or soft snow, yet an unforeseen week of significant cold or soggy earth because of snowmelt could make the fix come up short, requiring the requirement for a subsequent round of planting.
In addition, the temperatures at the time of sugar snap pea seeding are usually between 45 and 57 degrees Fahrenheit (about 45 to 57 degrees Celsius).
The sugar snap pea is a type of Pisum sativum that is easy to grow in cooler weather. In general, insects and diseases are not a problem for them.
You will have the best results if you plant the seeds directly in the garden in an area that drains well and gets full sun for most of the day.
If you live in a warm climate, plant them in a location that receives full morning sun and partial shade during the hottest part of the day.
How to Grow Sugar Snap Peas?
To improve germination, it is best to soak pea seeds in warm water the night before planting them. It is recommended that you inoculate your cold soil with nitrogen-fixing rhizobia, which are a type of bacteria. To grow it, we need to follow these steps…
Preparation of the Soil
Make sure that the area where you will plant the peas is free from any weeds or garbage. Till the soil 8 to 10 inches deep and rake it several times to break up any large dirt clods. Work the soil in the garden only when it is dry enough to not stick to the garden tools you are using. This will help to avoid compacting the soil.
Choose the Perfect Location
Place your pea rows in an area that gets a lot of direct sunlight for the sweetest peas.
If you're planning to plant peas, make sure the ground has good drainage. Wet soils can cause root rot, which peas are particularly susceptible to.
If you don't want your soil to be soggy from melted snow or rain, you should build raised beds.
Plant Seeds in the Ground
Plants the seeds 1 to 1½ inches deep and 1 inch apart in a single or double row.
Between one and two feet between rows is a good idea to keep things neat. To complete the process, add a thin layer of soil and lightly press it into place.
When planting rows of seeds, leave 18 to 24 inches of space between them. Double rows should have 8 to 10 inches between them.
If a light frost is expected, cover the seedlings once the seeds have germinated. The protection will help the plants to grow and produce earlier.
Sugar Snap Pea Beds
You can also sprinkle the seeds over the garden bed and cover it with light topsoil. To sow, gently walk over the garden bed. Sugar snap peas should be planted in beds that are 8 inches high and 18 to 24 inches apart.
Fertilizing
Nutrient-fixing plants can take nitrogen from the air and turn it into a form that can be used for food production.
A nitrogen-fixing inoculant containing bacteria can help increase crop production by helping the plant convert nitrogen into plant nutrition.
An inoculant is a material that you coat the seeds with before planting them, typically made of a powder that you moisten with water.
Watering
Make sure the soil does not dry out completely, but do not water it too much either. If it hasn't rained in a while, you might need to water your plants once a week.
Make a Trellis For Your Plants
As soon as the tendrils of vining peas like sugar snaps start sprouting and poking their way through the soil, they will need a support system, as they can grow up to six feet in height.
As vertical supports for your sugar snap peas, you can use a variety of things like a tomato cage, a makeshift chicken wire fence, or a piece of twine strung between two posts.
Mulch
After the tendrils have come up out of the ground, you can put a thin layer of mulch (straw or compost works fine) on top to help keep down the weed growth and stabilize the temperature of the soil underneath. Hand-pull any weeds that you come across.
Pests and Diseases
After you sow the seeds, it's a good idea to protect them from the birds. I personally have never had a problem with birds, but they can be a real annoyance. Place a wire mesh or sticks along the newly sowed row to keep the birds from eating the seeds. If you have a mouse problem in your garden, there is no guaranteed way to get rid of them. Mice will eat seeds quicker than you can sow them, so it is difficult to outpace them. Some gardeners coat the seeds in paraffin to keep them from being eaten, while others buy a cat to keep the animals away.
There are also several other problems that can arise, such as Pea Moth, Pea Weevil, or Pea Thrip, Greenfly, and Blackfly.
Powdery Mildew
The leaves and pods of this plant develop a sticky white substance. This usually happens at the end of the season. This disease is more prevalent in dry climates and will be more severe in gardens that are not exposed to wind. If you don't want to get the disease, spraying with a diluted milk solution is a good preventative measure. If you already have the disease, however, you will need to spray with sulfur. Planting varieties of kale that are resistant to disease will reduce the amount of time you spend dealing with sick plants.
Pea Moth
Farmers who grow crops in southern England will know about the pea moth, which drills through the pods and into the peas, making them inedible. There is no known cure for the disease, so the best course of action is to sow crops early or late in the season. A fast-maturing early variety should be sown in April.
Supporting Peas
The plants that peas belong to are climbers, so they will need support to grow. As soon as you see the first signs of the plant starting to droop, you need to provide support. Otherwise, it won't grow as well. Make sure your supports are strong enough to hold a mature crop of peas. The tendrils on a pea plant are the small, curled shoots that wrap around a support to help the plant climb.
Peas need lateral support and cannot climb a bamboo cane as beans can.
Using small branches
Most pea varieties will grow to be between 4 and 6 feet tall. Pruned branches from your trees can be used as free and natural-looking supports. Cut branches that are approximately 1-2 inches in diameter and 6 feet high. The best situation would be to get some straight ones. Push them into the ground at approx 2-foot spacings. Use smaller branches to create a horizontal support system between the uprights. The more branches you have, the better, as the peas increase in height. You can add more branches.
Making a pea wigwam
Tie suitable sticks together to create a wigwam. Bamboo poles can be used as an alternative to traditional wooden stakes, however, you will need to tie string or wire around the wigwam to help the peas climb. A combination of branches and twigs is ideal because they provide a lot of support for climbing. Make sure the structure is well-supported by sticks. I would recommend this method because it is fun and the garden looks great.
Using a pea & bean mesh
Fencing posts that are 2 inches or thicker should be placed in the ground approximately 4 feet apart. Use pillars that are 7/8 foot tall and bury them at least 12 inches into the ground. Attach your pea and bean support mesh to the posts using staples or u-shaped nails.
Crop Care
If the weather is dry and your peas have already started to flower, be sure to keep them well-watered. This will increase the yield. You should not water the plant excessively before the flowers have bloomed, as this will result in more luscious leaves, rather than the desired pods. Mulching the base of the plants helps to control weeds and retain moisture. Grass clippings can be used as long as the grass hasn't been sprayed for any form of moss or weed control. Only use enough grass clippings to cover the ground and keep down weeds, as they are high in nitrogen.
Harvesting Peas
Garden peas are best when they are not fully mature. If they are fully mature, they become hard and lose the sweet taste. Harvesting them early also encourages them to produce more. They should be harvested when they are a rich green colour and before they start to turn yellow. Peas should be harvested 3 weeks after flowering, when they are a rich green colour. It is best to pick peas just before you need to cook them, as they lose their flavor quickly after being harvested.
You should start by harvesting the peas at the bottom of the plant, since they will be the most ripe. As time goes on, you can work your way up the plant. When the plant stops bearing fruit, cut the top off and leave the roots in the ground to decompose and enrich the soil for next year.
One tip for harvesting peas is that if you don't keep picking them, the plant will stop producing. If you are fed up with peas or need to go away for a week, ask a neighbor to harvest them. Once they stop, they can't be stimulated back into action. You should pick your peas once or twice a week so they will stay tender. 3 To avoid damaging the pea plant, grip the pea by the stem and pull off the pod. There are different types of harvesting for each pea.
Shelling or maincrop peas
Choose pea pods that are bright green and well filled, but still have some space between the peas. Remove the peas from their pods, and either cook them right away or wait to cook the whole pod later to preserve flavor. You can eat peas straight from the vine, and they're delicious.
Dried Peas
Leave the plant pods on the plant until the end of the season when they turn brown. Lift the plants up and suspension them in a ventilated greenhouse. When the peas are dry and crispy, remove them from the pods and store them in airtight jars.
Mangetout – Flat podded types.
Peas are at their peak when the outlines of the peas are just visible through the skin of the pods and the pods snap cleanly in half. They won't stay fresh for very long, so keep an eye on your plants.
Mangetout – Sugar Snap types.
Pick when green, plump, and easily snapped in half. You can shell them if you want, but the pods of these peas are edible. Steam the whole lot very lightly, delicious!
Digging In Pea Roots
Pea plants grow by taking nitrogen from the air and storing it in their roots. Keeping nitrogen in the soil is important for healthy plants. The white balls on the roots in the photo are nitrogen-storing nodules. The peas should be cut down to soil level when they are finished producing at the end of the season. Loosen the soil around the roots of your vegetable plants to allow the nitrogen in the root nodules to be released. This will help fertilize your plants for the next growing season.
Storage:
Peas only last a short time, so it's not a good idea to keep them in their pods or shell them ahead of time. Keep store-bought pods in a plastic bag in the fridge, and use them up within a few days. The best way to store shelled peas is to freeze them. Boil the vegetables for a minute or two then put them in a bowl of ice water to help them keep their bright color. Drain and freeze them in zip-top bags. They will keep for five to six months.
One of the great joys of summer is being able to walk out into the garden and snack on freshly picked peas. Sadly, in my garden, most of the peas never make it into the house as visitors help themselves as they stroll by. To grow peas, you don't need to do much, but you need to build a strong support frame before you start.
Leave a Reply