

Saving seeds from your garden is a simple and rewarding way to grow vegetables year after year without buying new seeds. It allows you to create a self-sufficient garden while preserving varieties you love. Many gardeners enjoy seed saving because it connects them to the full cycle of planting, growing, harvesting, and replanting.
With each season, you learn more about your plants, and the seeds you save adapt better to your local soil, climate, and growing conditions. This natural process helps build stronger crops and gives you more control over your garden’s future.
Why Save Seeds?
Seed saving offers a long list of benefits for home gardeners. The first and most obvious advantage is cost savings. Instead of purchasing new seeds every year, you can use seeds from your own garden. Over time, this can save a significant amount of money, especially if you grow many crops.
Another reason is local adaptation. Seeds grown in your garden adapt to your soil, sunlight, and rainfall patterns. When you save seeds from the healthiest plants, you encourage stronger genetics that perform better in your area.
Seed saving also supports sustainability. By reusing seeds, you rely less on commercial seed companies and maintain a cycle of growth that stays in your own backyard. Many gardeners appreciate this independence and the chance to control what they grow and eat.
Finally, saving seeds helps protect biodiversity. Heirloom and unique varieties can disappear if people stop growing them. By keeping these seeds alive, you help preserve a piece of gardening history for future generations.
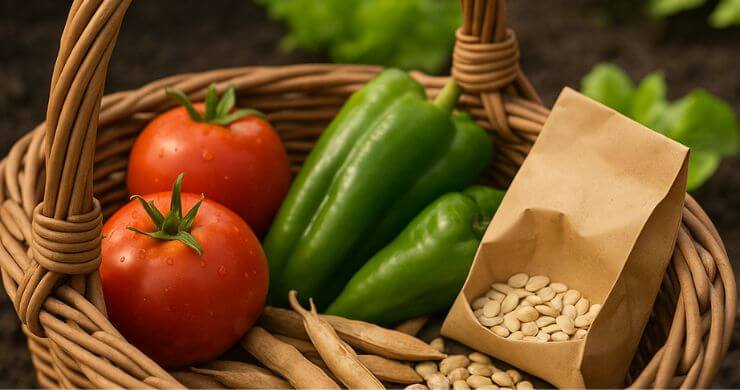
Best Vegetables for Beginners
Some vegetables are much easier for beginners to start with because their seeds are simple to collect, clean, and store. Tomatoes, peppers, beans, peas, and lettuce are great choices when learning seed saving.
Tomatoes are popular because you only need to scoop out the seeds, ferment them briefly, rinse, and dry. Peppers are even easier—remove the seeds, spread them out, and let them dry. Beans and peas require little work beyond letting the pods mature and dry on the vine before shelling out the seeds. Lettuce grows seed heads if you let the plants flower and develop fully, giving you plenty of seeds for the next season.
These vegetables give you confidence early on and help you learn the basic steps before trying crops that need more complicated handling, like squash or cucumbers.
Open-Pollinated vs. Hybrid Seeds
Before you start saving seeds, it is important to understand the difference between open-pollinated and hybrid varieties.
Open-pollinated seeds come from plants that naturally pollinate. If you save seeds from these plants, the next generation will look, taste, and grow like the parent plant. Heirloom seeds fall into this category and have stable traits passed down for many years.
Hybrid seeds, labeled as “F1” in seed catalogs, are crosses between two different parent plants. The first generation often grows well, but the seeds from those plants do not produce the same quality in the next generation. Hybrid seeds may give you weak plants or unexpected results, so they are not recommended for seed saving.
For consistent, reliable crops, always choose open-pollinated or heirloom varieties when you plan to save seeds.
How to Harvest Seeds Properly
Harvesting seeds at the right time ensures they will grow well the next season. Always let vegetables fully mature so the seeds have time to develop inside the plant. For beans and peas, this means waiting until the pods turn brown and dry on the vine. For tomatoes and peppers, allow fruits to ripen completely before collecting seeds.
Cleaning seeds varies by crop. For tomatoes, scoop out the seeds and pulp into a jar with a little water. Let them ferment for two or three days to remove the gel coating, then rinse and dry them on a paper towel. Beans and peas need only to be removed from their dry pods.
Take your time with this step. Proper harvesting leads to better germination rates and healthier plants next season.
Drying and Storing Seeds
Once seeds are collected, they must be dried thoroughly. Moisture leads to mold and poor storage life, so spread seeds in a single layer on a paper towel, plate, or screen. Choose a cool, shaded, and well-ventilated area for drying. Avoid direct sunlight, which can harm seed viability.
Drying may take several days, depending on the crop. Seeds should snap or break cleanly when dry enough, rather than bend.
For storage, use paper envelopes, small glass jars, or resealable bags. Label everything clearly with the crop name and harvest date. Store seeds in a cool, dark, and dry location such as a closet or pantry. With the right conditions, many seeds remain viable for several years.
Tips for Long-Term Success
For the best results, save seeds from the strongest and healthiest plants each year. These plants carry the best genetics for your garden’s conditions.
Rotate crops each season to prevent soil diseases and keep your plants vigorous. Keep a simple seed log where you record varieties, harvest dates, and germination results. Each year, test a few seeds by sprouting them on a damp paper towel to make sure they are still viable before planting time.
These habits help you build a reliable seed collection that grows stronger every season.
Seed saving is a practical and rewarding skill for every gardener. By starting with easy crops, choosing open-pollinated varieties, and learning proper harvesting and storage methods, you can grow vegetables year after year with less cost and more independence.
Over time, your seeds will adapt to your local environment, producing plants that thrive in your garden. Seed saving turns your backyard into a sustainable food source and keeps gardening traditions alive for future generations.
Leave a Reply