

You don’t need designer raised beds or a shed full of tools to put real food on the table. What you do need is a clear intention, decent soil, and a few habits that keep costs in check. If you can only splurge on one thing, make it soil or compost; everything else can be improvised from what you already have. The guidance that follows gathers the same practical ideas seasoned gardeners use—seed sources, container hacks, watering shortcuts, and crop choices—organized with headers so you can skim and return easily.
Define Your Purpose
The best place to begin is with purpose. Decide whether your first season is about replacing the pricier items in your grocery basket, producing reliable staples, or simply learning the ropes without pressure. Replacing store‑bought tomatoes, peppers, and herbs is a satisfying goal because those crops are both expensive and flavorful when homegrown. If your priority is volume, sweet potatoes and beans are forgiving and productive. If this is your learning year, choose easy wins like basil, dill, mint in its own pot, and loose‑leaf lettuce; they germinate readily and give you quick success.
Assess Light, Water, and Site Realities
With a goal in mind, walk your space and take notes. On a clear day, count hours of direct sun in each potential spot, because light governs what you can grow. Fruiting crops such as tomatoes, peppers, and eggplant want roughly six to eight hours of honest sun; greens and many herbs are content with three to five. Look for the nearest water source and think through how you will reach your plants—carrying cans across a yard gets old fast. Note wind exposure on balconies, hot reflected surfaces near driveways, and the habits of pets or wildlife. A simple barrier, like low fencing or netting, planned now saves heartache later. Finally, choose your growing format for this season. Containers and grow bags are ideal for renters and patios; a “no‑box” in‑ground bed—cardboard laid over grass with four to six inches of compost or soil on top—is the cheapest way to convert ground quickly; a simple framed bed assembled with corner blocks and boards gives tidy edges without carpentry skills.
Start Small for Real Success
It is tempting to start big, but small gardens win. Six well‑cared‑for plants will outyield a sprawling but neglected mini‑farm, and they teach you more because you notice what each plant needs. Expect ten to fifteen minutes most days for watering and quick checks once warm weather arrives, plus an hour or so each week for staking, pruning, and harvest. Keeping the garden close to your door is the single best placement decision you can make; what you see is what you tend.
Low‑Cost Ways to Get Seeds and Starts
Seeds and starts don’t have to strain your budget. Public libraries in many towns maintain seed drawers, and garden clubs host seasonal swaps where you can pick up packets and share extras later. Neighbors and market growers are often delighted to hand over a small envelope of seed or a few spare seedlings—gardeners routinely have more than they can plant. The produce aisle offers another route: seeds from ripe red, orange, or yellow peppers and ripe tomatoes can be saved and grown at home (tomato seeds benefit from a brief two‑to‑three‑day fermentation to clean them). Green peppers are usually immature and their seed may not sprout well. Watch for end‑of‑season sales on soil, tools, and pots after Mother’s Day and late summer; deep discounts appear when stores reset for the next retail cycle. If you are brand‑new or pressed for time, buying a handful of vigorous starts for your key crops is often cheaper than nursing multiple trays indoors unsuccessfully. When you do purchase seed, open‑pollinated and heirloom varieties let you save your own for next year, while F1 hybrids deliver excellent performance but won’t consistently breed true.
Seed‑Starting Basics Without Fancy Gear
Starting seeds is simple when you focus on the essentials: clean containers, drainage, light, and a light textured mix. Repurpose yogurt cups, berry clamshells, take‑out boxes, or cut a hinge into a milk jug to make a mini‑greenhouse—just be sure to poke drainage holes and set the containers on a tray. Fill them with seed‑starting mix if you can; in a pinch, sifted potting mix will do, but avoid heavy garden soil that compacts and stays wet. Plant most seeds at two to three times their thickness, and press surface‑sown seeds like many herbs and flowers into firm contact without burying them. Water gently with a mister or by bottom‑watering so the seeds don’t float away, and keep the medium evenly moist rather than soggy. A bright window can work; an inexpensive shop light placed a few inches above the seedlings for fourteen to sixteen hours a day delivers sturdier growth. Most common vegetables sprout happily around 70–75°F. Once seedlings have two or three true leaves, pot them up if roots are crowded, and spend a week hardening them off with gradual outdoor exposure before planting out. When troubleshooting, think environment first: leggy seedlings almost always need more light; damping‑off is a sign of saturated media and poor airflow; slow germination points to old seed, cold soil, or planting too deep.
Choose Containers and Beds That Fit Your Budget
Choosing containers and beds comes down to matching root volume and your willingness to water. Containers and fabric grow bags are tidy and portable, perfect for balconies and patios, but they dry more quickly and demand a decent potting mix with regular feeding. A pepper or eggplant is happiest in a five‑to‑seven‑gallon pot; patio tomatoes appreciate seven to ten gallons; full‑size indeterminate tomatoes want ten to fifteen or more; a generous sweet‑potato planting thrives in twenty‑five to thirty gallons. If you have ground, a no‑box bed created from cardboard and compost is the least expensive path to a productive plot and retains moisture better than pots. For a tidier look without carpentry, set four corner “castle” blocks and drop boards into the slots to frame a bed in minutes. Logs and rocks can edge a bed for free, and pallets stamped “HT” for heat‑treated lumber can be repurposed safely; avoid those marked “MB,” which indicates methyl bromide treatment, and skip creosote‑treated railroad ties entirely around food crops.
Invest in Soil and Mulch
Soil is where frugality should end. In containers, think of a mix as an engineered medium that must hold water, drain freely, and feed roots. A reliable recipe by volume is half high‑quality potting mix, roughly a quarter screened compost, about fifteen percent perlite or pumice for drainage, and the remainder coconut coir or well‑decomposed leaf mold for water‑holding, with a light dose of slow‑release organic fertilizer at the label rate. In garden beds, blend your native soil with thirty to forty percent compost if the native soil is usable; if it is very poor, start with a compost‑rich layer on top and let mulch and roots rebuild structure over time. Mulch is your insurance policy. Leaves, clean cardboard, straw, or wood chips laid two to three inches deep suppress weeds, buffer moisture and heat, and feed soil life as they break down. Keep a small donut of bare soil immediately around stems to prevent rot. To stretch dollars, ask municipal compost facilities and landscape suppliers about bulk pricing by the cubic yard, and confirm that material is finished—no ammonia smell and no heat when you turn it.
Simplify Watering and Placement
Watering is easiest when you simplify. A soaker hose snaked through a bed and tucked under mulch, attached to an inexpensive mechanical timer, is the cheapest set‑and‑forget method to deliver moisture slowly at root level. If you lack a hose, repurpose plastic jugs with pin‑holes as slow‑release irrigators, and cluster containers in a tray so you can bottom‑water. The “finger test” beats any gadget: push a finger two inches into the soil and water when it feels dry at that depth. Position plants where you can see them from the kitchen or back door; daily glances catch wilt, pests, and harvests before small issues become big ones.
Plan for Plant Size and Support
Plan for how big your plants really get. Cucumbers, pole beans, and many squash and melons are vines that can run eight to twenty feet; they benefit from a simple trellis made from stakes and string, a fence panel, or netting. Tomatoes need staking or caging from the start; tie them in as they grow. Peppers appreciate a single stake on breezy sites. Okra and beans turn from perfect to tough quickly in heat, so plant them where you pass daily and harvest often. Read the spacing guidance on seed packets and resist the urge to cram—crowding reduces airflow and light, inviting disease and disappointing yields. Group taller crops to the north or back of a bed so they don’t shade shorter neighbors.
Three Example Setups on a Shoestring
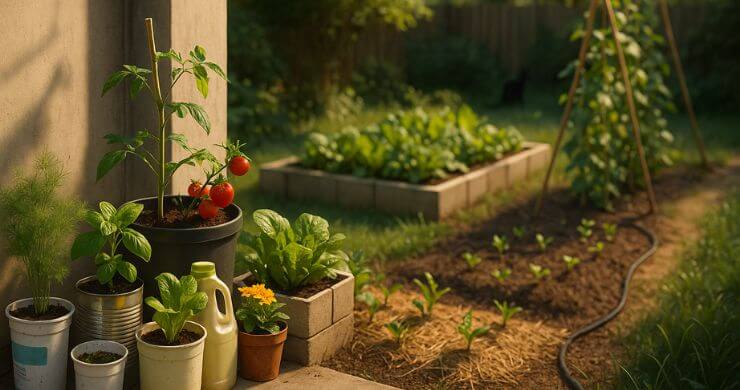
To picture what this looks like in practice, imagine three budget‑friendly scenarios. On a sunny balcony, two patio tomatoes in seven‑gallon containers, a five‑gallon pot with a bell or hot pepper, two small herb pots, and a shallow box of cut‑and‑come‑again lettuce can be set up with twenty to thirty gallons of soil in total. The initial outlay—containers or grow bags, soil and compost, a modest fertilizer—often lands between forty and eighty dollars depending on what you can repurpose, and an hour and a half to two hours of weekly care in warm months keeps it humming. In return, you enjoy a steady stream of herbs and salads, ten to twenty‑five pounds of tomatoes, and a healthy pepper harvest that would cost far more at retail. In a small yard without tools, lay down overlapping cardboard to smother a three‑by‑six‑foot patch of lawn, add four to six inches of compost or soil on top, plant three tomatoes and two peppers with basil or marigolds at the edges, then mulch and run a fifteen‑dollar soaker hose. Even at sixty to one hundred twenty dollars for soil and basics, the bed produces family‑sized harvests with little weeding and around ninety minutes of weekly attention. If staples are your focus, a single twenty‑five‑ to thirty‑gallon fabric bag or half‑barrel filled for sweet potatoes, flanked by a pair of five‑gallon peppers and a small pot of herbs, can deliver ten to twenty pounds or more of tubers in one warm season alongside peppers and herbs, all for roughly forty‑five to ninety dollars and about an hour of weekly care.
Timing and Climate Considerations
Timing depends on climate. In warm zones, especially Zones 9 and 10, fall through winter is prime time for cool‑season greens and many herbs, while tomatoes and peppers go in after the last spring frost. In mid‑zones 6 through 8, start warm‑season crops indoors six to eight weeks before your last frost date, then transplant when nights settle. In colder zones 3 through 5, simple season extenders like row cover and cold frames help you steal weeks on both ends of the season and protect tender transplants from chilly nights. No matter the zone, track what you plant and when; a small notebook that records sun hours, varieties, first blooms, and harvest dates becomes next year’s best advisor.
Common Mistakes and Quick Fixes
Most mistakes have quick fixes. Planting more than you can water and harvest is the surest way to burn out; scale back and add beds next season. Weak plants in cheap soil are a false economy; upgrading your growing medium and feeding lightly every couple of weeks in containers pays for itself in yield. Pots without drainage holes doom roots—drill or punch openings and elevate containers on bricks for airflow. If fruiting crops sulk, they may be in too much shade; move them to the sunniest spot and slide greens into partial shade as summer peaks. If watering feels endless, mulch deeply and let the soil work for you. Regular inspection while you water is your best pest strategy: a quick blast of water removes aphids; hand‑picking or mild controls like insecticidal soap or traps keep small problems small when used promptly and appropriately.
Conclusion: Attention Beats Spending
A tight‑budget garden rewards attention, not spending. Define a clear goal, choose an appropriate spot, and keep the plan small enough that you can water, prune, and harvest without stress. Gather free or repurposed containers, buy the best soil you can afford, and mulch as if it were insurance—because it is. Place the garden where you see it every day, and keep a few notes so each season gets easier and more productive. With these habits in place, a modest patch of well‑cared‑for plants will deliver real food and real momentum without draining your wallet.
Leave a Reply