
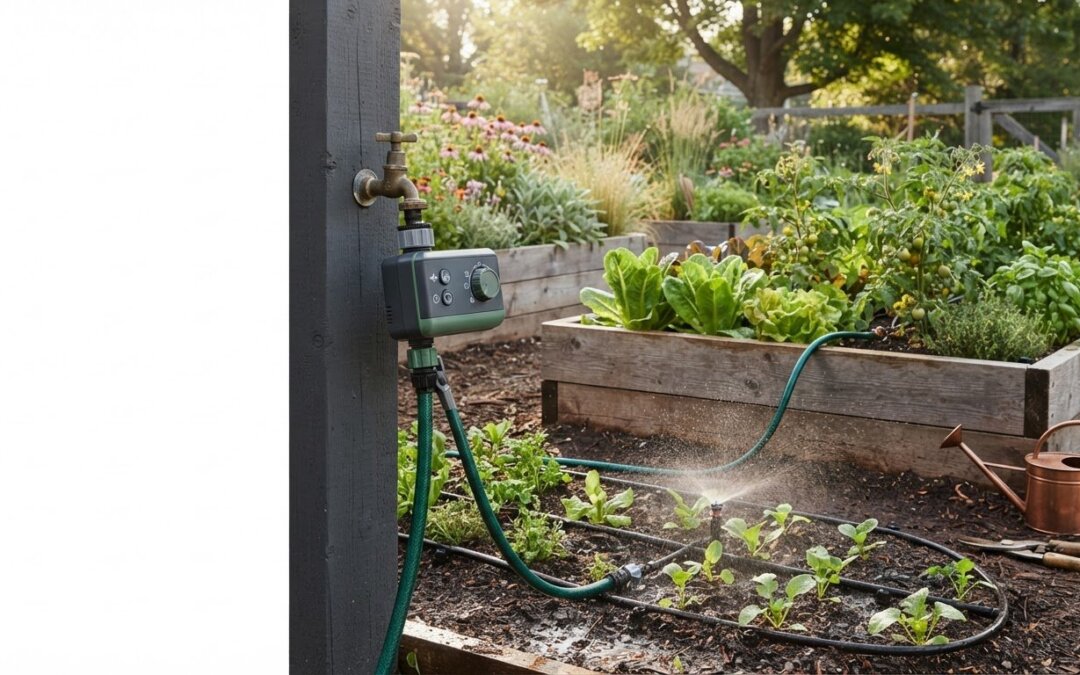
What if the best automated garden hose watering timer is the one with fewer features, but a better fit for your garden? It’s easy to see the appeal: fewer early-morning trips to the faucet and a more regular watering routine. But a fixed schedule can miss what your plants need when weather, soil, and seasons change.
The right setup depends on the job, whether you’re watering a lawn with a sprinkler, beds with drip lines, or containers with a hose. Mechanical, digital, and smart timers work differently, and not every model connects to the same watering equipment.
In this guide, you’ll learn how hose timers work, how the main types compare, and what to consider when matching a timer to your faucet, hose, sprinkler, or drip irrigation. You’ll also learn how to build a manageable schedule and adjust it as conditions change, so automation saves effort without turning watering into a “set and forget” task.
Key Takeaways
- Know the difference between a timer that shuts off after a set duration and one that starts watering on a recurring schedule.
- Match an automated garden hose watering timer to the number of watering areas, your connections, and the equipment it needs to run.
- Compare mechanical, digital, and smart controls by how much scheduling flexibility your garden actually needs.
- Test where the water goes, then adjust the schedule as you observe your plants and changing conditions.
- Use automation to make watering easier, while still checking that your plants are getting what they need.
What Is an Automated Garden Hose Watering Timer, and What Can It Do?
An automated garden hose watering timer is a device fitted between an outdoor faucet and a hose that controls when water flows and how long it runs. Depending on its design, it may shut off water after a selected duration, start watering at programmed times, or offer both functions. The timer controls the water supply. It doesn’t measure soil moisture or decide whether plants need water.
That distinction matters. A basic automatic shutoff timer starts when you turn on the faucet, then closes the valve after the selected watering period. It can help prevent water from running longer than intended, but it doesn’t necessarily start on its own at a particular time. A programmable timer, by contrast, can be set to start watering at scheduled times, and some models also let you choose how long each run lasts. Controls and features vary, so read how a timer operates rather than relying on the name on the box.
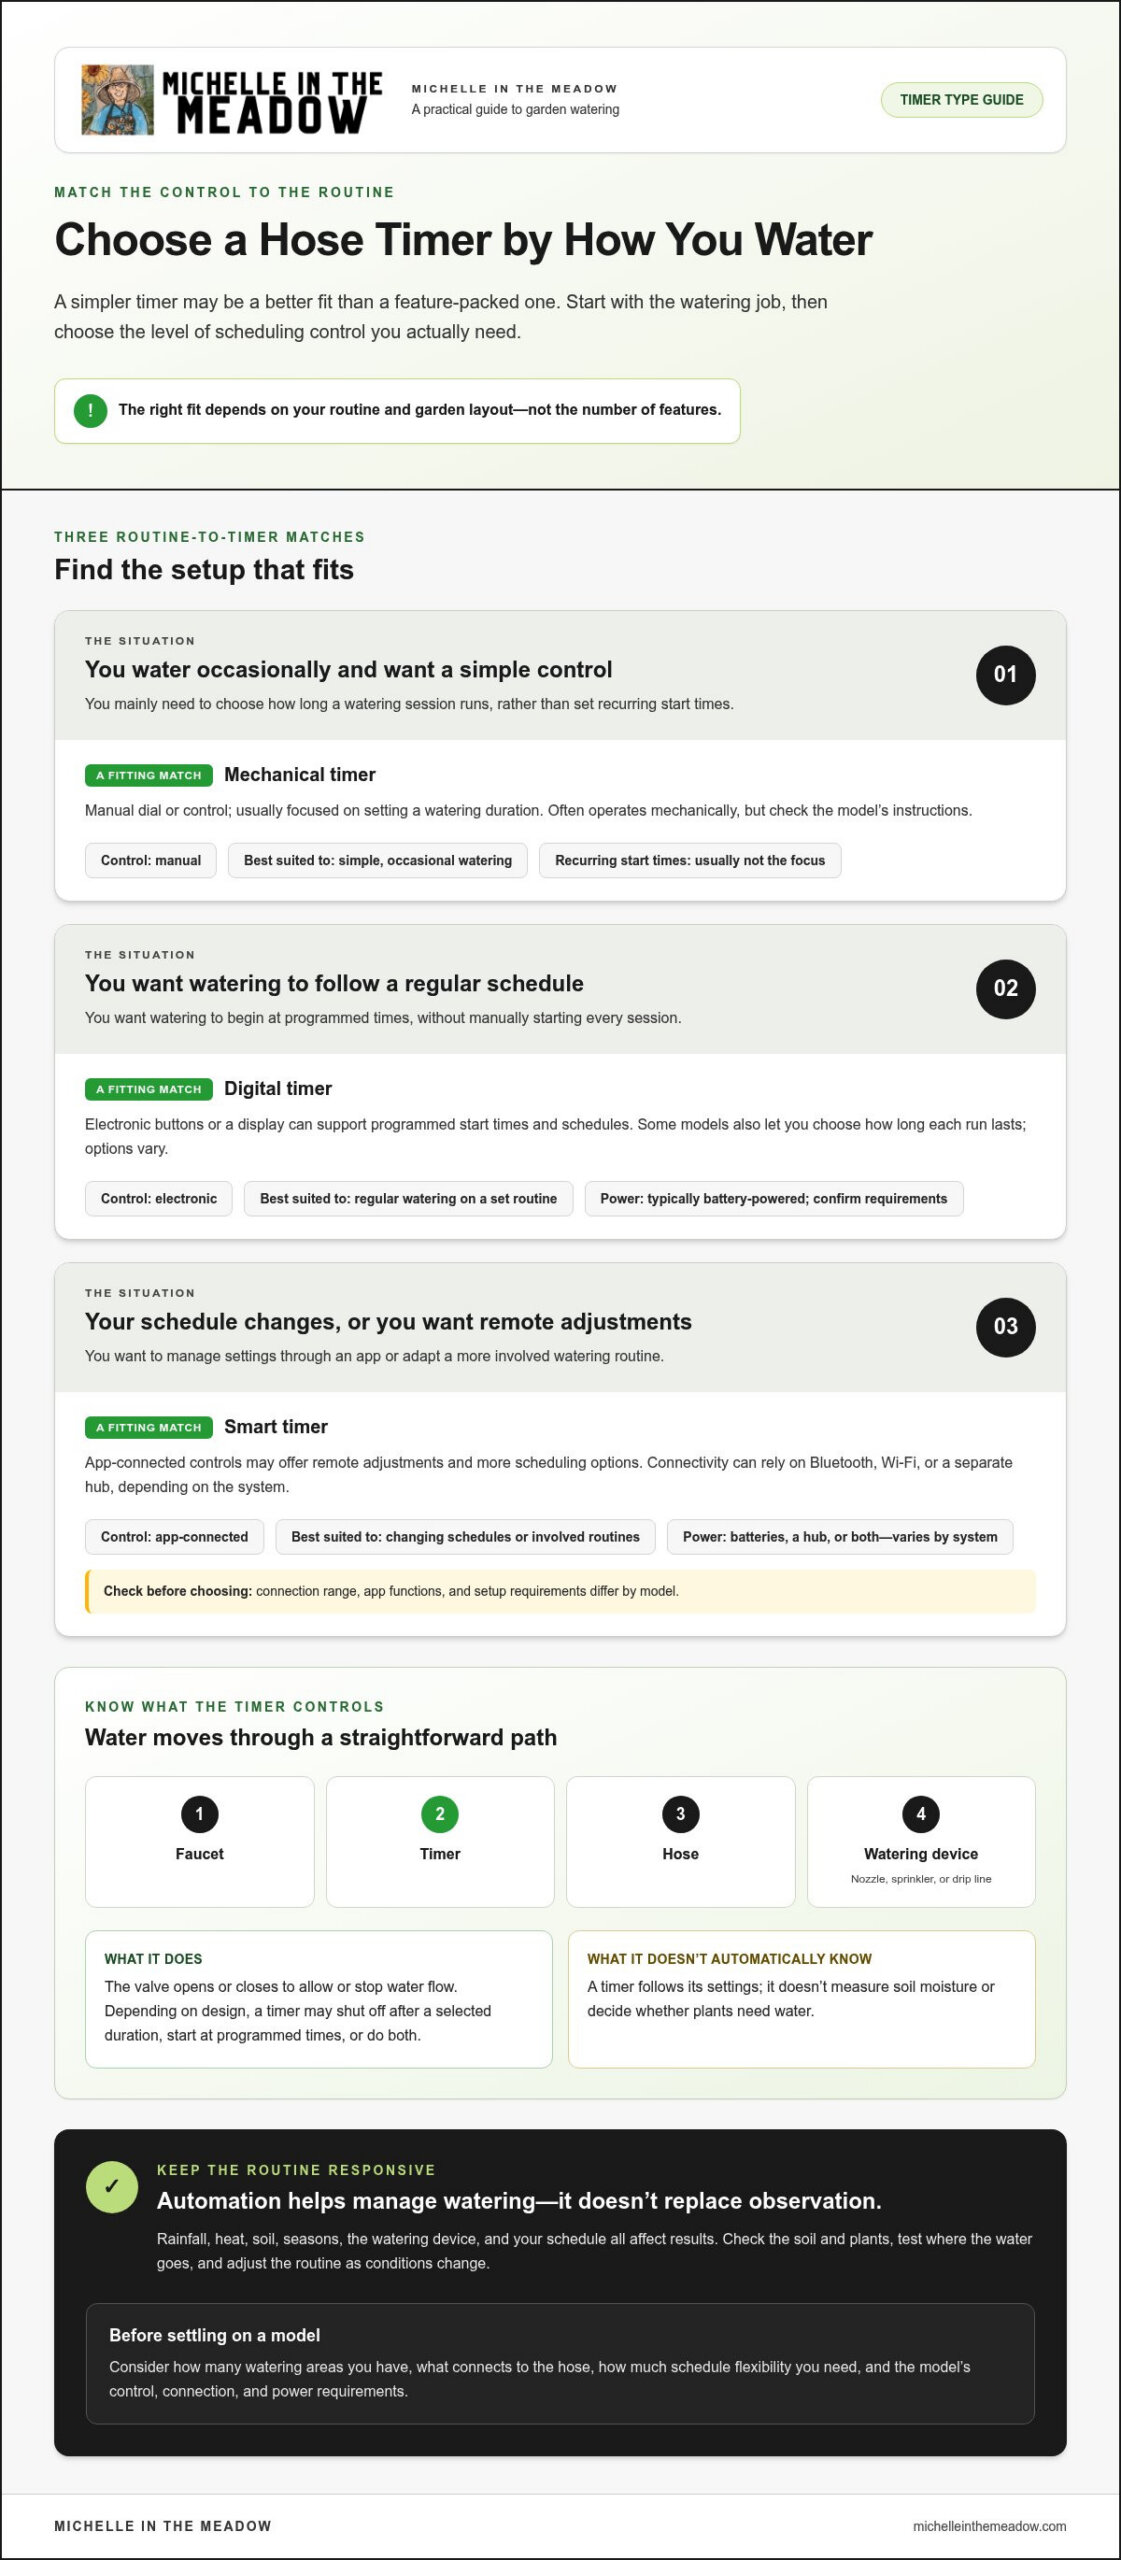
In either setup, water follows a simple path: faucet, timer, hose, then watering device. That device might be a handheld nozzle, a sprinkler, or a drip line. The timer opens or closes its valve to allow or stop the flow. For broader background on how different devices manage irrigation, see this overview of the irrigation controller.
How does a hose watering timer control water?
The timer screws onto the outdoor faucet, and the hose attaches to its outlet. When the valve opens, water passes through the hose to the connected watering device. When the valve closes, the flow stops. Some timers use a dial, while others rely on digital controls or an app. Whatever the interface, the timer follows the settings you enter, not the moisture level around your plants.
A preset run can be convenient, but it isn’t a moisture sensor. If a bed is still damp after rain, the timer may not know unless the system has a relevant feature and it’s set up to use it. Check the soil and plants as you settle on a routine.
When can a timer make garden watering easier?
Timers can help with recurring tasks, such as watering patio containers before a warm afternoon, running a sprinkler over a lawn, or delivering water to a vegetable bed through a hose-connected system. An automatic shutoff is especially useful when you start watering and move on to another task. The water stops at the set time instead of relying on you to remember to turn it off.
Convenience doesn’t guarantee the right amount of water. Results depend on the schedule, the watering device, and changing conditions such as rainfall and heat. Think of an automated garden hose watering timer as a way to manage the routine, while you stay responsible for noticing how your garden responds.
Mechanical, Digital, or Smart: How Automated Hose Timer Types Differ
The best automated garden hose watering timer isn’t necessarily the most advanced one. Start with the routine you want it to handle: a single watering session, a repeating schedule, or adjustments you can make from your phone. Then consider how many separate areas you water and how much control you need.
| Timer type | Control method | Scheduling flexibility | Power needs | Suitable use |
|---|---|---|---|---|
| Mechanical | Manual dial or control | Usually focused on setting a watering duration, not recurring start times | Often operates mechanically, but check the model’s instructions | Simple, occasional watering |
| Digital | Electronic buttons or display | Can support programmed start times and schedules; options vary | Typically battery-powered; confirm requirements for the model | Regular watering on a set routine |
| Smart | App-connected controls, commonly through Wi-Fi or Bluetooth | May offer remote adjustments and more scheduling options | May use batteries, a hub, or both, depending on the system | Changing schedules or managing more involved routines |
Quick takeaway: Choose a timer type based on your schedule’s complexity and your garden layout, not on the number of features listed. One faucet serving a few containers may call for a different level of control than several watering areas that need different routines. Even with an advanced timer, a suitable schedule and sensible watering practices matter. The EPA WaterSense watering tips offer practical guidance for making watering decisions with conditions in mind.
What is the difference between mechanical and digital hose timers?
A mechanical timer uses direct, hands-on controls, such as turning a dial to choose a watering duration. Digital timers use electronic controls and may let you program recurring start times. That can help if you want watering to begin at a particular time without turning it on manually. Run times, program limits, and control steps differ by model, so follow the product instructions. For occasional watering, a simple dial may be enough.
When might a smart hose timer be useful?
A smart timer may suit a garden where watering times change often or where you want to adjust a schedule remotely through an app. “Smart” doesn’t mean every model has the same controls: connectivity may rely on Bluetooth, Wi-Fi, or a separate hub, and power arrangements vary. Before choosing one, review the instructions for connection range, app functions, and setup requirements.
Think through your watering areas before comparing extra functions. One schedule may work for a straightforward setup, while different beds or containers might need separate timing options. For practical gardening ideas, explore gardening guidance and equipment recommendations.
How to Compare Automated Garden Hose Watering Timers for Your Setup
Before comparing features, map the watering job. Count the areas you want to water, note how many faucet connections you have, and list the devices you’ll attach, such as a sprinkler, drip line, or hose nozzle. A timer that suits one group of containers may be awkward for several beds with different watering needs. Start with the layout, then look for a timer that fits.
Use this checklist to narrow your options:
- Faucet and connectors: Compare the faucet outlet and hose fittings with the timer’s connection details. Note any adapters your setup requires.
- Watering areas and outlets: Decide whether one outlet can serve the whole job or separate outlets would help manage distinct areas.
- Schedule controls: Decide whether one shared schedule is enough or if each area needs its own start times or duration settings.
- Operating requirements: Check the timer’s stated flow or pressure limits, if provided, along with its power needs and control range.
Specifications help you match a device to your setup, but they don’t guarantee a particular result. A feature-rich timer can still be a poor fit if it doesn’t connect properly or can’t manage the watering pattern you need. Even a well-matched automated garden hose watering timer needs occasional attention. Check that water reaches the intended plants and adjust the routine when conditions shift.
Will the timer work with a sprinkler or drip irrigation?
It depends on the timer and the connected setup. A hose-end sprinkler and a drip system can place different demands on water flow, so don’t assume that compatibility with one means compatibility with the other. Check the timer instructions for connector details and any stated operating limits. Then consider the requirements of your sprinkler or drip components, including any flow needs specified by the manufacturer.
Which timer features matter for a small or complex garden?
For one watering area, prioritize controls you can understand at a glance and a duration setting that suits your routine. For several areas, compare the number of outlets and whether each can be scheduled independently. App control, rain-related adjustments, and flow monitoring are model-specific features, not standard features. Choose them only if they address a real need in your garden.
For example, if one faucet supplies a sprinkler for a single lawn area, one schedule may be enough. If that faucet also feeds containers and a vegetable bed, separate outlets or programs could make it easier to give each area a distinct routine. The right choice depends on how your connections are arranged and whether watering needs differ, not just on garden size.
After installation, observe the result rather than trusting the timer blindly. Check that the sprinkler covers its target or that water reaches the intended drip lines. If the timer runs as programmed but the plants or soil show that the routine isn’t suitable, revise the settings. Automation handles the repeated task; your observations guide the adjustments.
How to Set Up and Adjust a Hose Timer Watering Schedule
A reliable routine starts with careful setup, then improves through observation. Don’t assume the first schedule you enter will suit every bed or weather pattern. Soil, plant needs, temperature, and the way water is delivered all affect how long an area needs watering. Use this process to get the timer running and refine its settings as you see how your garden responds.
- Connect the timer. Attach it to the outdoor faucet as directed in the manufacturer’s instructions, then connect the hose and watering device. Make sure the setup matches the timer’s connection and operating requirements.
- Inspect the setup. Check that threaded fittings sit correctly and that the hose reaches the intended area without kinks or strain. Don’t force a fitting if it doesn’t turn smoothly. Consult the instructions for the correct connection.
- Test briefly. Set a short test cycle and watch water travel through the whole setup. Look for leaks at faucet and hose connections, and confirm that the sprinkler, nozzle, or drip line sends water where you expect.
- Observe the result. After watering, check the soil around the plants rather than relying only on the timer display. Notice whether water reached the root area, missed part of the bed, or ran off before soaking in.
- Adjust and check again. Change the duration or frequency if the test reveals dry spots, runoff, or soil that remains wetter than intended. Recheck after making changes so the timer settings reflect what’s happening in the garden.
How do you install a hose timer and check for leaks?
Follow the timer manufacturer’s connection instructions, especially if a fitting feels difficult to turn. Once the faucet, timer, hose, and watering device are connected, run a brief test and inspect each joint while water is flowing. Confirm that water reaches the intended plants without pooling or running off. If you find a leak or poor coverage, stop and correct the setup before relying on a schedule.
How should you fine-tune an automatic watering schedule?
Check soil moisture and plant condition as you establish a routine. A container, vegetable bed, and lawn may respond differently to the same watering duration, and rainfall or warmer weather can change what’s needed. Adjust duration or frequency when conditions shift, then inspect the garden again. A useful schedule isn’t a universal preset; it’s one you refine based on what you observe.
A good watering schedule is built through observation and adjustment, not by setting a timer and forgetting the garden. Keep notes on changes that work for each area, especially if one faucet serves several kinds of plants. This makes it easier to revisit your settings as growing conditions change. For more practical garden guidance, explore gardening tips and resources.
Choose a Timer That Fits Your Garden, and Keep the Routine Flexible
Choosing an automated garden hose watering timer comes down to matching its controls to the work you want it to do. For occasional watering in one area, a straightforward mechanical timer may be enough. If you want watering to begin on a recurring schedule, compare digital models and their programming options. A smart timer may suit routines that need remote adjustments, provided its connection and power requirements work with your setup.
More features aren’t automatically better. A timer should make your routine easier to manage, not encourage you to ignore what’s happening in the garden. Plants, soil, and weather change, so keep checking whether water is reaching the right places and adjust the schedule when needed.
What should you check before choosing a timer?
Before you buy, map the path from faucet to plants. This checklist can help you compare options without getting distracted by features you won’t use:
- Faucet connection: Note the faucet outlet and any connector or adapter needs.
- Hose and watering device: Identify the hose setup and whether you’ll attach a sprinkler, drip system, or another device.
- Watering areas: Count the areas you need to manage and decide whether they can share one routine.
- Controls and schedule: Choose between a simple duration setting, recurring programs, or remote adjustment based on your actual routine.
- Power and limits: Read the product instructions for power needs, compatible connections, and operating limits.
These details help you rule out a poor fit before installation. For example, one outlet and schedule may be straightforward for one area, while distinct watering areas may call for multiple outlets or independent programs, if the timer offers them.
How can you make automated watering more sustainable?
Use only the watering time your plants and soil conditions call for. Check the soil and plant response, then reassess after a change in weather or growth. If water pools, runs off, or misses part of the planting area, revisit the schedule and delivery setup instead of simply adding more time. A timer repeats your settings; it can’t replace your own observation.
With a suitable timer and an occasional check-in, automation can take some repetition out of watering while leaving you in charge of the garden’s needs. For practical garden resources and curated equipment recommendations, explore gardening tips and equipment ideas. Some product links may be affiliate links, which means the site may earn a commission if you make a purchase through them.
Start with One Watering Routine and Build from There
Pick the watering task you most want to make easier, then use it as your starting point. An automated garden hose watering timer can support a steadier routine, but your garden will still give you the best clues about what to change. As plants grow and the weather shifts, make small adjustments rather than expecting one schedule to suit every season.
You don’t need to solve every watering challenge at once. Begin with a setup that fits your current garden, see how it works in practice, and build your confidence from there. Practical advice can make the next decision simpler, especially when you’re comparing supplies or adapting your garden routine.
Explore Michelle’s practical garden guides and recommendations for gardening tutorials, helpful educational content, and curated recommendations for gardening supplies and equipment. Your garden doesn’t need a perfect routine, just one you can observe, adjust, and feel good about growing with.
Frequently Asked Questions
Do automated garden hose timers need batteries?
Some do, but power requirements depend on the timer. Mechanical models may operate without batteries, while digital and smart models often need batteries, and some connected systems use a separate powered hub. Check the product instructions for battery type and placement before installation. If the display is blank or a programmed cycle doesn’t start, check the power source first, then review the timer’s troubleshooting guidance.
Can a garden hose timer work with drip irrigation?
Yes, a hose timer can work with drip irrigation when its connections and operating limits suit the drip system. For example, a timer may connect at the faucet before a hose or drip tubing, but a drip setup might also use a filter or pressure regulator. Those parts and their order can affect compatibility. Follow instructions for both the timer and irrigation components, and observe the system during a test.
Can one hose timer water two different garden areas?
It can, depending on how the areas are connected and the timer’s outlet and program options. A multi-outlet timer may let you connect separate hoses, while one outlet may require you to move the hose between areas or use a branching connector. Don’t assume separate connections can run independently. Check the instructions, then test each area to confirm water reaches it as intended.
What should I do if my hose timer is leaking?
Turn off the faucet before checking the connection. Look for a misaligned fitting, debris, or a worn or misplaced washer at the faucet or hose joint. Clean the sealing surfaces and reseat the washer if the instructions allow. Reconnect without forcing or overtightening the threads. Turn the water on briefly to check again. If the leak continues, stop using the setup and follow the manufacturer’s troubleshooting guidance.
Can a hose watering timer be left outside in winter?
Don’t assume it’s safe to leave the timer outdoors through freezing weather. Water left inside a timer or attached hose may freeze, and cold-weather limits vary by model. Before temperatures drop, turn off the water, remove the timer and hose, and drain them if the manufacturer’s instructions recommend it. Store the timer as directed. Also check whether batteries should be removed during storage.
What happens if the water supply is turned off while the timer is running?
If the faucet is shut off, water can’t flow through the timer, so the connected area won’t receive water during that period. What the timer does next depends on its design: it may continue its programmed cycle, finish without water, or handle the interruption another way. Don’t count on a missed cycle being repeated automatically. Check the timer’s instructions and confirm the garden was watered once the supply is restored.
How do I know if my garden is getting too much water from a timer?
Check the soil, not just the timer settings. Persistently soggy soil, pooling, or water running off may mean the schedule or delivery rate needs adjusting. Yellowing leaves or wilting can have several causes, so look for more than one clue and feel the soil below the surface. If it’s still wet between scheduled cycles, reduce watering or pause a cycle, then observe how the plants respond.
