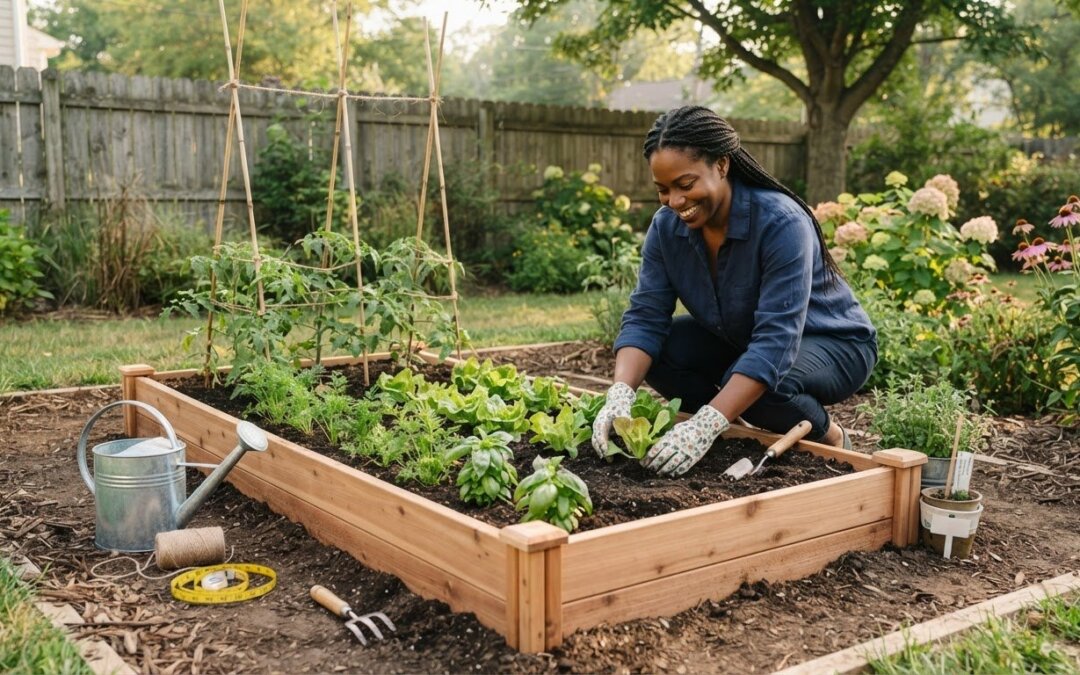
What if your first vegetable garden didn’t need a perfect diagram or a long list of rules? A beginner friendly vegetable garden layout starts with three practical things: where the sun falls, how you’ll reach each plant, and what you actually want to grow. It’s understandable to wonder how many beds to make or whether your vegetables will get enough light. Keep the plan simple, and those decisions get easier.
This guide will help you sketch a flexible layout for a raised bed, a small plot, or containers. You’ll learn how to place taller crops without shading shorter ones, leave room to water and harvest, and group vegetables in a manageable way. Start by measuring the space you can use and noting its sun and shade. Then choose a setup you can comfortably tend. If you choose a raised bed, a soil calculator can help estimate how much fill you’ll need. The goal isn’t a flawless garden on day one. It’s a clear, workable starting point that can grow with you.
Key Takeaways
- Build a beginner friendly vegetable garden layout around your growing goals, usable space, and the crops you want to tend.
- Track where shadows fall at different times of day before deciding where each growing area belongs.
- Compare raised beds, in-ground rows, and containers by access, space, and how easily you can adapt them.
- Use a five-step sketching process to mark boundaries, paths, growing areas, supports, and crop labels.
- Start with a simple setup, then adjust its dimensions, crop choices, and paths as you learn what works.
What Makes a Beginner Friendly Vegetable Garden Layout Work?
A useful garden plan doesn’t need elaborate diagrams or a long list of rules. A beginner friendly vegetable garden layout is an easy-to-access plan shaped by sunlight, available space, and what you want to grow. Put simply: a practical layout gives your vegetables the light they need, leaves room for you to care for them, and keeps the plan simple enough to manage.
Think of layout as the garden’s basic map: where growing areas, paths, and structures will go. It’s different from crop spacing, which tells you how far apart particular plants should grow, and from planting dates or soil preparation. Those details still matter, but they come later, once you know where the garden will be. For background on the traditional home food garden, see this overview of the kitchen garden.
Your first plan can be modest and flexible, with just a few vegetables you’re excited to eat. A compact garden is often easier to water, observe, and tend consistently. As you learn how sunlight moves across the space and which routines fit your schedule, you can adjust the plan or expand it. The aim isn’t to fill every available corner; it’s to make a garden you can care for.
Start with a small, manageable garden plan
Choose a manageable number of beds, containers, or rows for your first season. For example, start with one growing area and a few vegetables. This gives you room to practice watering, notice how plants respond, and work out how much time garden care takes. If the routine feels comfortable and you want to grow more, add another area later. Your own observations can guide that next step.
What a garden layout needs to show
Start with a quick hand-drawn sketch. Mark the garden’s boundaries, growing areas, paths, entry points, and taller structures such as trellises. Include fixed features you’ll plan around, like a fence or a spot you need to keep clear. You don’t need to draw every leaf or decide every crop today.
Keep the framework steady and the crop placements flexible. Paths and access points may be difficult to change once beds or containers are in place, while the vegetables in each area can shift from season to season. Leave enough room to reach plants for routine care and harvesting, then use crop-specific spacing instructions when you decide what to plant.
How to Map Sunlight, Access, and Garden Space Before Planting
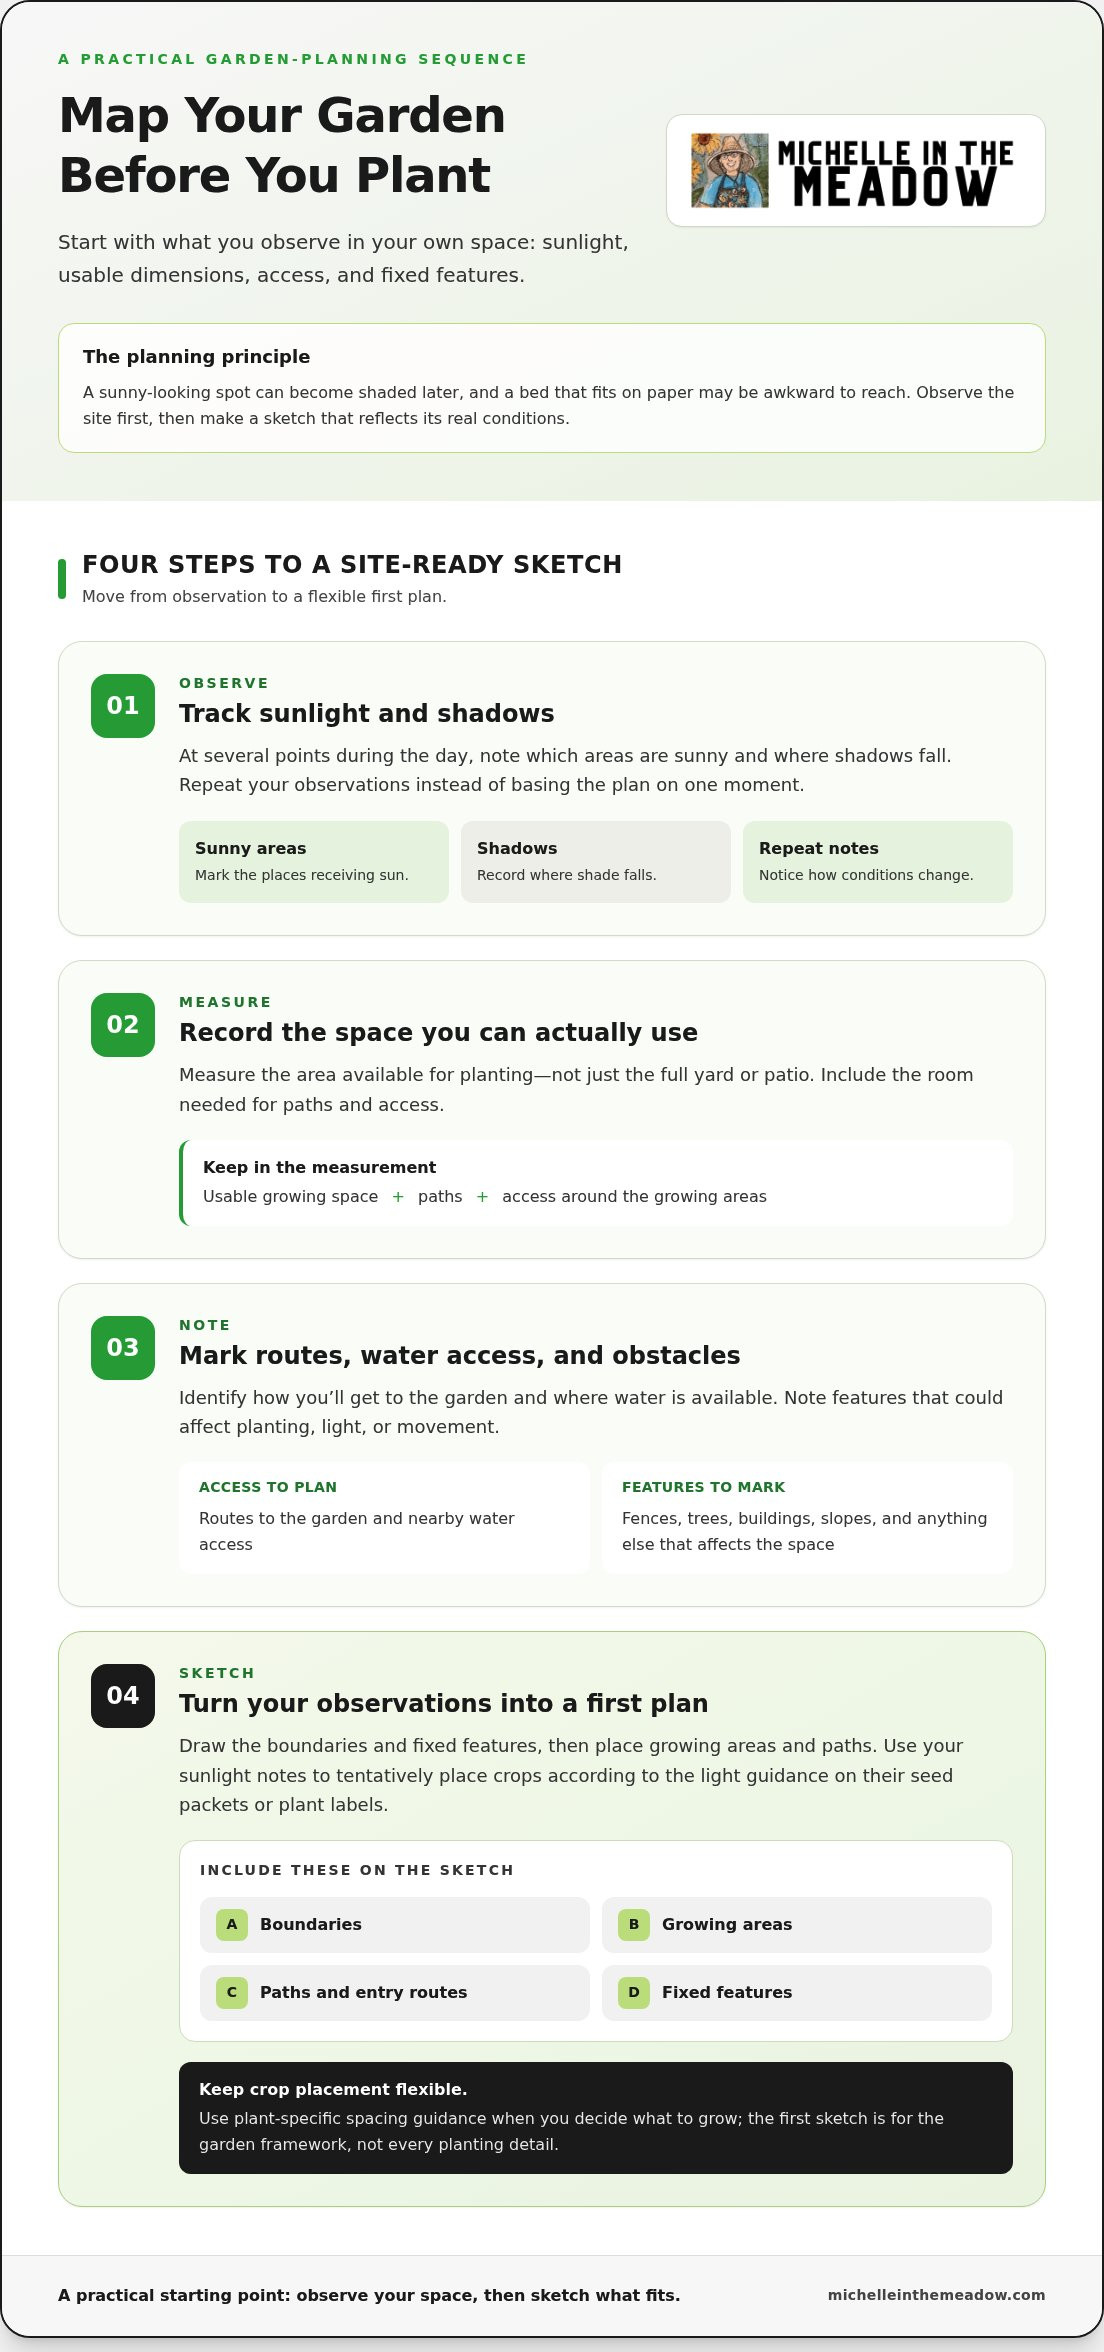
The best garden layout starts with what you observe in your own space, not a diagram copied from somewhere else. A spot that looks sunny in the morning may be shaded later, and a bed that fits on paper may be awkward to reach. Check the site first, then sketch a plan that reflects its light, boundaries, and your daily routine.
Work through these steps in order:
- Observe sunlight. At several points during the day, note which areas are sunny and where shadows fall. Repeat your observations so you’re not basing the plan on one moment.
- Measure usable space. Record the dimensions of the area you can actually plant in, not just the overall yard or patio. Include space needed for paths and access.
- Note access and obstacles. Mark routes to the garden and nearby water access, along with fences, trees, buildings, slopes, and anything else that could affect planting or movement.
- Sketch the site. Draw the boundaries, growing areas, paths, and fixed features. Use your sunlight notes to tentatively place crops according to the light guidance on their seed packets or plant labels.
Observe sunlight and fixed features
Make a simple record of light and shade at different times rather than relying on memory. A tree or building may cast a shadow that moves across the garden, while a fence can affect both available space and light. Mark these features on your sketch. Then match each crop to its stated light needs, leaving room to adjust placements if your observations reveal a shadier patch than expected.
Measure for comfortable access
Write down the dimensions of each planned bed or container and draw routes between growing areas. There’s no single path width that works for every garden: allow enough room for your natural stride and the tools you’ll carry. Make sure you can reach each bed to plant, water, and harvest without stepping into the growing area or stretching uncomfortably. If you use a cart or carry watering supplies, account for the space needed to move them along the route.
Once you’ve mapped these details, your beginner friendly vegetable garden layout has a real-world foundation. You can refine crop placement in the next planning stage, using each plant’s spacing guidance rather than trying to fit every detail into this first sketch. For more practical planning ideas, explore garden planning guidance.
Raised Beds, Rows, or Containers: Which Beginner Layout Fits?
There isn’t one right setup for every garden. The best choice depends on the space you have, its existing conditions, and the kind of care routine you can maintain. Compare the tradeoffs before deciding which framework makes your planting plan easiest to use.
| Layout | Access | Space | Flexibility |
|---|---|---|---|
| Raised beds | Defined edges can make planting and reaching crops straightforward; plan paths so you can tend each bed. | Useful where you want distinct growing areas, including in a yard or on a suitable hard surface. | The bed’s position and dimensions are relatively fixed once set up, while crop choices can change. |
| In-ground rows | Paths between rows provide access, though their placement needs to suit your movement and tools. | Can make use of an open patch of ground without a raised-bed frame. | Rows can be rearranged as your plan changes, depending on the available growing area. |
| Containers | Arrange them where watering and harvesting are convenient, and keep every pot reachable. | Can suit a patio, balcony, or other space with limited ground area. | Containers can be moved or regrouped, though each one has its own watering needs. |
When raised beds make layout planning simpler
A raised bed’s clear outline gives you a defined area to draw and divide into planting zones. Decide on the bed’s dimensions and position before placing crops, then account for how much fill it will need. Michelle In The Meadow’s raised-bed soil calculator can help estimate that amount once you know the dimensions. The bed itself creates structure, but it doesn’t determine which vegetables you must grow.
When rows or containers may suit the space better
Rows can be a straightforward fit for an open growing area, especially if you’d rather plant directly in the ground than build a frame. Containers offer another option where ground space is limited or unsuitable, and you can arrange them around the light and access your site allows. For a smaller garden, keep the plan compact and prioritize the containers or rows you can comfortably maintain.
Choose based on what makes gardening workable, not appearance alone. Consider whether you can reach each growing area, bring water to it, and keep up with its care. A beginner friendly vegetable garden layout can use any of these approaches, or combine them: for instance, containers beside an in-ground patch. Start with the arrangement that fits your conditions now, then adjust as you learn what works.
Build Your Beginner Vegetable Garden Layout in Five Steps
With your site notes in hand, turn them into a working sketch. This five-step process keeps the plan clear without locking you into exact crop positions before you’ve checked each plant’s needs.
Turn observations into a simple sketch
Draw the garden boundary and mark its dimensions, sunlight notes, water access, and any fixed obstacles. Add paths and access points before assigning crops, so there’s room to move, water, and tend plants. For example, a simple plan might show one bed beside a path, containers near an entrance, and a clear route to the water source. A pencil sketch is plenty.
- Draw the boundaries. Outline the usable garden area and label its dimensions. Mark existing features you can’t easily move, such as a fence, tree, or building.
- Mark paths and access points. Add the routes you’ll use to reach beds or containers, plus entrances and water access. Leave workable space for your movement and tools.
- Assign growing areas. Label each area as a bed, row, or container group. Keep the plan modest enough to manage, and reserve room for the crops you actually want to grow.
- Place tall supports. Add trellises or other supports where they fit without unnecessarily shading shorter plants. Use your sunlight observations to guide placement.
- Label crops. Group crops according to your planting plan, then check seed packets or plant labels for spacing and mature size. Adjust the sketch if plants would be crowded or hard to reach.
Copy and fill in this blank layout template on paper or in a digital note:
Garden boundary and dimensions: ____________________
Sun and shade notes: ______________________________
Water access and entrances: _______________________
Fixed features or obstacles: _______________________
Growing areas: Bed(s) ______ Row(s) ______ Containers ______
Paths and access: __________________________________
Trellises or tall supports: _________________________
Planned crops and spacing notes: ___________________
Place crops by height, access, and care
Put taller crops or supports where they won’t cast avoidable shade over shorter plants, using the light pattern you recorded. Keep crops you expect to harvest often close to a path, so gathering them doesn’t mean reaching across other plants. Before finalizing the sketch, compare each crop’s spacing guidance and mature size with the room available. The goal is a plan that leaves plants, and you, space to work.
Ready to turn your sketch into a practical growing plan? Explore Michelle’s garden planning resources for helpful next steps.
Adapt a Starter Vegetable Garden Layout as Your Experience Grows
A first-season plan is a starting point, not a permanent blueprint. Choose a simple arrangement that fits your observations, then adjust its size, crops, and paths as you learn how the space works. These examples are flexible templates, not fixed dimensions or crop-count rules.
Choose a starter template for your space
One raised bed: Draw a rectangle and label its dimensions. Mark the path and access side, then write in your chosen vegetables and any support structure. Keep the layout open enough to reach plants, and use each crop’s spacing guidance to decide how much will fit.
Example sketch: PATH → [ RAISED BED: crops ______ | support ______ ]
Two growing areas: Sketch two beds, plots, or container groups with a route between them. Note the sunlight each receives, then assign crops and supports to suit those conditions. You might keep one area for crops you harvest often and use the other for different choices that fit your growing plans.
Example sketch: ACCESS → [ AREA A: crops ______ ] → PATH → [ AREA B: crops ______ ]
Rows or containers: Draw the available ground as rows with paths between them, or arrange labeled containers around an access route. Write in the crops, supports, and water access. Change row lengths, container positions, and the route to fit the space you have and the light you observed.
Example sketch: WATER → [ ROW OR POTS: crops ______ ] → ACCESS ROUTE
These compact sketches are easy to read on paper or a phone. Add notes directly beside each area, and leave crop choices open until you’ve checked light needs, mature plant size, and spacing.
Make the next season’s layout easier
During the season, jot down a few useful observations: which plants were easy to reach, where shade fell, and which spots felt crowded. Also note whether paths worked for watering and harvesting. Small reminders can make next season’s planning less like starting from scratch.
Changing the layout is normal. You might move a container closer to the water source, widen a route that felt awkward, or give a vigorous plant more room. That’s learning, not failure. Keep your notes with your plan so you can use them when you map the next season.
Your beginner friendly vegetable garden layout can grow along with your experience. For more practical ideas as you plan, explore Michelle’s gardening tutorials and planning resources.
Take the First Step Toward Your Garden
A beginner friendly vegetable garden layout doesn’t need to be complicated. Start by observing sunlight and access, then choose a setup that suits your space, whether that’s a raised bed, in-ground rows, containers, or a mix. A simple sketch with paths, growing areas, and supports gives you a plan you can adjust as you learn.
Keep your first garden manageable, and let your own experience shape what comes next. Notice which plants were easy to reach, where shade fell, and what felt crowded. Those small observations can help you make next season’s layout more comfortable and useful.
Michelle’s beginner-friendly gardening tutorials, curated product recommendations, and raised-bed soil calculator can help with your next planning steps, including estimating bed fill. Explore Michelle’s practical gardening guides and planning resources and choose one small step to begin. Your garden doesn’t have to be perfect to be a good place to start.
Frequently Asked Questions
How do I plan a vegetable garden layout for beginners?
Start by observing sunlight and measuring the space you can use. On a simple sketch, mark paths, water access, and fixed obstacles such as fences or trees. Choose a manageable growing area, then place crops according to the light and spacing instructions on their seed packets or plant labels. Keep frequently harvested vegetables easy to reach. Treat the plan as adjustable, and use notes from your first season to guide changes.
What is the easiest layout for a beginner vegetable garden?
The easiest layout is one you can reach and care for consistently. A clearly defined bed, a few containers, or simple in-ground rows can all work, depending on your space and routine. Start with a small number of growing areas, plan access routes, and avoid crowding plants. Consider how you’ll water and harvest each area, too. Choose the format that fits your available ground and feels manageable to tend.
How much space should I leave between vegetable garden beds?
Leave enough room to reach each growing area comfortably and move through the garden with the tools or supplies you use. There isn’t one path width that suits every gardener and site. Consider how you move, the height and placement of the beds, and whether you’ll carry items through the paths. Sketch routes before choosing bed locations, then check that you can reach plants for planting, watering, and harvesting.
Can I grow vegetables in a garden that gets partial shade?
Yes, some vegetables can grow with less direct sunlight, but suitable choices depend on the crop and the light available. Observe the garden at different times of day and note where shadows fall. Compare those notes with the light guidance on seed packets or plant labels. Place crops with greater light needs in brighter areas, and don’t assume all vegetables will thrive in the same conditions.
Should tall vegetables go at the back of a garden bed?
Place tall crops and supports where they’re least likely to shade shorter plants that need more light. “At the back” may work in some beds, but the right position depends on the garden’s orientation, nearby structures, and the sun’s path. Observe the site, then consider each crop’s mature height and growing instructions. Keep supports accessible, too, so you can tend climbing plants without blocking paths or nearby crops.
How do I make a vegetable garden layout in a small space?
Measure the usable area, then identify its sunniest spots and easiest access routes. Choose a format that fits, such as a compact bed, a small row, or containers. Focus on a few vegetables you’d like to grow, and follow their spacing guidance so they have room to develop. Vertical supports may help make use of available space for suitable crops. Keep watering and harvesting routes clear and comfortable.
Do I need to rotate crops in a beginner vegetable garden layout?
Crop rotation can help you plan where different plant families will grow in later seasons, but it doesn’t need to complicate your first layout. Keep a simple record of what you planted in each bed or growing area. When planning the next season, use those notes to consider new placements. Start by creating a workable arrangement, keeping access clear, and following each crop’s growing instructions. You can build on the plan over time.