
What if the difference between a sturdy soil block and a crumbly mess is just a little more water? If you’re learning how to use a soil blocker for seedlings, getting the mix’s moisture right can feel like the trickiest part. You may also be wondering how deep to sow each seed or which blocker size to choose.
Soil blocks need a different touch from seed trays: the mix must hold together when pressed, while seedlings still need steady moisture as they grow. A few practical checks can make the process much less guesswork.
This beginner’s guide covers how to choose a blocker size, prepare a mix that forms firm blocks, sow seeds at suitable depths, and keep the blocks evenly moist. You’ll also learn what to watch for as seedlings develop and how to judge when they’re ready to move into the garden. Start with a small batch, then adjust as you get a feel for your mix and growing setup.
Key Takeaways
- Match your blocker size to the seeds you’re starting, how long seedlings will grow indoors, and the space you have.
- Follow a simple sequence: hydrate the mix, press the blocks, then sow and label your seeds.
- Use the squeeze test to check that the mix is moist enough to form sturdy blocks without dripping water.
- Keep blocks evenly moist. Careful bottom watering can help without leaving them waterlogged.
- Use crop-specific signs of readiness, and plant each intact block with as little root disturbance as practical.
What Is Soil Blocking, and Why Use It for Seedlings?
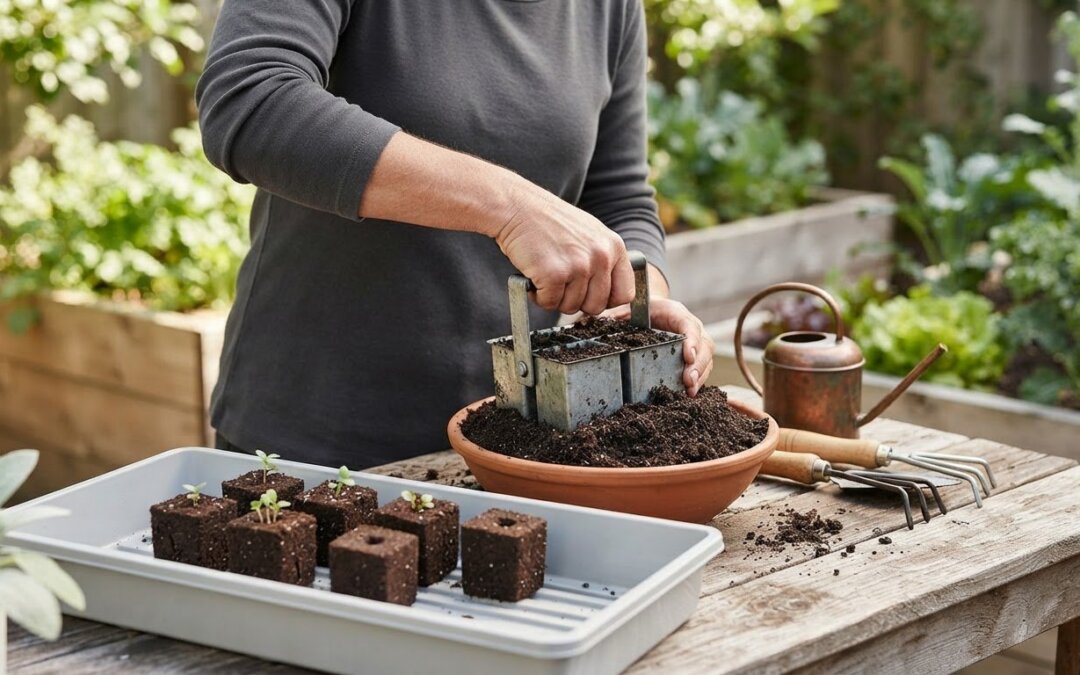
A soil block is a portion of growing medium pressed into a firm shape that can hold together without an individual pot or cell around it. A soil blocker is a hand-operated tool with one or more forming chambers. It compresses the mix into blocks, often with small planting spaces on top. Each block acts as both the container and the growing space for a seedling. For a general overview of the method and its background, see Soil block (horticulture).
One potential benefit is air pruning. As roots grow toward a block’s exposed edges, they meet air and are less likely to keep circling as they might against the inside of a solid-sided pot. This can encourage roots to branch within the block, but it doesn’t guarantee stronger plants or prevent every transplant setback. Seedling health still depends on suitable growing conditions and attentive care.
Soil blocking can reduce dependence on single-use plastic seed-starting pots and cells, but it isn’t a tool-free setup. You’ll need a blocker, a fine-textured mix that forms cohesive blocks, and a tray or flat to support them. There’s also a learning curve. You’ll need to find the right moisture level for your mix and keep an eye on blocks that are exposed to air on their sides.
How soil blocks differ from seed trays
In a standard seed tray, potting mix sits inside reusable cells that support it on the sides. With soil blocking, each compressed block supports itself, without an individual cell around the roots. You can group blocks closely, but they still need support. Set them beside one another on a flat or snugly in a suitable tray so they don’t shift or dry unevenly. Handle them gently, especially before roots have helped hold the mix together.
Is soil blocking a good fit for your seed-starting setup?
Soil blocking may suit gardeners who want to reuse their equipment, reduce plastic use, and fit seedlings into a compact growing area. It can also work well if you don’t mind spending time preparing blocks and checking their moisture. Starting a large number of seedlings may feel like a chore, particularly while you’re learning the process.
You don’t have to replace your usual seed-starting routine all at once. Try a small batch of a crop you already grow. Notice how long block-making takes and whether the tray fits your growing space. You can keep a few familiar cells alongside the blocks if you want to compare the routines. Treat the first batch as useful practice, not a test you have to pass.
If you’re weighing up how to use a soil blocker for seedlings, think of it as a hands-on method rather than a shortcut. The essentials are a blocker that suits your needs, a mix that holds together, and a routine for checking moisture. The next sections cover those choices, plus the steps for making blocks, sowing seeds, and caring for seedlings as they grow.
Choose a Soil Blocker, Mix, and Tray That Suit Your Seeds
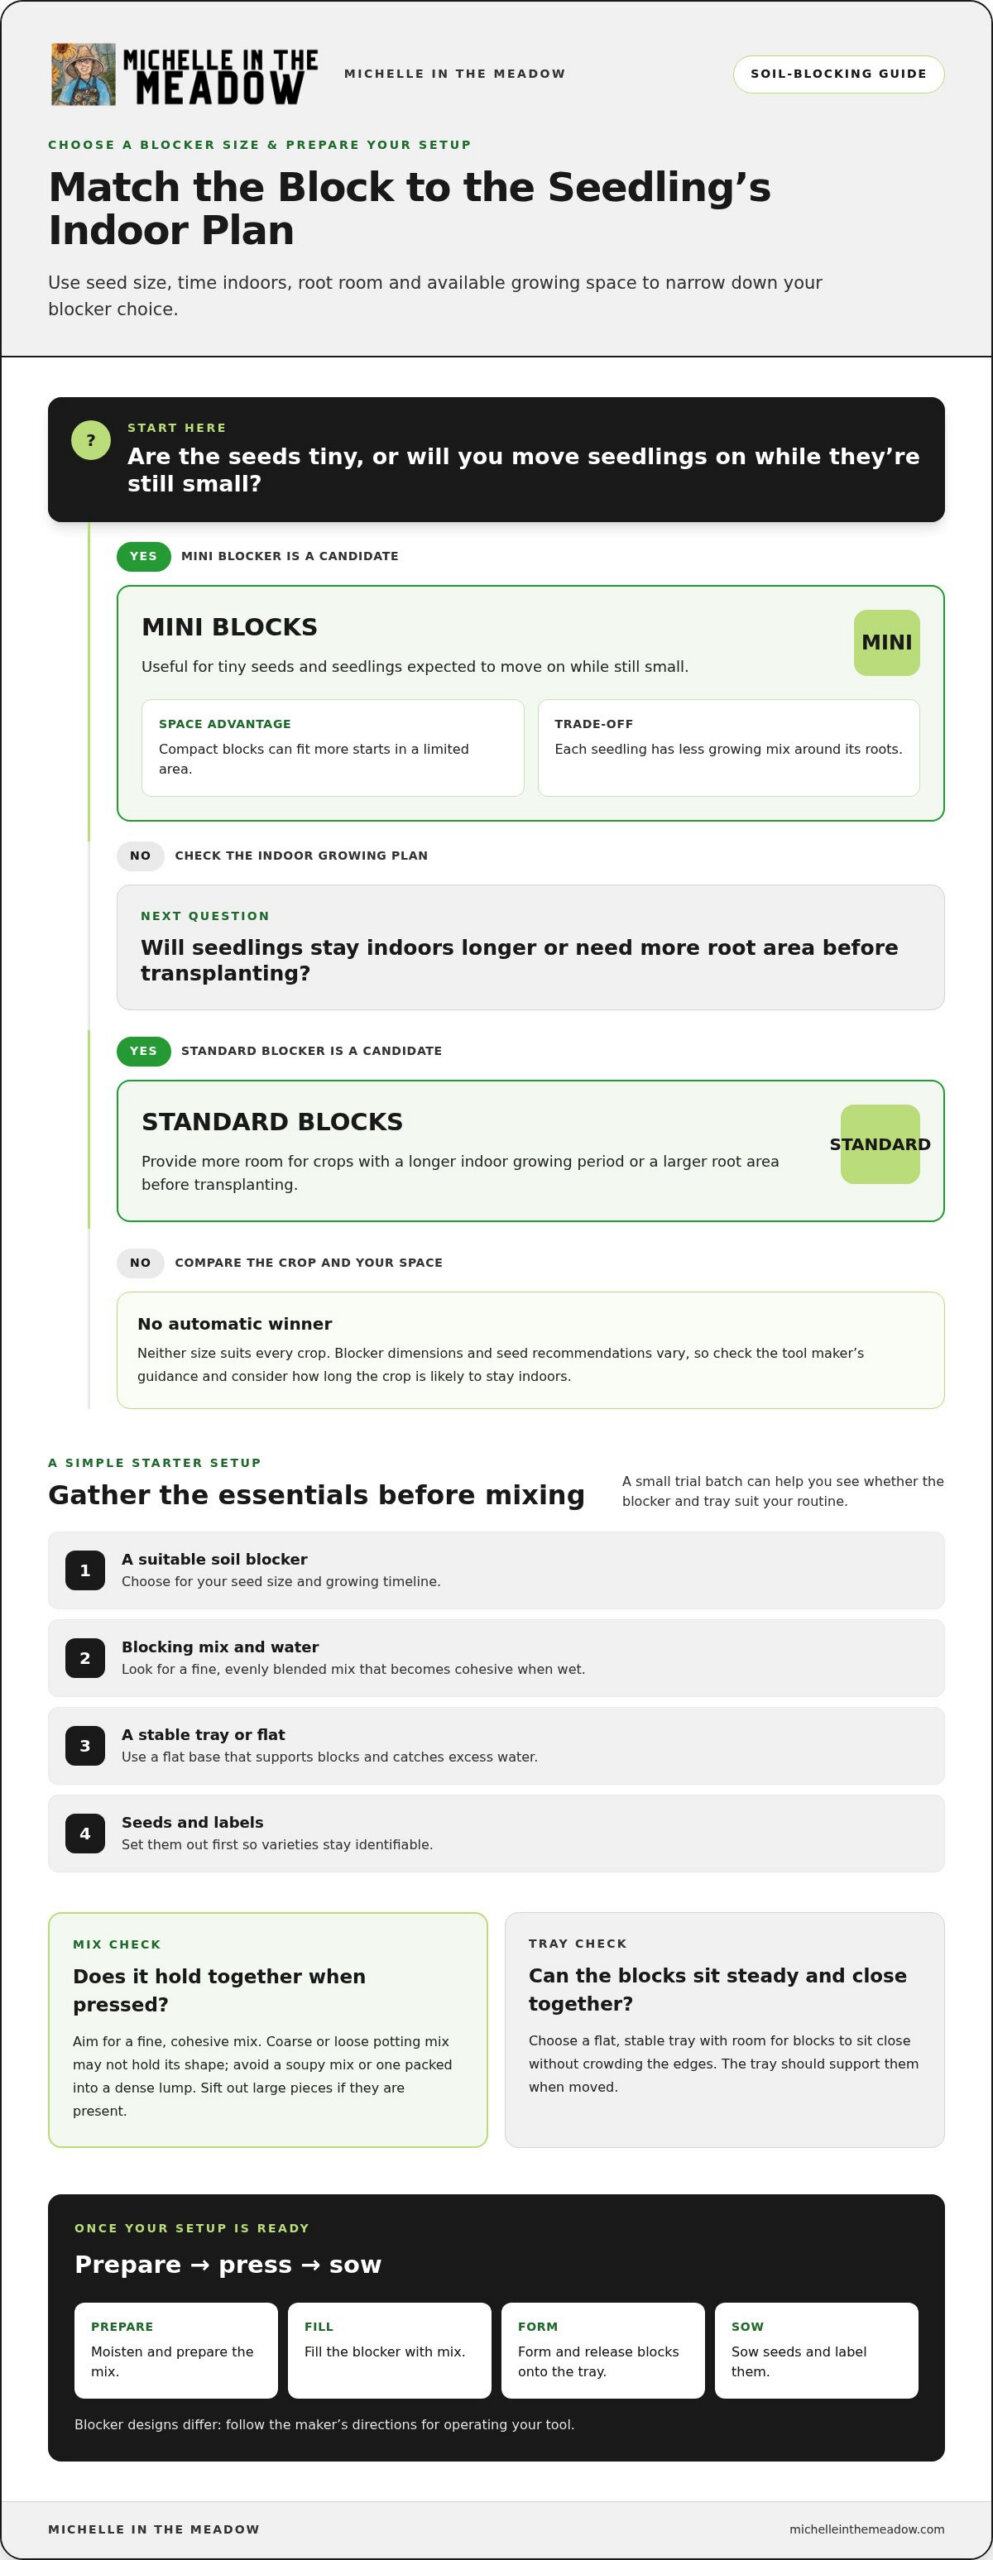
A simple starter setup doesn’t need a cupboard full of specialty gear. Choose a blocker that suits the seeds you plan to sow, a mix that presses into a cohesive block, and a tray that keeps your blocks steady. The right blocker size depends on more than seed size. Consider how long seedlings will stay indoors and how much room you have under lights or on a windowsill.
Mini or standard soil blocker: which size should you use?
Mini blocks can be useful for tiny seeds and seedlings you expect to move on while they’re still small. Their compact size lets you fit more starts in a limited area, but each seedling has less mix around its roots. Standard blocks provide more room for crops that need a longer indoor growing period or a larger root area before transplanting. Neither size suits every crop. Blocker dimensions and seed recommendations vary, so follow the tool maker’s guidance and consider how long your crop is likely to stay indoors.
What mix and basic supplies do you need?
Gather your supplies before mixing. That way, the prepared medium won’t sit and dry while you look for a tray or labels. For a first batch, keep it simple:
- A soil blocker suited to your seed size and growing timeline
- A suitable blocking mix and water for preparing it
- A stable tray or flat to support the blocks and catch excess water
- Seeds and labels to keep varieties identifiable
Ordinary potting mix may not work well if it’s too coarse or loose to hold its shape when pressed. Look for a fine, evenly blended mix that becomes cohesive when wet without turning soupy or packing into a dense lump. Large pieces can stop the blocker from filling evenly or make seed placement awkward, so sift them out if they’re present. If the mix is already consistent, you can skip sifting.
Choose a tray with a flat, stable base and enough room for the blocks to sit close together without crowding the edges. It should support the blocks when you move them and catch water that drains through. You don’t need to begin with a large, elaborate setup. A single blocker, a tray that fits your growing space, and enough mix for a small trial batch are practical starting points. Place the tray somewhere you can check the seedlings regularly.
A small trial helps you learn whether the blocker size and tray suit your routine before you make more blocks. If you’re choosing tools, you can also explore curated gardening product recommendations as you compare options. Once your setup is ready, you can mix, press, and sow.
How to Make Soil Blocks and Sow Seeds Step by Step
Work in order to keep the process manageable: prepare the mix, fill the blocker, form and release the blocks, then sow. Set out your tray, seeds, and labels first so the fresh blocks don’t sit unattended while you look for supplies. Blocker designs differ, so follow the maker’s directions for operating your tool.
How wet should soil-blocking mix be?
Aim for mix that’s thoroughly moist and moldable, not dripping or crumbly. Squeeze a handful: it should hold together when you open your hand, but no stream of water should run out. If it falls apart, add a little water and mix again. If it’s soupy, work in more dry mix. Ingredients and conditions affect how much water you’ll need, so make small adjustments and check the texture again.
How do you press blocks and sow seeds?
Once the mix passes the squeeze test, form a few blocks and check their shape before making the full batch. Keep the tray on a level surface and leave enough room to water without knocking blocks out of place. Follow the seed packet for sowing depth, and label each variety right away. It’s much easier than trying to identify similar seedlings later.
- Hydrate the mix. Add water a little at a time, stirring thoroughly between additions so moisture spreads through the mix. Give dry pockets time to absorb water before judging the consistency again.
- Load the blocker. Push the forming chambers into the prepared mix until they fill consistently. Follow the tool’s guidance for loading it, and make sure each chamber is filled rather than partly empty.
- Compress the blocks. Press firmly into the mix so it holds together, but don’t force the tool in a way its maker doesn’t recommend. Consistent pressure helps the blocks release in a stable shape.
- Release onto the tray. Position the blocker over the tray and use its release mechanism as directed. Check that the blocks hold together, then set them close enough to support one another without crowding the tray.
- Sow and label. Place seeds at the depth given on the packet. Cover them only if the instructions call for it, then label each variety with its name and sowing date.
For very small seeds, a pencil tip or similar clean tool can help you place one seed at a time. Larger seeds may be easier to position with your fingers. Use the packet’s depth guidance instead of assuming every seed belongs in the small indentation on top of the block. Some seeds need light to germinate and shouldn’t be covered, while others need a layer of mix.
As you learn how to use a soil blocker for seedlings, treat the first batch as a chance to observe and adjust. If blocks crumble as they release, revisit the moisture level and loading pressure before changing several things at once. A well-formed block should stay intact as you sow and water.
How to Water and Care for Soil-Blocked Seedlings
Soil blocks are exposed on their sides, so they can lose moisture faster than mix inside a cell. Check them regularly rather than relying on a fixed watering timetable. Aim for evenly moist blocks, not constantly saturated ones. Dry blocks may stress young roots, while prolonged waterlogging can deprive them of air.
How can you water blocks without washing them apart?
Use a gentle stream, a fine rose, or a mister to moisten the surface without knocking seeds loose or eroding the block edges. Once blocks are stable, you can also water at tray level: add water to the tray and let the blocks draw it up. Check the blocks as they absorb moisture, then pour away any water left standing.
Let the blocks guide your next check. The surface may look dry before the center does, so gently feel a block rather than watering just because its top has changed color. If it still feels moist, give it more time. If it’s drying through, water carefully. A small trial helps you learn how quickly your mix dries in its particular spot, especially under lights or near a warm window.
What should you do when blocks dry out or seedlings struggle?
Look for patterns before changing your routine. Blocks that crumble may need more consistent moisture or firmer, more even pressing when formed. Slow or uneven emergence can relate to sowing depth, seed viability, or growing conditions. Compare what you see with the seed packet’s instructions before adjusting care.
- Blocks crumble or split: Check whether they’ve dried too far. If they were damp but still broke during release or handling, review how evenly the blocker was filled and pressed.
- Blocks dry quickly: Check them more often and adjust watering to the conditions around the tray. Air movement and warmth can affect how quickly moisture is lost.
- Green growth appears on the surface: Algae can be a sign that surfaces stay wet. Improve airflow and avoid leaving standing water in the tray.
- Seeds emerge slowly or unevenly: Check the packet for sowing depth and germination guidance. Then consider whether the blocks are too dry, too wet, or in unsuitable light or temperature conditions for that crop.
Seedlings also need suitable light, airflow, and temperature as they grow, but one setting won’t suit every crop. Use the seed packet as a starting point, avoid crowding seedlings, and watch how they respond. If stems look stretched, check whether they’re receiving enough light. If surfaces stay damp for long periods, improve airflow around the tray and reduce excess moisture.
Learning how to use a soil blocker for seedlings means noticing small changes, not just making tidy blocks. For practical gardening tutorials and tool suggestions to support your seed-starting routine, explore gardening resources.
When to Transplant Soil-Blocked Seedlings and Next Steps
There isn’t one leaf count or calendar date that suits every seedling. Consider the crop’s development, the guidance on its seed packet, and the conditions where it will grow. A seedling may look ready but still need more time if outdoor weather doesn’t suit that crop. Waiting for a suitable planting window is part of transplanting well.
How do you know a seedling is ready to transplant?
Check the seed packet for transplant timing and assess the plant’s overall growth, not just one feature. A seedling should be developed enough for its crop and able to handle the next stage of growing. Consider the forecast and the plant’s needs, too. If it’s moving from indoors to outdoors, introduce it gradually to outdoor conditions rather than making the change all at once.
- Growth: Look for a seedling that’s growing steadily and has the development expected for its crop.
- Timing: Use the packet’s transplant guidance as a reference, then account for current weather and growing conditions.
- Acclimation: Give indoor-grown seedlings a gradual introduction to outdoor conditions, following crop-specific guidance.
How do you transplant and reuse your soil-blocking setup?
Prepare the destination soil before lifting seedlings so each block can be planted promptly. Make a space that fits the block, then support it from underneath as you move it. Handle the block rather than pulling on the stem. Set it at a depth suited to that crop, using the seed packet or crop guidance to help determine placement.
Gently firm the surrounding soil so the block sits securely, then water the area to settle the soil and moisten the block. Keep an eye on moisture as the seedling adjusts. A garden bed or container may dry at a different rate from the seed-starting tray, so check the planting area directly instead of assuming its watering needs will match those indoors.
Some seedlings may be ready while others in the same tray need more time. Transplant in manageable batches, and avoid leaving a block exposed or unsupported while you prepare the next planting spot. If conditions aren’t suitable yet, keep caring for the seedlings and reassess rather than rushing them outdoors.
After transplanting, remove leftover mix from the blocker and tray, clean them, and let them dry before storing. This reset leaves the equipment ready for another round and gives you a moment to note what worked: which block size suited your crops, how seedlings handled transplanting, and what you’d change next time.
For your next attempt, start with a small batch and keep notes from sowing through transplanting. Learning how to use a soil blocker for seedlings is a process of matching the tool and routine to the crops you grow. Explore more seed-starting guidance as you plan your next round.
Make Your Next Seed-Starting Round a Little Better
Your first soil-blocking batch doesn’t need to be perfect to teach you something useful. Notice which parts felt easy, where you had to adjust, and how your seedlings responded. Carry one small lesson into your next round. That’s a practical way to build confidence with how to use a soil blocker for seedlings, one crop and season at a time.
Michelle In The Meadow shares gardening tutorials in written and video formats, along with curated recommendations to help you find tools suited to your seed-starting plans. Explore more practical seed-starting guides and build a routine that works for your garden.
Start small, stay curious, and give yourself room to learn as you grow.
Frequently Asked Questions
Can you use regular potting soil in a soil blocker?
Sometimes, but only if the potting mix is fine and cohesive enough to hold a pressed shape. Coarse bark, chunky compost, or large pieces can keep the blocker from filling evenly and leave weak spots in a block. Try a small amount first. If it crumbles as it comes out of the tool, use a finer blocking mix or remove oversized pieces before making a larger batch.
Why are my soil blocks falling apart?
Blocks commonly fall apart when they’re too dry, loosely packed, or made with a mix that doesn’t bind well. First check whether the mix holds together before pressing. Then make sure the blocker is filled evenly and pressed with consistent force. If a block breaks after release, check how you’re handling it and whether the tray supports it. Change one factor at a time to pinpoint the cause.
Do soil blocks need drainage holes?
No, the blocks themselves don’t need drainage holes. They’re formed from growing medium rather than enclosed in a pot, so water can move through the block and into the tray beneath it. The tray should catch runoff, and you should empty any standing water after the blocks have absorbed what they need. If you’re using a solid-bottom tray, pay close attention to excess water so the blocks aren’t left sitting in it.
How often should you water soil-blocked seedlings?
There isn’t one reliable interval for every setup. Check the blocks directly and water when they’re drying, considering how warm, bright, or breezy their growing spot is. A sunny, warm area may dry blocks faster than a cooler one. Rather than watering automatically each morning, check at a consistent time and adjust based on what you feel. The goal is to avoid both dried-out blocks and persistently saturated ones.
Can you put more than one seed in a soil block?
Yes, if the seed size and crop make it practical, but follow the packet’s sowing advice first. With tiny seeds, placing more than one may be easier than handling a single seed; with larger seeds, one per block may be simpler. If multiple seedlings emerge, avoid pulling extras if that would disturb the one you’re keeping. Snip unwanted seedlings at the surface with clean scissors instead.
When should you transplant seedlings from soil blocks?
Transplant when the seedling’s development, crop guidance, and growing conditions all point to readiness, rather than using one leaf-count rule for every plant. Check the seed packet for timing and make sure the destination bed or container is ready. If seedlings are moving outdoors from a protected spot, acclimate them gradually. Lift each block from underneath, plant it at the crop-appropriate depth, and water it in.