
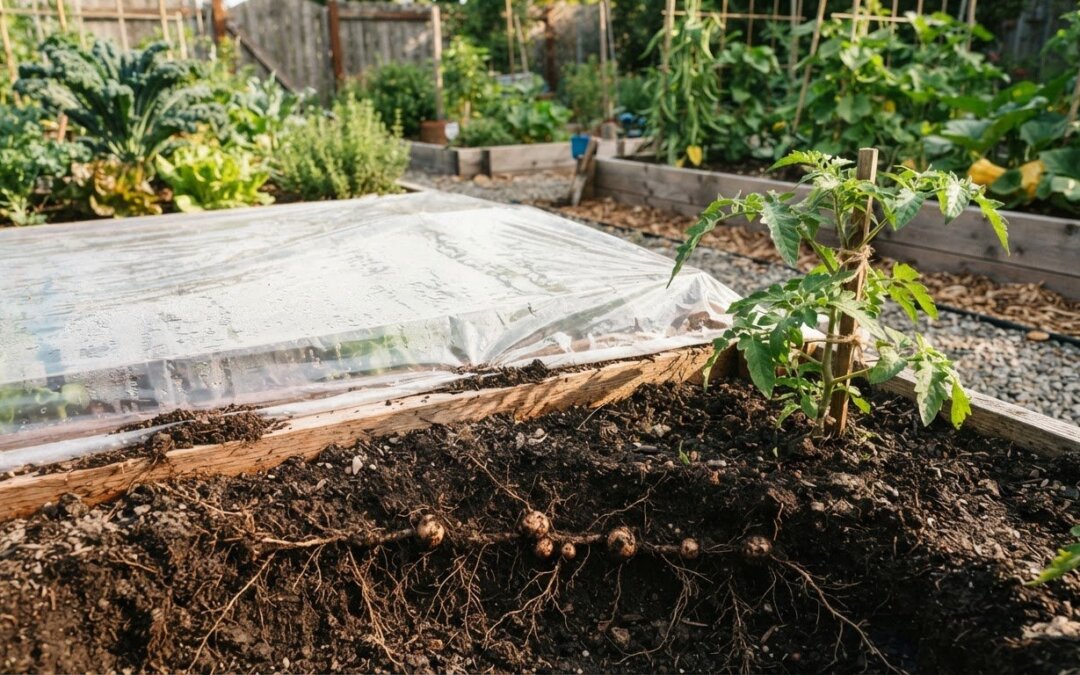
Root-knot nematodes often leave their clearest clues underground, not on the leaves. These microscopic roundworms feed on plant roots, causing telltale galls that can interfere with healthy growth. Organic root knot nematode control starts with checking roots for these changes, then reducing nematodes in the soil with practical measures such as solarization.
When a plant looks stressed, watering, nutrients, or disease may come to mind first. Root-knot nematodes can be harder to spot, and even a vigorous plant may show no obvious symptoms. This guide explains what nematodes are, how root-knot nematodes affect plants, and what to look for when inspecting roots. You’ll also learn how to prepare and cover soil for solarization, along with other garden practices that can help limit nematode populations. Looking below the soil surface can help you choose a more informed next step.
Key Takeaways
- Inspect roots for unusual swellings, since root-knot nematodes can affect plants even when symptoms above ground are subtle.
- Learn how to prepare soil for solarization by tilling and flattening it, dampening it evenly, and securing clear plastic over the surface.
- Understand how nematodes move through their life cycle and why disrupting their access to host plants can help limit their impact.
- Use Michelle In The Meadow’s Soil Calculator for Raised Beds to estimate the soil volume your raised bed needs.
1. What are the symptoms of root knot nematodes in plants?
Root-knot nematodes feed inside plant roots and can trigger rounded swellings called galls. These can interfere with water and nutrient uptake. Aboveground, affected plants may wilt, yellow, or grow poorly, even when watering seems adequate. A vigorous plant may show no obvious symptoms, so inspecting roots can reveal clues that leaves don’t.
Carefully lift a struggling tomato or pepper and loosen the soil around its roots. Look for abnormal swellings, then compare the roots with those of a healthy plant of the same kind. Poor growth alone doesn’t confirm nematodes. Watering or nutrient problems can also cause it, so consider the whole plant and growing area.
Keep new beds and containers as clean as possible. Use clean potting mix for transplants, choose plants with healthy-looking roots, and avoid carrying soil from a suspect bed on tools or footwear. These habits help prevent infested soil from reaching other garden areas. Organic root knot nematode control also depends on planning what grows in each bed: avoid growing a susceptible host in the same site for more than one year, and rotate with non-host plants.
Mustard and other brassica cover crops can be grown, chopped, and mixed into moist soil as biofumigant plants before another crop is planted. These practices can be part of organic root knot nematode control, but heat and biofumigant compounds may affect beneficial soil organisms too. Limit treatment to the target area and keep nearby untreated soil habitat.
After harvest, remove crop roots and record plant growth, root condition, and bed location. Managing nematodes takes repeated attention, so compare later plantings or use a soil assay to see whether populations have changed. Species, host plants, and suitable control options vary across the U.S.; choose rotations that reflect the crops you grow.
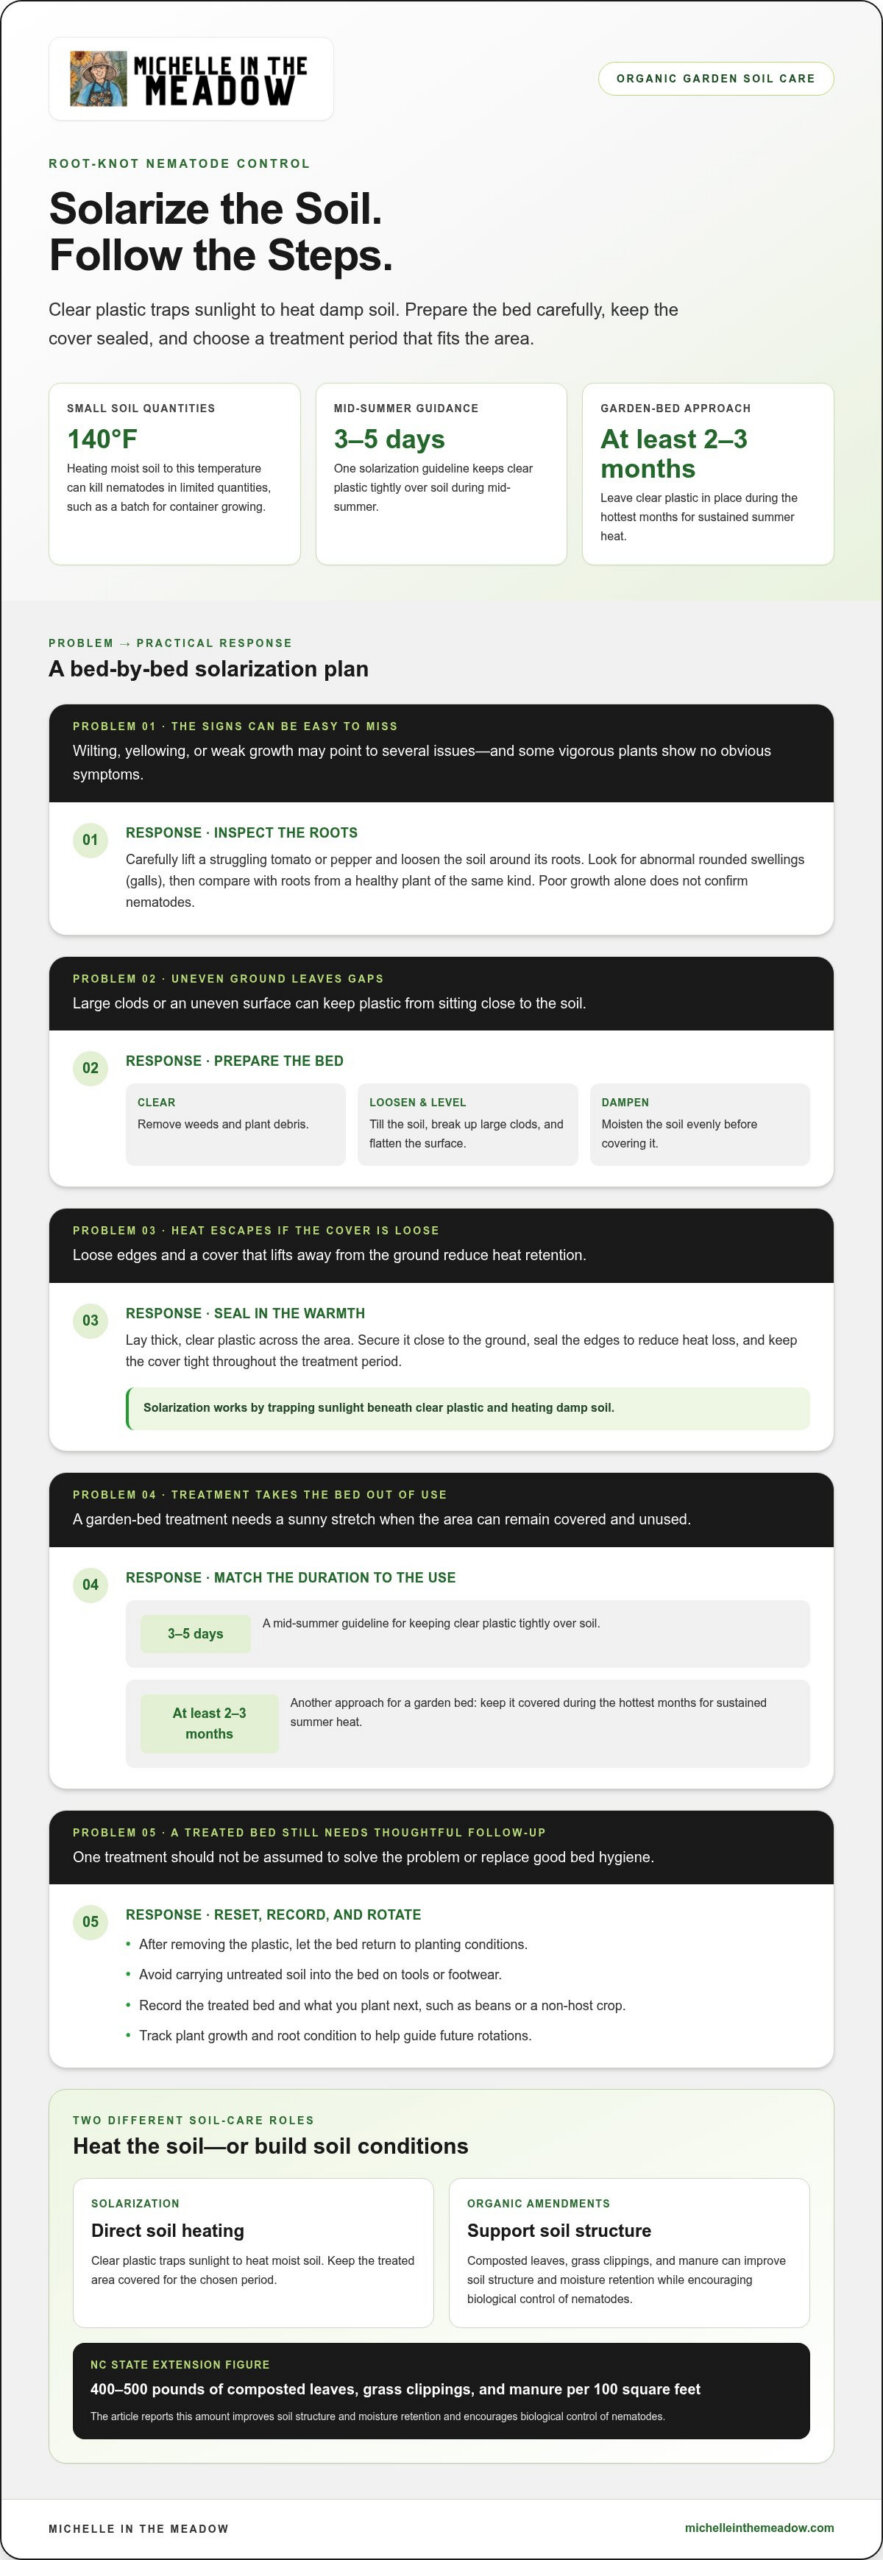
According to NC State Extension, incorporating 400 to 500 pounds of composted leaves, grass clippings, and manure per 100 square feet improves soil structure and moisture retention and encourages biological control of nematodes.
2. Environmental control through soil solarization
Soil solarization uses sunlight trapped beneath clear plastic to heat damp soil. Root-knot nematode activity varies with soil conditions. Heating moist soil to 140°F can kill nematodes in small quantities of soil, such as a limited batch for container growing.
To solarize a garden bed, first remove weeds and plant debris. Till the soil, break up large clods, and flatten the surface so the plastic sits close to the ground. Dampen the soil evenly, then secure thick, clear plastic across the area. Seal the edges to retain warmth and reduce heat loss, and keep the cover tight throughout the treatment period.
Solarization guidance describes keeping clear plastic tightly over soil for three to five days in mid-summer. For a garden bed, another approach is leaving clear plastic in place for at least 2-3 months during the hottest months of the year. The longer treatment uses sustained summer heat; choose a sunny stretch when the bed can remain covered and unused.
Organic soil amendments work differently from heating soil under plastic. Composted leaves, grass clippings, and manure can improve soil structure and moisture retention while supporting biological control of nematodes. Solarization heats moist soil directly; amendments improve conditions for soil organisms that can help suppress pests. Each has a different role, and you can combine soil-building practices with solarization when timing and bed use allow.
After removing the plastic, let the bed return to planting conditions. Avoid carrying untreated soil into it on tools or footwear. Record which bed was treated and what you planted next, such as beans or a non-host crop. These notes help with future rotations and tracking plant growth, without assuming one treatment will solve the problem.
For a raised bed, accurate soil volume helps you plan amendments before treatment. Gardening educational content can help you work through practical soil decisions alongside solarization steps.
3. Root-knot nematode symptoms and detection
Aboveground symptoms can point you toward an inspection, but they can’t identify the cause on their own. Wilting, yellowing, and weak growth may also result from watering or nutrient problems. Notice whether struggling plants cluster in one bed or patch, then compare them with vigorous plants nearby. Uneven growth can help you decide where to inspect first.
Examine roots from a symptomatic plant instead of relying on leaf symptoms. Loosen the soil carefully, lift the plant, and gently remove soil until the root surface is visible. Look for abnormal swellings and fewer fine roots. If possible, compare the roots with those of a healthy plant of the same kind. Seeing them side by side makes differences easier to spot.
Before changing your routine, record the plant type, bed location, and visible symptoms. Note whether the plant wilted despite moist soil or whether several plants in the same area grew poorly. These observations can help distinguish a recurring bed pattern from an isolated plant problem. Photographs also preserve a useful record as roots and symptoms change.
Visual checks are a first step, not a complete measure of nematodes in the soil. A nematode assay can help determine whether root-knot nematodes are present. The North Carolina Department of Agriculture & Consumer Services Nematode Assay Section accepts nematode samples. Keep soil from different areas separate, and label each sample with its bed and crop so the results remain useful.
Use inspection or assay findings to guide your next planting decision. If roots show damage or a sample indicates nematodes, avoid planting another susceptible crop in the same spot. Track the next crop’s growth and root condition, then compare your notes with the original symptoms. Consistent records make it easier to assess whether your garden practices are helping over time.
4. Nematode life cycle
Root-knot nematodes begin as eggs, often protected in a gelatinous egg mass produced by a female. Eggs can remain in soil or on infected roots, so leaving root debris after harvesting tomatoes may preserve a source of future infection. Understanding this cycle shows why managing roots and host plants matters between crops.
Young nematodes hatch as juveniles. Infective juveniles move through thin films of water between soil particles, then enter a suitable root. They commonly penetrate near the growing root tip and move within the root to a feeding site. A susceptible crop, such as tomato, provides the living tissue they need to keep developing.
Once inside a root, a juvenile establishes a feeding site and settles in place. The plant responds by forming the swollen gall associated with root-knot damage. The nematode develops there, drawing nutrients from root cells. As normal root function is disrupted, the plant may struggle to take up water and nutrients effectively.
As it develops, the nematode matures into an adult. A female produces eggs, often in a mass near the root surface, and the cycle begins again. Infected roots left in the bed can carry the problem from one planting to the next. Soil movement can also spread eggs or juveniles to another part of the garden.
Use the life cycle to plan a practical sequence: remove infected crop roots, avoid planting a susceptible host in the same bed again, and prevent infested soil from traveling on tools. A non-host crop interrupts access to a suitable root, while clean growing media helps protect containers and raised beds. Since development depends on a living host and favorable soil conditions, combine these steps rather than relying on just one.
Build a more informed garden plan with practical gardening education on soil and crop care.
Michelle In The Meadow: Soil Calculator for Raised Beds
Michelle In The Meadow’s Soil Calculator for Raised Beds helps you estimate how much soil you need to fill or refresh a raised bed. After planning a crop rotation or preparing a bed for solarization, knowing the bed’s soil volume can help you organize the next steps.
Use the calculator when setting up a raised bed or estimating how much soil an existing bed needs. Michelle In The Meadow also shares gardening educational content and curated gardening product recommendations to support practical garden planning. These resources complement your own observations, such as noting which crops grew in each bed and where root problems appeared.
For a practical next step, visit Michelle In The Meadow online to explore the soil calculator and gardening resources.
Make Your Next Planting Decision Count
Make each growing season a chance to plan your garden more intentionally. Keep a simple record of where crops grow, how plants perform, and which beds need extra attention. Those notes can guide your next rotation and help you focus your effort, rather than treating every bed the same way. Steady organic root knot nematode control comes from thoughtful choices that carry forward from one planting to the next.
Choose one practical step to begin with, such as mapping your beds or planning a non-host crop for a problem area. Then adjust your approach as you observe how plants and soil respond. For support with your garden planning, contact Michelle In The Meadow. Small, well-considered steps can help you build a more resilient garden over time.
Frequently Asked Questions
What Are Nematodes?
Nematodes are roundworms, a large group that includes organisms with different roles in soil. Some feed on microbes, while plant-parasitic types feed on plants. Root-knot nematodes are one plant-parasitic group, with more than 90 species estimated to exist. That diversity matters: the same garden may contain species with different host preferences, so “nematodes” doesn’t mean every kind harms your crops.
What are the symptoms of root knot nematodes in plants?
Root-knot nematodes may cause poor growth, yellowing, or wilting, but those signs alone can’t confirm the cause. A vigorous plant may show no symptoms. If one crop looks weak while nearby plants of the same kind appear healthy, inspect the roots of a struggling plant. Look for abnormal swellings and compare its roots with a healthy example before deciding what to change.
What causes root-knot nematodes and how do they damage plants?
Root-knot nematodes damage plants when juveniles enter susceptible roots and establish feeding sites. The plant forms galls around those sites, and damaged roots become less effective at taking up water and nutrients. Infested soil or root pieces can carry nematodes into another bed. For example, soil clinging to a garden tool can move from a problem patch to a clean planting area.
How can you identify root-knot nematodes and distinguish them from other root problems?
Inspect roots directly, since wilted leaves can have several causes. Root-knot nematode swellings are part of the root, while soil clumps can usually be brushed away. Compare an affected plant with a healthy one of the same kind. If the difference remains unclear, a nematode assay can help determine whether nematodes are present rather than another root problem.
Which organic methods are proven to control root-knot nematodes in home gardens?
Home gardeners can combine soil solarization, crop rotation, removal of infected roots, and soil-building amendments. Solarization heats moist soil beneath clear plastic, while rotation reduces access to susceptible host plants. NC State Extension says the most reliable control comes from combining two or more tactics. Choose methods that fit the bed’s planting schedule, then record the treated area and the crop that follows.
How effective are crop rotation and resistant plant varieties against root-knot nematodes?
Rotation can help when a susceptible crop is replaced with a non-host, but it won’t work if the replacement plant also supports the nematodes in the soil. Resistant varieties can limit damage when their resistance matches the nematode species, but resistance isn’t immunity. Avoid planting a susceptible host in the same site for more than one year, and plan each bed’s sequence carefully.
