
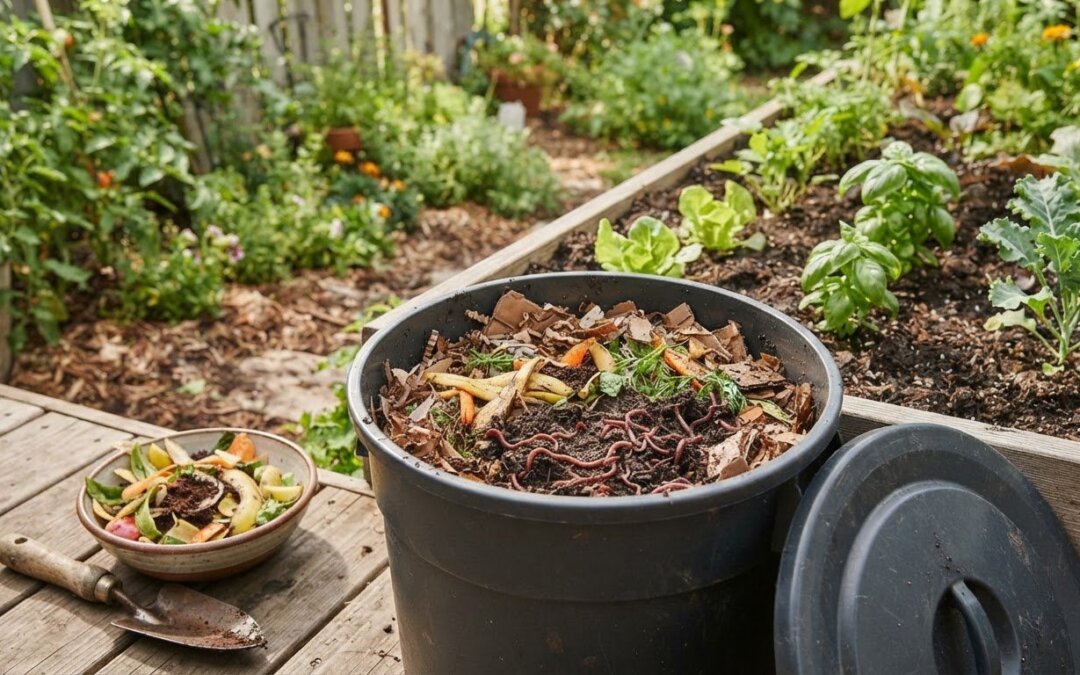
More food isn’t a shortcut to faster compost. For a vermicomposting setup for kitchen scraps, start with one or two cups of food, then wait until it has virtually disappeared before adding more. Once the worms are settled, feed red wigglers 2-3 times each week, burying suitable scraps in different spots under the bedding.
It’s tempting to add another handful when a bin looks hungry, but uneaten food may be a sign to slow down. Smaller pieces and a steady routine make feeding easier to manage, while choosing suitable scraps helps keep the bin balanced.
This guide explains how to choose a container and bedding, set up the bin, and decide what to feed or leave out. You’ll also learn how to adjust feedings when scraps linger, harvest finished castings, and judge how much kitchen waste a worm bin can handle. The goal is a simple system that suits your scraps and space without overwhelming the worms.
Key Takeaways
- Prepare bedding from materials such as torn newspaper, leaves, or coir, and keep it as damp as a wrung-out sponge.
- Choose fruit and vegetable scraps, coffee grounds, tea leaves, and non-coated paper; leave meat, bones, dairy, and oily foods out.
- Chop scraps into small pieces and bury them in different areas so you can track what the worms are actually consuming.
- Harvest when the finished compost is dark blackish-brown and moist, then use it to enrich garden beds or potting mix.
- Match the bin’s capacity to your household’s scraps: one worm bin may not handle all kitchen waste without careful waste reduction.
What are the Acceptable Materials to Include in a Worm Bin?
Set up the bedding first: fill an 18-gallon worm bin about two-thirds full with dry bedding, moisten it, then place worms on top. They can move down through the damp material toward food scraps.
Keep the bedding as moist as a wrung-out sponge, and place the container in a cool spot away from direct sun. Red wigglers do well from the mid-50s to the low 80s degrees, with airflow through holes in the bin.
To discourage odors and fruit flies, bury food instead of leaving it exposed on the surface. Chop scraps into 2 to 3-inch pieces and cover them with damp newspaper strips.
- Choose loose bedding materials. Newspaper strips, coconut coir, peat moss, leaves, and wood chips can all go in a worm bin. Tear newspaper into strips about one inch wide. This creates loose spaces for worms to move through and makes it easier to mix bedding with food scraps.
- Fill the bin without packing it down. Use dry bedding to fill about two-thirds of an 18-gallon container, then moisten it evenly. Keep the material loose rather than pressing it into a dense layer. Compacted bedding can make it harder for worms to move and forage for food.
- Moisten the bedding gradually. One preparation method is to soak 4 pounds of bedding in 1 and 1/2 gallons of water. Check a handful after mixing: it should feel damp like a wrung-out sponge, without water dripping freely. If excess moisture collects at the bottom, mix in dry newspaper or leaves.
- Balance browns and greens. Aim for about 70 percent brown matter and 30 percent green matter in the bin. Newspaper, leaves, and wood chips provide brown material; kitchen scraps provide green material. Add dry bedding when food scraps make the bedding heavy or soggy.
- Prepare and cover food scraps. Chop scraps into 2 to 3-inch pieces and bury them beneath the bedding. Cover each portion with a two- to three-inch layer of moistened newspaper strips. Broccoli and onion scraps can cause odors even in a properly maintained bin, so use them sparingly or leave them out.
- Choose a cool, ventilated location. Keep the bin out of direct sun, in a cool place such as a porch, basement, or kitchen. Drill 1/4- to 1/2-inch holes in the bottom and lid, with additional airflow holes in the sides. Once bedding is ready, place worms on top so they can move down into it.
Feeding kitchen scraps
A vermicomposting setup for kitchen scraps works best when you feed at the worms’ pace. Start with a small meal, then let what remains guide your next addition.
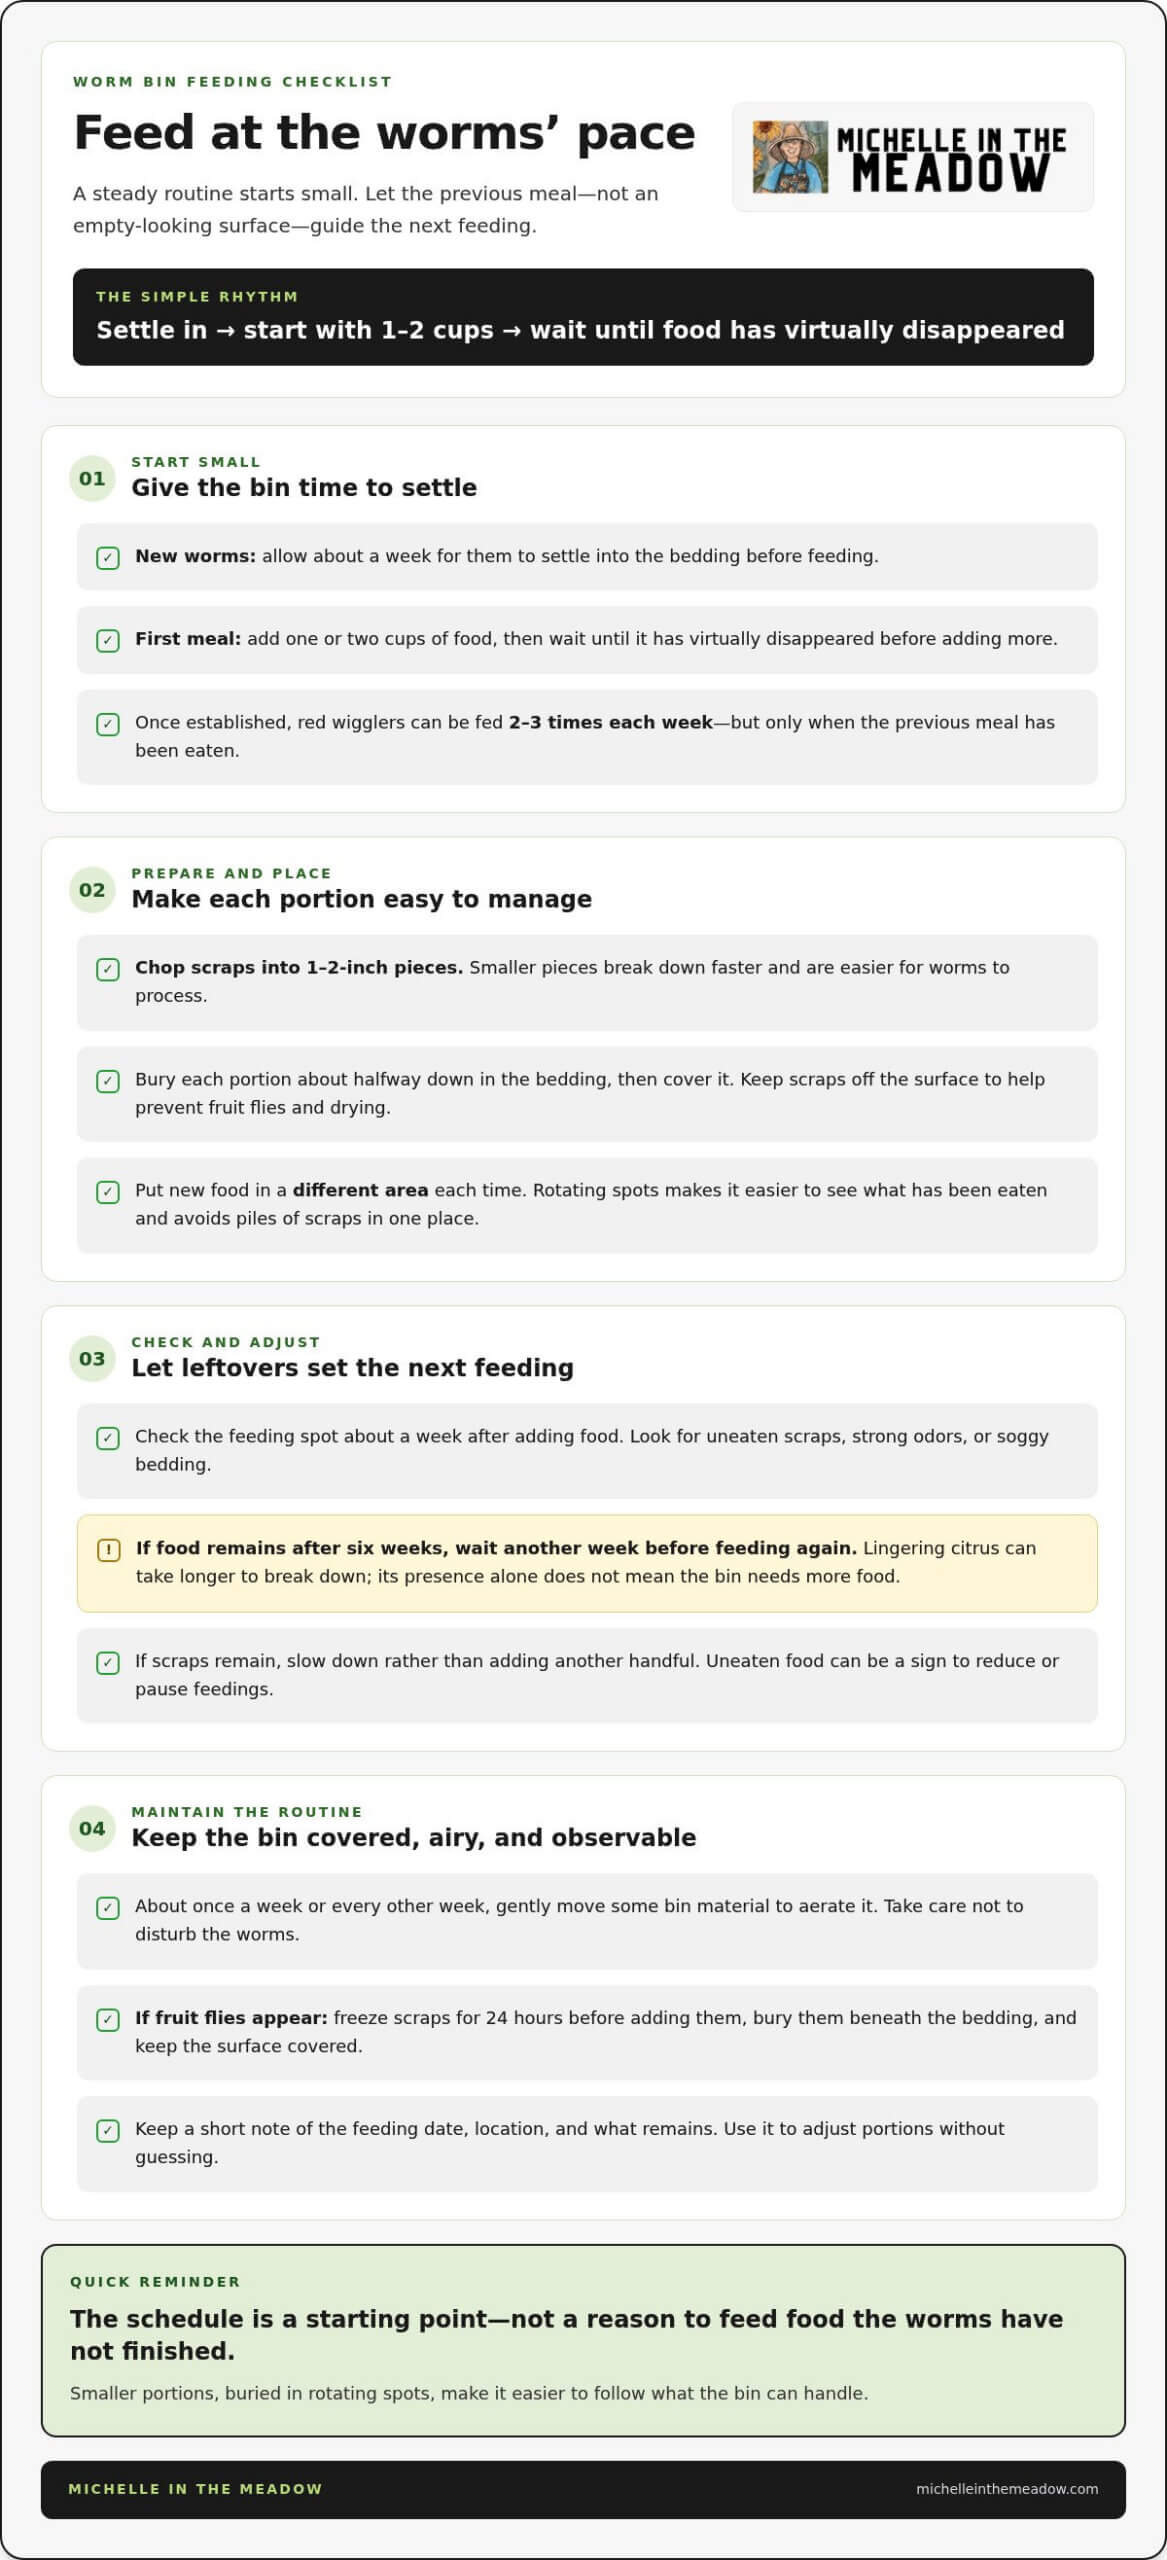
- Give newly added worms about a week to settle into their bedding before feeding. Then add one or two cups of food and wait until it has virtually disappeared before adding more. This pause helps you see how quickly the worms and other organisms process food in the new container.
-
Prepare and Feed Kitchen Scraps
Chop scraps into one- to two-inch pieces before adding them. Smaller pieces break down faster and are easier for worms to process than large chunks. Bury each portion about halfway down in the bedding, then cover it. Don’t leave scraps exposed on top, where they can attract fruit flies or dry out.
- Once the worms have settled, feed red wigglers 2-3 times each week, but let the previous meal set the pace. In a vermicomposting setup for kitchen scraps, a regular schedule is a useful starting point, not a reason to add food that the worms haven’t finished. If scraps remain, wait before feeding again.
- Check the feeding spot about a week after adding food. Look for uneaten pieces, strong odors, or soggy bedding. If food remains after six weeks, wait another week before feeding again. Citrus scraps can take longer to break down, so their presence alone doesn’t mean the bin needs more food.
-
Feed and Aerate the Bin
Add each new portion in a different area rather than returning to the same spot. This rotation helps you track what has been eaten and prevents scraps from collecting in one place. About once a week or every other week, gently move some bin material to aerate it, taking care not to disturb the worms.
- If fruit flies appear, freeze food scraps for 24 hours before adding them. Bury them beneath the bedding and keep the surface covered. These steps can help reduce exposed food and discourage flies, while also making each feeding easier to locate during your next check.
- Keep a short note of the feeding date, location, and what remains. In a vermicomposting setup for kitchen scraps, that record helps you adjust portions without guessing. For example, if one area still holds scraps, try a smaller meal in another spot next time. Practical garden composting education can also help connect bin care with garden use.
Harvesting and separating worm castings
Worm castings may take about 2-3 months to be ready. Look for finished material that is deep blackish-brown and moist before separating it from the worms.
Harvesting doesn’t mean emptying the bin. Leave some bedding and compost behind so worms and other organisms can continue working in their environment.
- Check whether the compost is finished. Look for dark, moist material with a fairly even texture. Recognizable food scraps or large pieces of bedding mean the contents need more time. Check different parts of the bin, since material near a recent feeding spot may still be breaking down.
- Use light to separate worms. Spread the harvest into small piles and leave it uncovered in natural daylight for a day or two. Worms move down away from the light, allowing you to remove the upper layer of compost. Work gradually, and return visible worms to the bin.
- Encourage worms to migrate. Move finished material to one side and put fresh bedding on the other. Add food to the fresh bedding, giving worms a reason to move toward that side. Once they’ve migrated, collect the finished castings while leaving the worms in their new bedding.
- Pause feeding for a fuller finish. You can stop adding food after 4-6 months and let the worms digest remaining scraps and bedding. Compost may be ready one to two months after new material is no longer added. Check its color and texture before harvesting rather than relying on time alone.
- Use the finished vermicompost thoughtfully. Apply it as a top dressing during the growing season, or mix it into potting medium at no more than one-quarter by volume. Leave some material in the bin to support its continuing composting cycle. Keep the castings moist, but don’t let stored material become waterlogged or dry out.
Limits of a worm bin for handling kitchen waste
For a basic worm bin, gather an opaque container, redworms, damp bedding, and a drill to make airflow holes. Add shredded newspaper or other bedding, then place the container somewhere the temperature stays suitable for red wigglers.
- Choose red wigglers, not deep-soil worms. Redworms used for vermicomposting are typically 2-4 inches long and live near the soil’s upper level. Nightcrawlers work much deeper, so they don’t suit a shallow indoor bin as well. Redworms are most efficient at consuming organic matter and reproducing between 55º and 75ºF, so keep the bin within that range when possible.
- Start with enough worms, then match scraps to capacity. A small indoor bin needs at least 1 pound of redworms, or about 500-1,000 worms. Redworms can consume approximately their own weight in raw organic matter each day, but the bin still has limits. One worm bin isn’t enough for all household scraps unless you carefully minimize food waste.
- Size the container for a broad, shallow bed. Long, wide bins are preferable to tall, narrow ones because worms forage near the surface. Agricultural extension services recommend a plastic bin measuring 21 inches long by 15 inches wide and 5-8 inches deep, with about 2.2 square feet of surface area. That size can handle 2-3 pounds of kitchen scraps each week, according to standard agricultural guidance for a successful vermicomposting setup for kitchen scraps.
- Prepare the bin supplies before adding worms. Use an opaque plastic container with a lid, damp bedding, and air holes in the sides and lid. A sturdy 18-gallon plastic tub is another practical container option. Shredded newspaper, leaves, or coir can form bedding; check that it feels like a wrung-out sponge rather than waterlogged material.
- Keep unsuitable scraps out. Don’t add meat, bones, dairy, or fatty or oily foods. These materials can create problems in a small bin and don’t belong in its regular feed. Use plant scraps in manageable amounts, and add dry bedding if the contents become too wet or compacted.
- Plan a second route for extra waste. A worm bin is best treated as one part of kitchen-scrap management, not a container for every leftover. If scraps regularly exceed the bin’s capacity, reduce food waste first and direct excess material elsewhere in your household’s waste plan. Avoid overloading the bedding, since crowded, wet material is harder to aerate and manage.
Suitable and unsuitable kitchen scraps
What goes into the bin matters as much as how much you feed it. Sort scraps before adding them, and use the list below to choose suitable foods and avoid materials that can cause problems.
- Set aside everyday plant scraps. Fruit and vegetable scraps are suitable, including apple cores, melon rind, carrot peelings, and wilted leaves. Cut them into manageable pieces before adding them. Smaller pieces break down more readily, while a large pile of one food can linger and make it harder to see what the worms are eating.
- Save coffee and tea leftovers. Coffee grounds and paper filters, tea leaves, and tea bags can go into the bin. Check that tea bags are made with suitable material, and tear them open if you want the leaves to mix with the bedding. Eggshells are also acceptable. Crush them before adding, so large shells don’t sit intact on the surface.
- Use plain paper as a useful extra. Non-coated paper can join the bin, along with bedding such as newspaper strips and dry leaves. Keep the paper free of plastic coatings and glossy finishes. Tear it into small pieces, then mix it with food scraps to keep the contents from becoming a dense, wet mass.
- Keep animal products and rich foods out. Don’t feed worms meat, bones, dairy, or fatty or oily foods. These scraps can create odor and attract pests as they break down. If a leftover meal contains cheese, meat, or oily sauce, sort out those portions rather than placing the whole serving in the bin.
- Be selective with strong-smelling or acidic scraps. Broccoli and onion scraps can cause odors even in a properly maintained bin, so use other vegetables instead if smell is a concern. A little citrus peel can be added, but its acid can build up. Leaving citrus out is a straightforward way to avoid that concern.
- Bury and cover each addition. Place suitable scraps below the bedding, rather than leaving food exposed on the surface. Cover them with damp newspaper strips, then close the container. If flies appear, freeze scraps for 24 hours before feeding; this can help reduce fruit flies. Check the feeding spot before adding more, and pause if scraps remain.
Use these choices as a simple sorting routine: keep a small kitchen container for approved scraps, and leave unsuitable leftovers out. For help connecting composting choices with garden care, explore practical gardening education.
Michelle In The Meadow: Soil Calculator for Raised Beds
Michelle In The Meadow’s Soil Calculator for Raised Beds helps you plan how much soil a raised bed needs. After harvesting worm castings, use it to estimate the soil needed for your garden bed.
Michelle In The Meadow also shares gardening educational content and curated gardening product recommendations. These resources connect composting with practical garden decisions, from using finished castings to planning your growing space.
Explore the gardening resources at Michelle In The Meadow when you’re ready to plan your raised bed.
Give your finished compost a place to grow
Next, decide where your garden will make room for the soil and plants you want to nurture. A vermicomposting setup for kitchen scraps can fit into a broader growing routine: notice what your garden needs, then plan where to use the finished compost.
If you’re preparing a raised bed, Michelle In The Meadow’s Soil Calculator for Raised Beds can help estimate the soil your project needs. The site’s gardening content and curated product recommendations offer further guidance as you plan and choose practical next steps.
You don’t need to plan the whole garden at once. Start with the space you have, build on what you learn, and let each season inform the next. Explore gardening resources at Michelle In The Meadow and take your next step when you’re ready.
Frequently Asked Questions
How Often and How Much Should You Feed Your Worms?
Feed based on how much the previous meal has disappeared, not on a fixed pile of daily scraps. Newly added worms should settle for about a week before their first feeding; start with one or two cups, then wait until the food has virtually disappeared. Once established, redworms can be fed 2-3 times each week. If scraps remain, skip a feeding and let the worms catch up.
How much food… and how often?
Begin with a small amount and increase only as the worms consume it. Montgomery County, Maryland, guidance recommends feeding red wigglers once a week and adding up to 3 to 4 pounds of chopped scraps each week. That is a maximum recommendation, not a target for every bin. For a smaller household’s container, the amount of visible uneaten food is the clearest cue to wait.
What is Vermicomposting?
Vermicomposting is the process of using worms and the organisms in their bedding to break down organic scraps into compost. In a home bin, worms consume suitable food, and the finished dark material is called vermicompost or worm castings. You can use it to support garden soil, but it’s an amendment rather than a complete replacement for potting mix or garden soil.
Where should you begin?
Start by deciding which scraps you’ll divert, then choose a bin that suits that amount and a suitable spot in your home. Prepare the bedding before adding worms, and keep the first feeding small. Recording feeding dates and locations can reveal patterns, such as where scraps remain, without requiring you to disturb the whole bin each time.
Where to Keep Your Worms?
Keep the bin out of direct sun in a cool spot, such as a basement, porch, or kitchen. Montgomery County, Maryland, recommends keeping red wigglers between 55°F and 80°F. A shaded indoor location can make temperature easier to manage than an exposed sunny spot. Keep airflow holes clear, and check the bedding if the room becomes unusually warm or the contents feel too wet.
What size worm bin is needed for a household’s kitchen scraps?
Size the bin around the household’s weekly scraps and available floor space. The University of Maryland Extension says a bin with about 2.2 square feet of surface area can handle 2-3 pounds of kitchen scraps each week. If your household produces more, reduce the scraps sent to the bin or use another waste-management route rather than overfilling it.
Which type of worms is best for indoor vermicomposting?
Red wigglers are the best fit for a typical indoor worm bin because they live and feed near the surface. Nightcrawlers generally live deeper underground, so they’re less suited to the shallow space in a container. Redworms used for vermicomposting are typically 2-4 inches long. Choose worms suited to surface-level composting rather than gathering garden worms for the bin.
Which kitchen scraps can worms eat, and which should be avoided?
Worms can eat fruit and vegetable scraps, eggshells, coffee grounds and paper filters, tea leaves and tea bags, and non-coated paper. Keep meat, bones, dairy, and fatty or oily foods out. Onion and broccoli scraps can cause odors, while citrus peel can be added sparingly because its acid can build up. Chop suitable scraps, bury them, and cover them with bedding.