
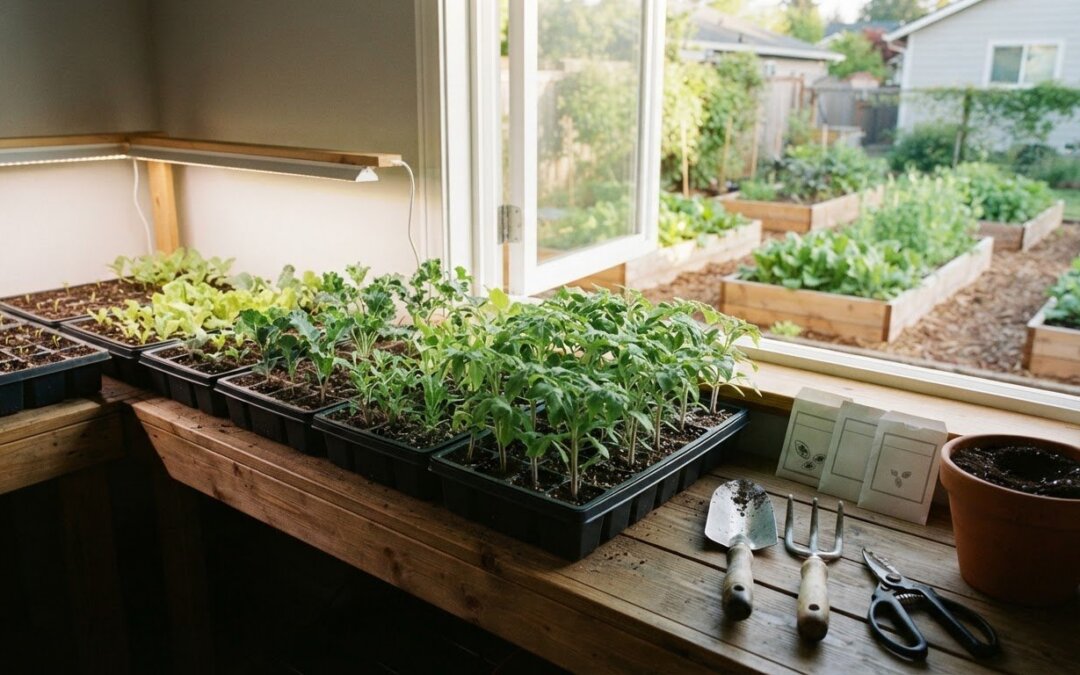
What if the secret to robust summer crops isn’t planting earlier, but having the patience to count backward? Starting your seeds on an arbitrary calendar date is the fastest route to weak, leggy seedlings that stall the moment they hit the garden. To raise sturdy transplants that transition smoothly outdoors, you need a dependable indoor seed starting schedule built around your area’s actual last spring frost date.
We’ve all felt that eager late-winter itch to fill every tray in sight, only to end up overwhelmed by clashing germination windows and fragile stems outgrowing their lights before the soil even warms. It’s discouraging to watch seedlings struggle after weeks of careful tending. The good news is that mastering your garden timing doesn’t require complicated guesswork. By anchoring your planting dates to your local frost window, you’ll produce resilient, thick-stemmed starts ready to flourish when planting day arrives. In this guide, we’ll walk through a clear, week-by-week timeline from seed tray to garden bed, giving you the quiet confidence to manage every variety with ease.
Key Takeaways
- Calculate a reliable indoor seed starting schedule by working backward from your local estimated last frost date rather than guessing from the calendar.
- Organize crops into bi-weekly planting blocks to prevent crowded seed trays and keep diverse vegetable varieties thriving on their natural timelines.
- Dial in your lighting and temperature controls to stop seedlings from stretching, ensuring thick, resilient stems before moving day.
- Manage sudden weather delays with simple staging techniques, including timely potting up to keep root-bound plants healthy.
- Follow a step-by-step, week-long hardening off process to eliminate transplant shock as starts transition into your outdoor raised beds.
How to Calculate Your Indoor Seed Starting Schedule
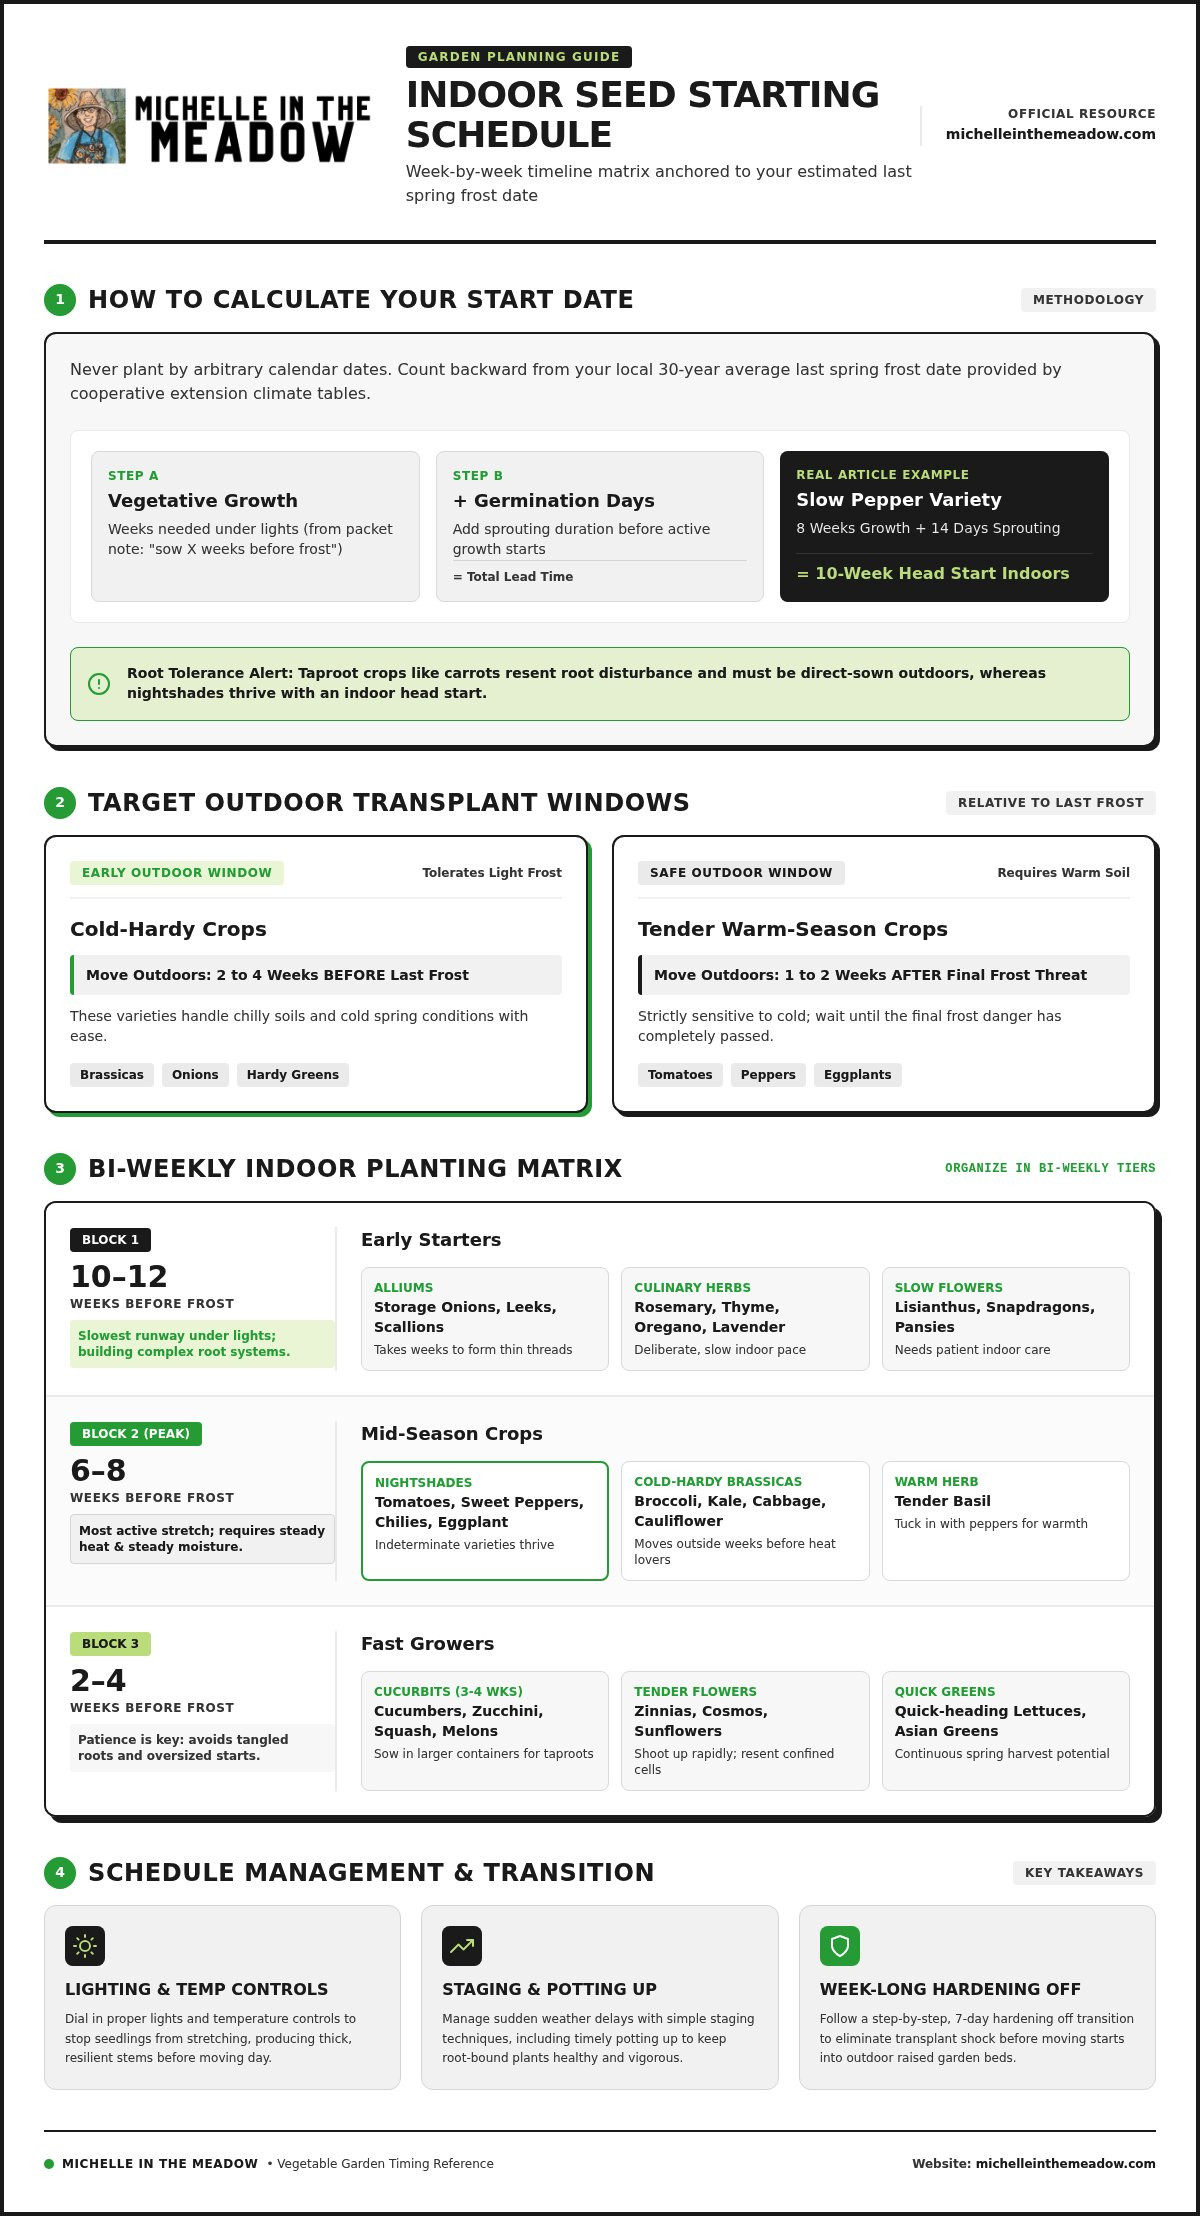
Rigid calendar dates found in generic guides often fail because spring arrives at different speeds across different zones. Instead of seeding on a specific day in March simply because a magazine suggested it, a reliable indoor seed starting schedule works backward from your area’s average last spring frost date. This backward calculation ensures your plants develop healthy roots without outgrowing their trays before outdoor conditions become hospitable.
The broader process of planting seeds indoors requires balancing two distinct phases: germination time and active vegetative growth. Ignoring that early waiting period while seeds germinate leaves you with undersized plants when transplant day arrives.
Determining Your Frost Dates and Growing Window
Your local cooperative extension service provides 30-year climate tables documenting your estimated last spring frost. Rather than relying on a single date, treat this number as a baseline anchor for your calendar.
- Cold-hardy crops: Brassicas, onions, and hardy greens handle light frosts. You can safely transplant them outdoors two to four weeks before your last frost date.
- Tender warm-season crops: Tomatoes, peppers, and eggplants demand warm soil. Schedule their outdoor move one to two weeks after the final frost threat has passed.
Mark these two target transplant dates on your master calendar before opening a single seed packet.
Reading Seed Packets for Critical Timing Clues
Seed packets hold specific instructions, but you must know how to decode them. Look for the phrase “sow indoors X weeks before last frost.” That number tells you how long the seedling needs under bright lights to build a sturdy root system and true leaves.
Always add the “days to germination” to that weekly estimate. If a slow pepper variety requires 8 weeks of vegetative growth plus 14 days to sprout, you need a 10-week head start indoors. Finally, verify root tolerance; taproot crops like carrots resent root disturbance and should be direct-sown outdoors, whereas nightshades thrive with an indoor head start.
Master Indoor Seed Starting Schedule: Week-by-Week Planting Matrix
Sowing an entire seed collection during a single marathon weekend leads to immediate tray overcrowding and staggered watering headaches later on. Grouping your varieties into bi-weekly tiers keeps your indoor seed starting schedule organized and manageable. Staggering your efforts creates a steady, calm rhythm as the spring season unfolds.
Early Starters: 10 to 12 Weeks Before Last Frost
Slow-developing species require the longest runway under lights. These varieties spend their initial weeks building intricate root structures before sending up significant leafy top growth.
- Alliums: Storage onions, leeks, and scallions take weeks just to form thin, grass-like threads.
- Culinary herbs: Perennial favorites such as rosemary, thyme, oregano, and lavender grow at a deliberate pace and need an early push.
- Slow flowers: Lisianthus, snapdragons, and pansies require patient indoor development before facing variable spring weather.
Mid-Season Crops: 6 to 8 Weeks Before Last Frost
This mid-winter block is typically the most active stretch of the season. Indeterminate tomatoes, sweet bell peppers, hot chilies, and eggplants hit their stride here, soaking up steady heat and moisture.
Cold-hardy brassicas like broccoli, kale, cabbage, and cauliflower also belong in this window. Because they tolerate chilly soils, they can move outside weeks ahead of the heat-lovers. When planning your seed starting schedule, remember to tuck tender basil in with your peppers where temperatures remain reliably warm.
Fast Growers: 2 to 4 Weeks Before Last Frost
Patience pays dividends with vigorous, fast-sprouting annuals. Sowing large-seeded crops too early produces tangled root balls that stall when planted out.
- Cucurbits: Cucumbers, zucchini, summer squash, and melons need just three to four weeks indoors; sow them directly into larger individual containers to protect sensitive taproots.
- Tender flowers: Zinnias, cosmos, and sunflowers shoot up quickly and resent confined cell trays.
- Greens: Quick-heading lettuces and Asian greens can be started here for continuous spring harvests.
While these fast growers develop, take time to check garden preparations. You can map out your layout and calculate soil volumes using helpful tools from Michelle In The Meadow so your raised beds are filled, rich in organic matter, and ready when transplant day arrives.
Essential Equipment Setup to Keep Your Schedule on Track
Even the most precise planting calendar falls apart if environmental conditions fluctuate. When room temperatures drop or light levels stay inadequate, plant metabolism slows, quickly disrupting your planned indoor seed starting schedule. You don’t need expensive commercial nursery setups to keep seedlings growing vigorously, but a few consistent tools make all the difference.
Start with a lightweight, sterile soilless seed-starting mix to protect delicate root systems from damping-off pathogens. Pair this with a basic seedling heat mat beneath your trays to raise root-zone temperatures by 10 to 15 degrees, cutting germination times dramatically. Once seedlings emerge, place a gentle oscillating fan nearby. That slight breeze provides mechanical stimulation, triggering thicker stem walls and producing stocky transplants ready for outdoor conditions.
Lighting Requirements and Positioning Heights
A sunny south-facing windowsill rarely provides enough intensity during early spring. Window-grown starts stretch toward glass, turning into pale, fragile stems that collapse under outdoor elements. Full-spectrum LED grow lights deliver balanced, direct light across your entire propagation flat.
- Keep fixtures close: Suspend lights two inches above the emerging canopy, raising them gradually as plants grow.
- Automate the cycle: Plug fixtures into an outlet timer set for 14 to 16 hours of steady light each day.
- Respect dark periods: Turn lights off for eight hours every night so seedlings can rest and process stored carbohydrates.
Optimizing Soil Moisture and Bottom Watering Methods
Water management keeps early development moving without interruption. Pre-moisten your soil mix with warm water before filling propagation flats until it feels like a damp sponge. Once seeds are planted, pour water directly into solid bottom trays rather than overhead. Bottom watering draws moisture upward by capillary action, leaving fragile top growth dry and undisturbed.
Use clear humidity domes to hold steady moisture until seeds sprout, but take them off the instant green growth appears. Lingering high humidity traps stale air, inviting surface mold and stalling active seedling growth.
Troubleshooting Stalled or Overgrown Seedlings
Spring weather rarely follows a straight line. An unexpected late freeze or stubborn cold snap can instantly pause garden transplanting, leaving you with trays of vigorously growing plants that have nowhere to go. When outdoor conditions force a detour in your indoor seed starting schedule, proactive adjustments keep your starts thriving rather than declining.
Seedlings held in cramped starter cells quickly exhaust available nutrients. If lower foliage begins yellowing, apply an organic liquid fish fertilizer or kelp meal diluted to quarter-strength. If roots circle tightly around the drainage holes, pot them up immediately into four-inch containers filled with damp potting soil to prevent severe root binding.
Fixing Stretched, Leggy Seedlings Under Lights
Seedlings become tall and floppy when they have to reach for illumination. Catching this early allows you to reverse the problem before stems permanently weaken.
- Adjust light height: Reposition grow light fixtures downward until they sit just two inches above the tallest leaves.
- Run an oscillating fan: Gentle air movement stimulates the production of lignin, signaling the plant to thicken its main stem rather than stretching upward.
- Bury deep at potting: When potting up elongated tomatoes, bury the stem right up to the first set of true leaves; roots will emerge along the buried stem.
Managing Late Spring Freezes and Delayed Ground Prep
When freezing night temperatures trap plants indoors past their target date, slow their growth down intentionally. Lowering ambient room temperatures to the low 60s Fahrenheit naturally reduces metabolic activity. At the same time, reduce watering frequency slightly, allowing the surface mix to dry between waterings so plants maintain current size without putting out surges of soft foliage.
Use this unexpected indoor waiting period productively by completing your outdoor site setup. Calculate your exact compost and soil blend needs ahead of time using the Michelle In The Meadow soil calculator. Having beds fully prepped and filled ensures you can get root-bound starts into rich, warm garden soil the minute spring conditions finally stabilize.
Hardening Off and Transitioning Seedlings to Outdoor Garden Beds
Placing lush seedlings directly into direct sun after weeks under indoor fixtures is a recipe for scorched leaves and stalled growth. Indoor foliage lacks the thick waxy cuticle that protects outdoor plants from intense solar rays and drying winds. Hardening off provides the essential, week-long bridge that connects your indoor seed starting schedule to thriving, productive outdoor garden beds.
This simple acclimation period gradually toughens plant cellular walls. By taking things slowly over seven to ten days, you safeguard weeks of careful indoor propagation and prevent devastating transplant shock.
The 7-Day Hardening Off Step-by-Step Protocol
You don’t need fancy cold frames or poly-tunnels to harden off seedlings effectively; a sheltered patio corner works perfectly.
- Day 1: Place trays in a sheltered, fully shaded spot out of direct wind for two hours, then bring them back indoors under lights.
- Days 2 to 3: Increase outdoor exposure by two hours daily, allowing seedlings an hour of gentle morning sun while shielding them from gusty breezes.
- Days 4 to 5: Extend outdoor time to eight hours, introducing direct midday sun. Check trays often, as outdoor air dries small soil cells quickly.
- Days 6 to 7: Leave sturdy starts outdoors overnight, provided forecasted nighttime temperatures stay safely above freezing.
Preparing Your Raised Beds for Transplant Day
While seedlings complete their outdoor transition, turn your attention to the soil. Raised bed soil settles several inches over the winter months, so you’ll want to calculate your compost and topsoil top-offs beforehand. Adding fresh organic compost restores essential biology and nutrients just as roots prepare to expand.
Always verify your bed temperatures before tucking plants into the ground. While cold-tolerant brassicas thrive in 50-degree soil, tender nightshades and cucurbits stall if soil temperatures haven’t climbed past 60 degrees. Aim to transplant on an overcast afternoon or late in the day to minimize moisture loss, then water each plant deeply with mild organic compost tea to settle the soil around root balls. Explore sustainable growing guides at Michelle In The Meadow to keep your raised beds thriving throughout the entire growing season.
Bring Your Garden Vision to Life This Spring
Growing vibrant, bountiful vegetables from tiny seeds doesn’t have to feel like a high-stakes guessing game. By anchoring an indoor seed starting schedule to your regional frost window, you replace late-winter anxiety with steady, intentional progress. Staggering your varieties by growth speed, keeping lights low, and patiently hardening off foliage ensures your starts hit the garden ready to thrive.
While your green seedlings flourish indoors, use this quiet preparation window to ready their outdoor home. Take the guesswork out of bed prep and calculate your raised bed dirt needs with our free raised bed soil calculator before transplanting day arrives. With grounded planning, earth-friendly soil prep, and a little daily care, you’ll set the stage for your most abundant harvest yet. Grab your calendar, trust the process, and enjoy every step of the journey.
Frequently Asked Questions
How do I find my exact last spring frost date for seed starting?
Check the historical weather data published by your local state university extension office. These climate tables calculate frost probabilities based on thirty years of regional weather patterns. Look for the date associated with a 50% frost probability in spring. This date serves as your anchor point for mapping out your entire indoor seed starting schedule.
Can I start seeds indoors using sunlight from a south-facing windowsill?
Windowsills rarely supply enough usable solar energy for robust seedling development in early spring. Weak, short daylight hours cause emerging stems to stretch toward the glass, resulting in pale, spindly starts that easily snap. Using dedicated full-spectrum LED fixtures positioned inches above the foliage ensures seedlings grow straight, stocky, and structurally sound from day one.
What happens if I start my vegetable seeds indoors too early?
Seeding weeks ahead of schedule produces overgrown, root-bound plants long before garden soil warms up. Confined root systems deplete starter nutrients rapidly, leading to stunted top growth, early flowering, and yellowing foliage. These stressed plants suffer severe transplant shock and frequently underperform compared to younger, vigorous starts planted right on time.
Which vegetable varieties should never be started indoors in trays?
Root vegetables like carrots, radishes, turnips, and parsnips should always be sown directly into your garden beds. Their sensitive taproots distort when disturbed in cell trays, resulting in forked or stunted crops. Large-seeded legumes such as peas and beans also establish much faster and healthier when planted straight into outdoor soil.
How many hours of light do indoor seedlings need every day?
Indoor seedlings thrive best with 14 to 16 hours of steady, direct artificial light every day. Setting your fixtures on an automated outlet timer provides reliable light cycles without manual intervention. Plants also require 8 to 10 hours of darkness every night to process energy, so never leave lights running continuously around the clock.
Do I need to fertilize seedlings while they grow in seed trays?
Seeds pack enough stored nutrition to support early growth until their first set of true leaves appears. Once those true leaves unfurl, begin feeding every seven to ten days with an organic liquid kelp or fish fertilizer mixed to quarter-strength. Sterile seed-starting mixes contain virtually no native nutrients, so light supplemental feedings keep cellular growth steady.
How warm should soil be before transplanting tomatoes and peppers outdoors?
Transplant heat-loving nightshades only after garden soil temperatures consistently register 60 degrees Fahrenheit or warmer at a four-inch depth. Moving them into cold, soggy ground stalls root development and invites fungal root rots, even if nighttime air temperatures stay above freezing. Checking your soil with a simple probe ensures plants hit active ground running.
