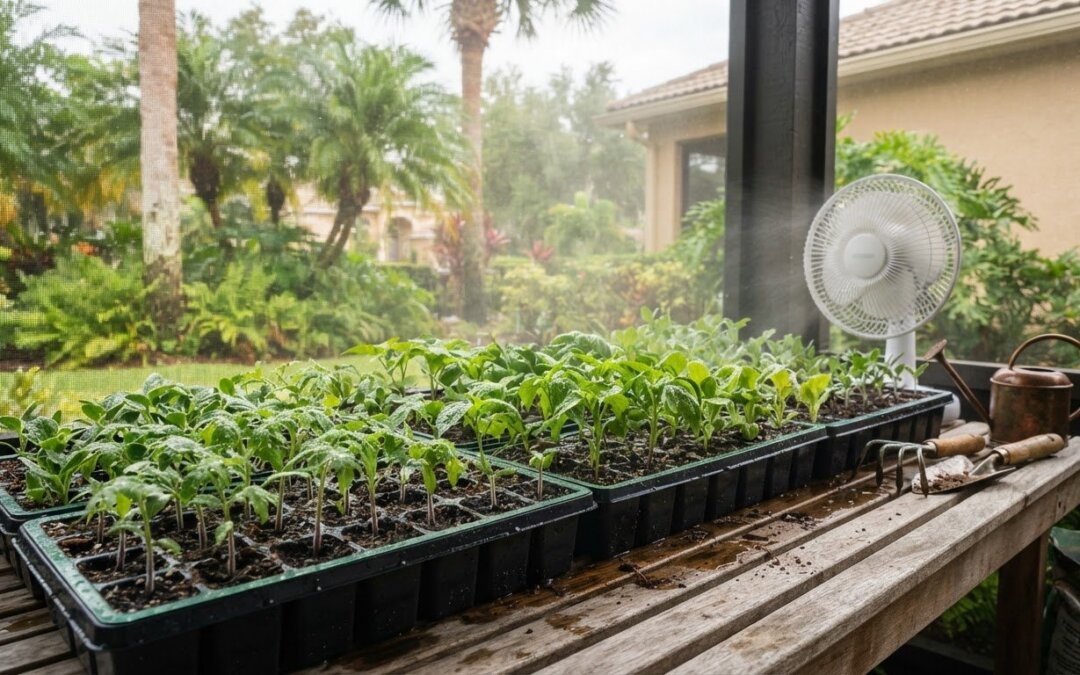
What if the biggest threat to your Florida seedlings isn’t cold, but too much moisture and too little airflow? If you’ve watched sprouts topple overnight or spotted fuzzy mold spreading across a seed tray, you’re not alone. Starting seeds in florida humidity can be tricky because damp air slows evaporation, leaving the mix soggy when seeds need both moisture and oxygen.
It’s easy to blame the heat or the seed packet, but the fix often starts with changing how air and water move around your seedlings. A few steady habits can reduce the risk of damping off, discourage mold and algae, and help you grow sturdy plants for your raised beds.
This 2026 guide walks you through a Florida-focused seed-starting routine, from choosing a light, clean mix and watering carefully to improving airflow and hardening off seedlings in warm, humid conditions. You’ll also learn how to adjust your timing to Florida’s growing seasons and build a repeatable system.
Key Takeaways
- For starting seeds in florida humidity, choose a clean, lightweight seed-starting mix and containers that let excess moisture drain.
- Compare indoor, outdoor, and screened-porch conditions to find a spot with suitable light, temperature, and airflow for young seedlings.
- Hydrate the mix before sowing, then space seeds thoughtfully and follow each variety’s recommended planting depth.
- Use a current Florida planting calendar to plan transplant timing, and prepare raised beds for reliable drainage.
- Estimate how much soil your raised beds need before transplanting, so your seedlings have a well-prepared place to grow.
Why Starting Seeds in Florida Humidity Challenges Seedlings, and How to Prevent It
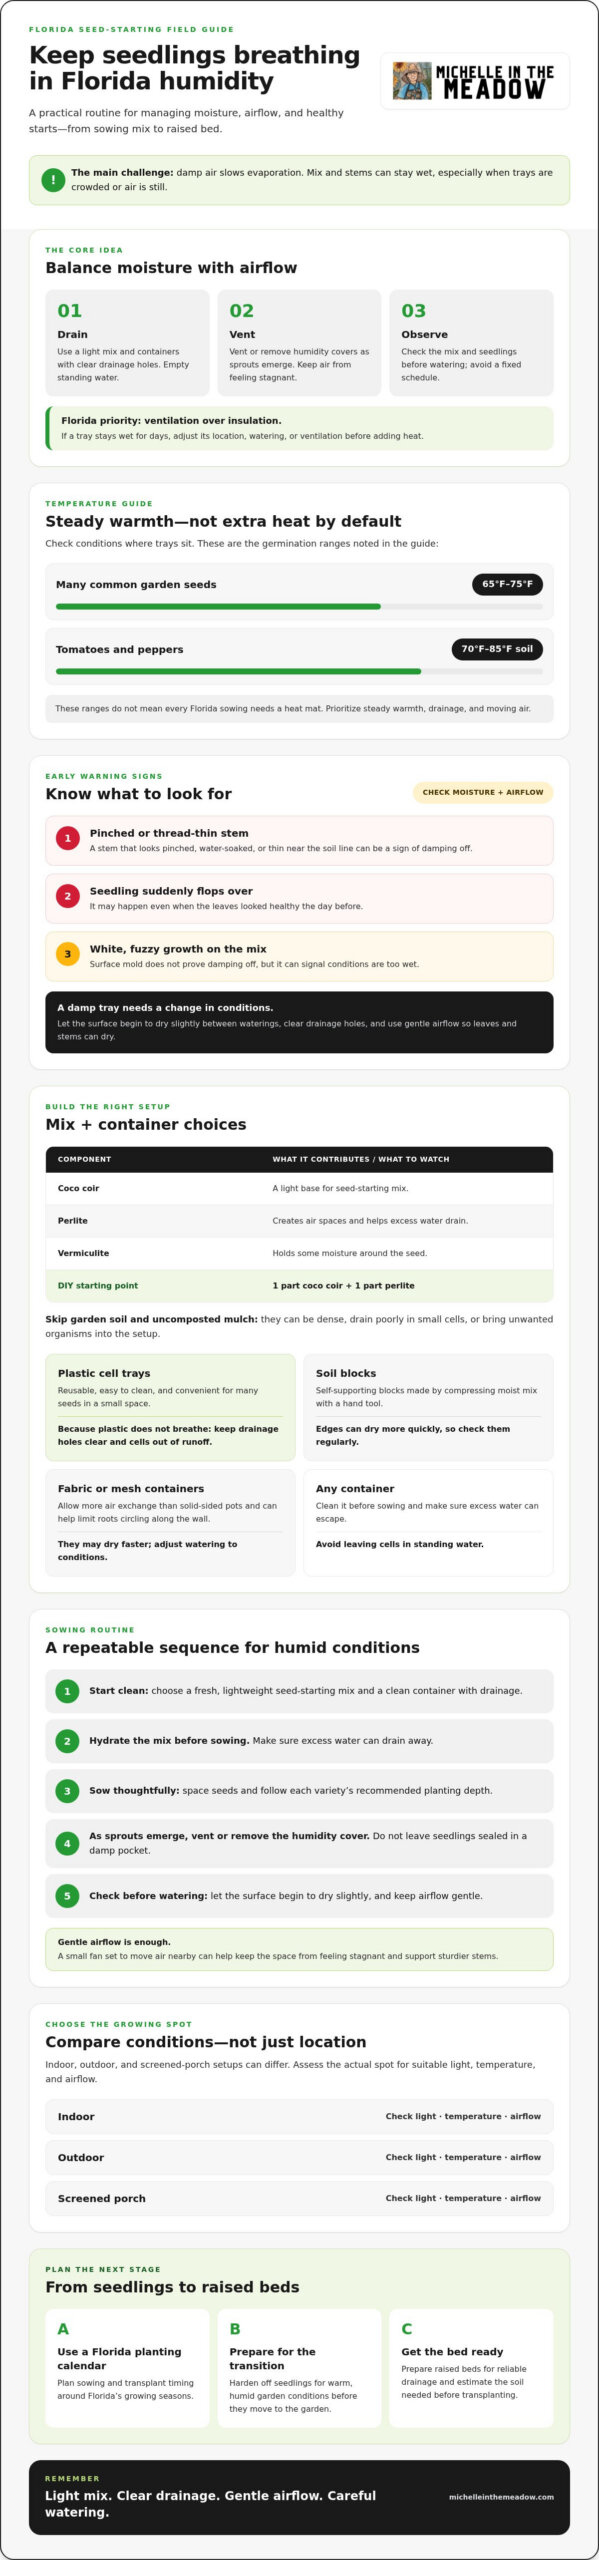
In Florida, seedlings often struggle less with cold than with staying wet. Warm, humid air slows evaporation, so moisture can linger on the soil and around delicate stems. This creates favorable conditions for pathogens, especially when seed trays are crowded or air is still. For starting seeds in florida humidity, prioritize ventilation over insulation.
Keep the growing area comfortably warm without sealing seedlings into a damp pocket. Many common garden seeds germinate well around 65°F to 75°F, while tomatoes and peppers prefer soil around 70°F to 85°F. These ranges don’t mean every Florida sowing needs a heat mat. Check the conditions where your trays sit, and focus on steady warmth, drainage, and moving air before adding heat.
Identifying Damping Off and Early Warning Signs
Damping off is a soil-borne fungal disease associated with excess moisture that can kill seedlings before or shortly after they emerge. Watch for a stem that looks pinched, water-soaked, or thread-thin near the soil line. The seedling may suddenly flop over even if its leaves looked healthy the day before. White, fuzzy growth on the soil surface is another reason to check moisture and airflow. Surface mold doesn’t prove a seedling has damping off, but it can signal that conditions are too wet.
The Moisture Trap: Why Traditional Methods Fail
Humidity domes help hold moisture during germination, but in Florida they can become a problem if left on after sprouts appear. Condensation can keep the surface and stems wet, while still air gives moisture nowhere to go. Vent or remove the cover as seedlings emerge, rather than waiting for the tray to look soaked.
Peat pots can also stay damp in humid conditions, particularly when trays drain poorly or sit in standing water. They’re not automatically a problem, but check the pot and mix instead of watering on a fixed schedule. High humidity slows drying, so an extra splash can leave roots short of oxygen. Let the surface begin to dry slightly between waterings, keep drainage holes clear, and use gentle airflow to help leaves and stems dry.
Air movement doesn’t need to be harsh. A small fan set to move air gently nearby can keep the space from feeling stagnant and help seedlings develop sturdier stems. If a tray stays wet for days, adjust its location, watering, or ventilation before adding heat. A healthy seedling setup needs to breathe.
Selecting Sterile Mixes and Breathable Containers
Your seed tray is only as reliable as what goes into it. For starting seeds in florida humidity, skip garden soil and uncomposted mulch. They can be dense, drain poorly in small cells, and bring weed seeds or unwanted organisms into a warm, damp setup. Choose a fresh, lightweight seed-starting mix instead. “Sterile” generally means the mix has been treated to reduce harmful organisms. It doesn’t mean spores can never reach it after opening.
Look for ingredients that balance air and moisture. Coco coir provides a light base, perlite creates air spaces and helps excess water drain, and vermiculite holds some moisture around the seed. A simple DIY starting point is one part coco coir to one part perlite. This mix favors drainage, so check moisture rather than assuming it will stay damp. For regional sowing and transplant guidance, look to trusted local agricultural extension resources for starting seeds successfully.
Sterile Mix vs. Potting Soil: The Humidity Test
Potting soil may be too heavy for small seeds and cells, while garden soil can compact and stay wet. Use extra caution with an old, opened bag stored in a humid space, where dampness and poor storage can encourage mold or contamination. Check the mix before using it. If it smells musty, feels persistently wet, or shows visible growth, don’t put it in seed trays. A fresh bag of seed-starting mix is the more dependable choice.
Choosing Containers for Maximum Airflow
Plastic cell trays are reusable, easy to clean, and convenient for sowing many seeds in a small space. Because plastic doesn’t breathe, drainage holes and careful watering matter. Empty standing water from the bottom tray, and don’t let cells sit in runoff.
Soil blocking is another option. A hand tool compresses moist mix into self-supporting blocks, reducing the need for individual plastic cells. Blocks can dry more quickly at the edges, so check them regularly. For larger starts, breathable fabric pots or mesh containers allow more air exchange than solid-sided pots and can help limit roots circling along the container wall. They may also dry faster, so adjust watering to the plant and conditions.
Whichever container you choose, clean it before sowing and make sure extra water can escape. If you’re planning where these starts will grow next, use the raised-bed soil calculator to estimate the soil your beds need.
Location Strategy: Indoor, Outdoor, or Screened Porch?
For starting seeds in florida humidity, the best spot isn’t automatically indoors or outside. Air conditioning can make a home feel much drier than outdoors, while an exposed patio may bring intense sun, heavy rain, and humid, still air. Choose a location by checking what your seedlings actually experience. Light, temperature, moisture, and airflow can vary even within the same yard.
A heat mat isn’t the default fix in Florida. Seeds need appropriate warmth for their variety, but adding heat to an already warm, damp setup can encourage problems rather than solve them. A fan that keeps air gently moving is often the more useful first adjustment. Penn State Extension’s advice on controlling damping off also emphasizes managing moisture and growing conditions to reduce disease risk.
The Screened-in Porch Advantage
A screened porch can offer a helpful middle ground: bright natural light without all-day direct sun, shelter from downpours that can splash or displace seeds, and more fresh-air movement than a closed room. Check the porch at different times of day to see whether it suits your trays. If sunlight falls directly on them, move them back or provide light shade. If the air feels stagnant, add gentle fan circulation. Keep trays where rain can’t reach them.
Indoor shelves may work well, especially with overhead grow lights, but moving seedlings from a cool, air-conditioned room straight into hot, humid outdoor conditions can stress tender growth. Acclimate them gradually instead.
Mechanical Airflow: Your Secret Weapon
Set a small oscillating fan to move air lightly around the seedlings, not blast them from one direction. Leaves should flutter a little, not bend or dry out. Gentle movement helps wet foliage dry and encourages sturdier stems. If you don’t have a fan, lightly brush the tops of seedlings with a clean hand once in a while. This mimics a mild breeze, but it won’t move air around a crowded tray as effectively as a fan.
Use a dehumidifier only if a small indoor growing space stays persistently damp. Keep an eye on the mix, since lowering room humidity can also make containers dry faster. Aim for balance, not bone-dry air.
Check your setup daily. Is condensation lingering? Are leaves staying wet? Does the tray receive bright light without harsh, direct heat? Small changes in placement and airflow can make a noticeable difference. For more Florida-friendly growing guidance, explore practical seed-starting advice.
A Step-by-Step Guide to Sowing in High Humidity
For starting seeds in florida humidity, aim for evenly moist mix, not a tray that stays wet. Sow only what you have room to monitor, label each variety, and check moisture before reaching for the watering can.
The Sowing and Watering Process
- Pre-moisten the mix. Add water gradually and mix until the medium feels like a wrung-out sponge. It should hold together lightly without dripping when squeezed. Fill clean containers loosely, without packing the mix down.
- Sow with space to grow. Follow the seed packet’s depth instructions, since seed size and variety affect how deeply to plant. Avoid dropping several seeds into one small cell just in case. Crowded sprouts restrict airflow and make it harder to spot a struggling seedling.
- Water with a light hand. For established seedlings in larger pots, bottom-water when the top inch of mix feels dry, then let excess water drain away. In shallow seed cells, check the surface and the tray’s weight instead of relying on that depth. A gentle mist can moisten the top without washing seeds aside, but don’t keep the surface constantly wet.
Once seedlings are large enough to distinguish, thin crowded cells by snipping extra sprouts at the mix line rather than pulling them and disturbing neighboring roots. Give each remaining plant room for air to move around its leaves. Check daily, but let the mix, not the calendar, guide watering.
Hardening Off: The Humidity Transition
A seedling raised indoors or on a sheltered porch needs time to adjust to outdoor light, wind, and temperature. Use a gradual seven-day transition as a starting routine, adjusting for weather and how plants respond. Begin with a short spell outdoors in bright shade, then increase the exposure and time outside over the following days. Avoid placing tender seedlings in harsh midday sun, which can scorch leaves and cause rapid wilting. Morning light is a gentler first step.
Watch the plants after each outing. A briefly drooping seedling may be reacting to heat or water stress. Move it into shade and check the mix before watering. Rot is different: look for persistently wet medium, a dark or pinched stem at the soil line, or a seedling that collapses rather than recovering. Pause the transition if plants show stress, then resume more gradually when they look settled.
When your seedlings are ready for transplanting, plan their next home before moving them. Use the raised-bed soil calculator to estimate the soil your garden beds need.
Transitioning Seedlings to the Florida Garden
Healthy seedlings need a well-prepared landing spot. Before transplanting, check the 2026 Florida planting calendar for your crop and growing region. Florida’s seasons differ from those in much of the country, and the right timing depends on the plant and local conditions. Use current Florida-specific guidance, such as UF/IFAS recommendations, rather than assuming a familiar planting date applies.
Plan the bed before moving seedlings out of their containers. Note each plant’s mature size and leave enough room for leaves to dry after rain. That future airflow helps reduce damp, crowded conditions that can invite fungal trouble. With starting seeds in florida humidity, transplant timing and bed layout are part of the same plan. Sturdy starts need space and soil that drains well.
Raised Bed Preparation for Humidity
Good drainage matters in a raised bed because frequent rain or persistent wetness can leave roots sitting in saturated soil. Check that water can move through the bed and away from its base. In a low spot or during a rainy stretch, shaping the planting area into a modest mound can lift roots above temporarily soggy ground. It’s a practical adjustment, not a substitute for fixing poor drainage.
Florida sand can drain quickly and hold few nutrients, so blend in suitable organic matter to improve its ability to retain moisture without making the root zone waterlogged. Apply mulch after planting to soften raindrop impact and reduce soil splashing onto leaves, where soil-borne pathogens can spread. Keep mulch pulled back from stems so the base of each plant doesn’t stay damp.
Scaling Up: From Tray to Harvest
Before filling or topping up a raised bed, measure its length, width, and soil depth. The Soil Calculator for Raised Beds can help estimate the soil volume you’ll need, making it easier to plan before sourcing materials. Arrange crops by mature size, not by how small they look in the tray. A tiny transplant can grow into a broad plant that needs room for air and access for watering and harvesting.
In sandy Florida soils, choose an organic fertilizer suited to the crop and follow its label directions, since nutrients can move through sandy ground with water. Once the bed is ready, transplant during a cooler part of the day and water the root zone gently. A thoughtful layout, good drainage, and mulch kept clear of stems give seedlings a steadier start in the garden.
Give Your Seedlings a Strong Start in the Garden
Success with starting seeds in florida humidity comes from creating balance: keep the mix moist without leaving it soggy, give young plants room and airflow, and ease them into outdoor conditions before transplanting. Carry that care into the garden with a planting plan suited to Florida’s seasons and a bed that’s ready for healthy roots.
You don’t need a complicated setup to grow sturdy seedlings. A few thoughtful choices, repeated each season, can make the process more reliable. Michelle In The Meadow shares Zone 9a gardening advice, affordable homesteading tutorials, and earth-friendly organic methods.
Ready to prepare the next step for your seedlings? Use the Soil Calculator for Raised Beds to estimate the soil your raised bed needs. Start small, pay attention to what your plants are telling you, and keep growing. Your next healthy harvest can begin with the seeds you sow today.
Frequently Asked Questions
Can I use a humidity dome for starting seeds in Florida?
Yes, but use it temporarily and vent it or remove it as seedlings emerge. A dome can help keep seeds from drying during germination, but trapped condensation in Florida’s humid conditions may leave stems and mix too wet. Check the tray often, provide gentle airflow, and don’t leave seedlings sealed under a dome after sprouting. If the surface stays damp or mold appears, uncover the tray and reassess watering.
How often should I water my seedlings in high humidity?
Water when the mix needs it, not on a fixed daily schedule. Florida’s humid air can slow evaporation, so check the surface and feel the mix before adding water. Keep it evenly moist, never soggy, and make sure containers drain freely. Bottom-watering can reduce disturbance to small seedlings, but empty excess water after the mix has taken up moisture. If cells still feel heavy and wet, wait and check again later.
What are the best seeds to start for a Florida fall garden?
Cool-season crops are common choices for Florida fall gardens. Depending on your region and timing, consider leafy greens such as kale, collards, and lettuce, along with root crops such as carrots and radishes. Some crops are better direct-sown, while others can be started in trays for transplanting. Check a current Florida planting calendar for your area before sowing, since fall timing varies across the state and by crop.
Do I need a heat mat for seed starting in Zone 9a?
Not necessarily. A heat mat is useful only if the seed mix is cooler than the temperature a particular crop needs to germinate. Many common garden seeds germinate best around 65°F to 75°F, while tomatoes and peppers prefer soil around 70°F to 85°F. Check the temperature where your trays sit and follow the seed packet. In a warm Florida home, good drainage and airflow may matter more than extra heat.
Why is there green algae growing on my seed starting soil?
Green algae usually signals that the mix surface is staying damp and receiving light. It may not directly harm a seedling, but it’s a clue to review your watering, drainage, and airflow. Let the surface dry slightly between waterings, clear standing water from the tray, and avoid keeping a humidity dome closed after sprouts appear. If seedlings are crowded, thin them so air can move more freely around the leaves and soil.
How do I prevent fungus gnats in my indoor seed trays?
Reduce the conditions fungus gnats favor by avoiding constantly wet mix and standing water. Use fresh seed-starting mix, clean containers, and trays with open drainage. Water only when needed and empty runoff. Remove dead leaves and other plant debris promptly. If adult gnats are present, sticky traps can help monitor them, but they won’t fix overly wet soil. Let the surface dry slightly between waterings while keeping seeds and roots from drying out.
Is it better to start seeds indoors or outdoors in Florida?
Neither location is always best. Choose based on the crop, weather, and protection your setup provides. Indoors offers more control from heavy rain and pests, but air conditioning can create a drier environment than outdoors. A screened porch may provide bright light and airflow while sheltering trays from downpours. Whichever spot you choose, avoid harsh direct sun on tender seedlings and make sure air can circulate around them.
When is the best time to start tomato seeds in Florida for 2026?
Start by finding the recommended outdoor planting window for tomatoes in your part of Florida, then sow indoors about 4 to 8 weeks before that date. Florida’s timing differs by region, so use a current 2026 Florida planting calendar or UF/IFAS guidance rather than one statewide date. Tomatoes germinate best in soil around 70°F to 85°F. Keep the mix moist, not saturated, and provide bright light once seedlings emerge.