
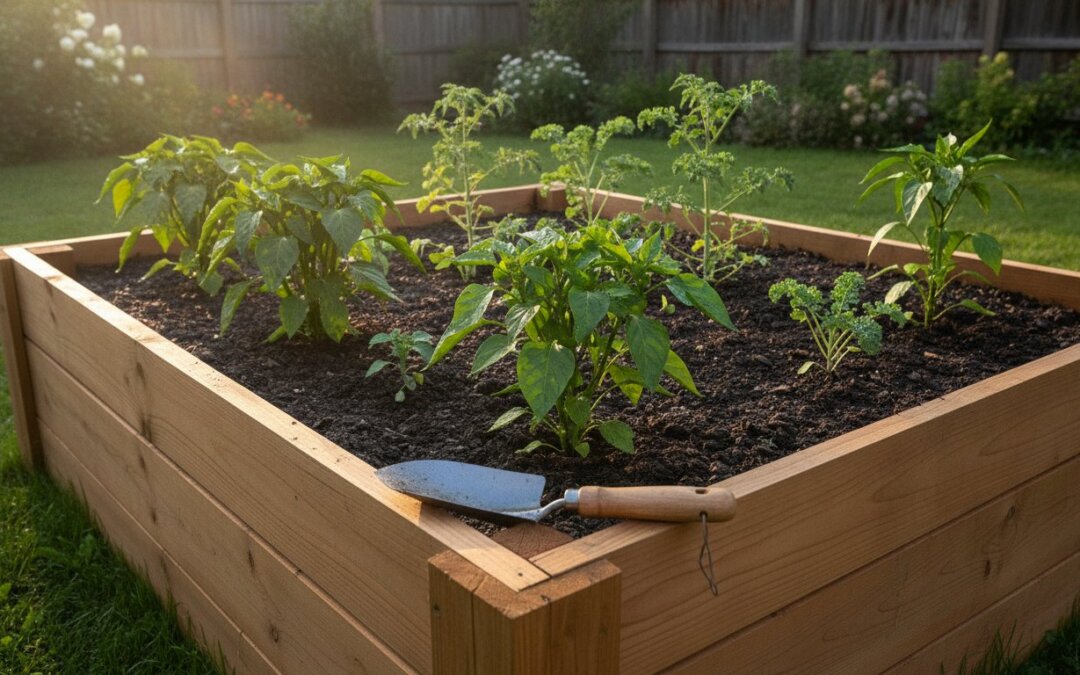
That layer of gravel you carefully spread at the bottom of your garden box? It might be the very thing drowning your plants. It sounds like common sense to add “drainage rocks,” but modern soil physics shows this often creates a perched water table, trapping moisture right where your roots are trying to breathe. It’s incredibly frustrating to watch your expensive peppers succumb to root rot when you’ve been searching for effective raised bed drainage solutions. You shouldn’t have to guess if your soil is healthy or just a soggy mess.
I know the fear of having to dig everything up and start over, but fixing your garden doesn’t have to mean back-breaking labor or a drained bank account. We all want that perfect balance of 50% solid matter and 50% pore space where roots can thrive without suffocating. In this guide, we’ll diagnose exactly why your soil is staying soggy and walk through earth-friendly ways to fix it. We’ll explore how to use a soil calculator to plan your amendments and look at why non-woven geotextile beats old-school plastic every time. By the end, you’ll have a clear, budget-conscious plan to keep your garden vibrant and your plants’ feet dry.
Key Takeaways
- Learn to identify the early warning signs of root-suffocating soil before your plants show permanent signs of vascular collapse.
- Explore science-backed raised bed drainage solutions that debunk the “rocks at the bottom” myth to keep your root zones healthy and aerated.
- Discover low-impact methods to fix drainage in established beds without the need for expensive soil replacements or heavy lifting.
- Master the art of site selection and “bottomless” design to ensure your new garden boxes drain naturally by connecting with the native earth.
- Use a specialized soil calculator to determine the exact organic amendments needed to maintain long-term soil porosity and prevent future waterlogging.
Why Your Raised Bed Needs Better Drainage (And How to Tell)
It’s a heartbreaking sight to see your carefully planted heirloom tomatoes wilting when the soil feels damp to the touch. We often turn to raised-bed gardening because we’ve been told it’s the ultimate fix for heavy clay or swampy yards. But sometimes, even an elevated box can suffer from “soggy bottom” syndrome. This happens when water moves through the top layers but hits a wall at the base, creating a hidden reservoir that slowly drowns your plants from the roots up. Finding the right raised bed drainage solutions starts with understanding that your soil isn’t just dirt; it’s a living, breathing ecosystem that needs air as much as it needs water.
Signs of Poor Drainage: The Warning Bells
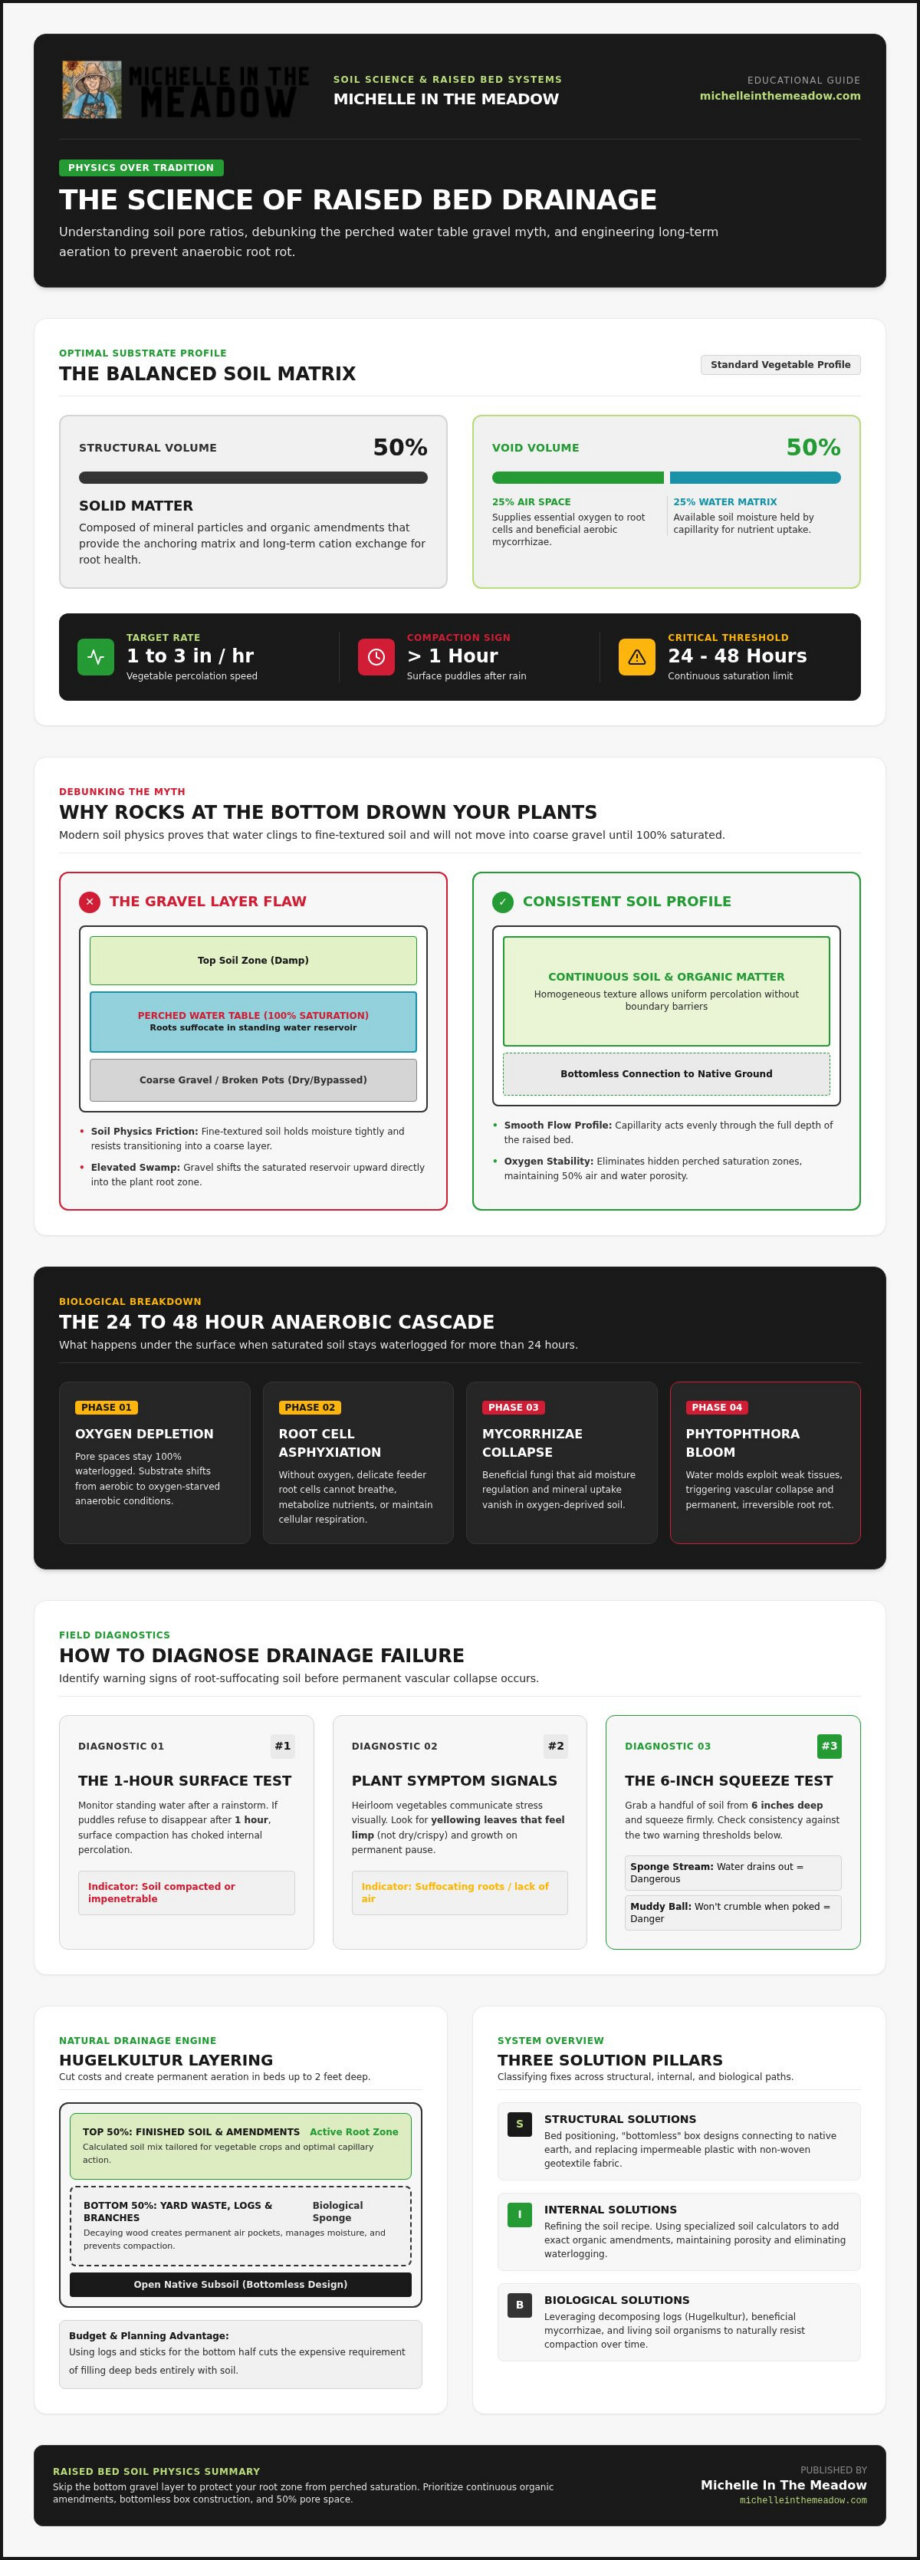
You don’t always need a degree in soil science to spot a problem. Sometimes the signs are as clear as a puddle that refuses to disappear after a rainstorm. If water sits on the surface for more than an hour, your soil is likely compacted. Your plants will tell you too. Look for yellowing leaves that feel limp rather than crispy, or growth that seems to have hit a permanent pause button. If you’re unsure, try the “squeeze test.” Grab a handful of soil from about six inches deep and squeeze it firmly. If water streams out like a sponge, or if it stays in a tight, muddy ball that won’t crumble when poked, your drainage is dangerously low.
The Science of Saturated Soil and Root Health
Healthy soil should ideally be about 50% pore space, split evenly between air and water. When that space stays filled with water for 24 to 48 hours, it creates anaerobic conditions. Essentially, your roots are gasping for air. Without oxygen, root cells die, and the beneficial mycorrhizae that help your plants absorb nutrients begin to vanish. This environment is a playground for water molds like Phytophthora, which cause the vascular collapse we know as root rot. In the context of your garden, percolation is the measured rate at which water moves downward through the soil profile to reach the native ground below. For most vegetables, you want a rate of one to three inches per hour to keep that vital oxygen flowing. Implementing effective raised bed drainage solutions ensures this balance remains stable, protecting your soil’s biology from the silent threat of saturation.
Comparing Top Raised Bed Drainage Solutions
Choosing the right raised bed drainage solutions often feels like a balancing act between your budget and the needs of your plants. We can generally group these fixes into three categories: structural, internal, and biological. Structural solutions involve how the bed is built or where it sits. Internal fixes focus on the “recipe” of your soil. Biological solutions rely on living organisms to keep the soil loose. While some people swear by expensive metal kits, these principles work whether you’re using cedar, stone, or recycled materials. The goal is always the same: keep the water moving so the air can follow.
The ‘Perched Water Table’ Myth: Why Gravel Might Be Hurting You
Let’s talk about the rock in the room. For decades, the standard advice was to put a layer of gravel or broken pots at the bottom of any container or raised bed. It sounds like common sense, but soil physics tells a different story. Water doesn’t like moving from a fine-textured material, like potting soil, into a coarse material, like gravel. It actually clings to the soil and won’t cross that boundary until the soil above it is 100% saturated. This creates what scientists call a perched water table. Instead of helping water leave, you’ve accidentally moved the “swamp” higher up into the root zone. A much better approach is to focus on consistent raised bed soil structure and drainage throughout the entire depth of the bed. If you need to fill space, use coarse organic matter that blends more naturally with your soil mix.
Hugelkultur and Layering: Natural Drainage Engines
If you’re looking for a budget-friendly way to fill deep beds while ensuring great drainage, Hugelkultur is a fantastic option. This method involves layering logs, branches, and sticks at the very base of your bed before adding soil. As that wood slowly decomposes, it creates permanent air pockets and act like a sponge that manages moisture levels. It’s a biological engine that keeps the soil from compacting over time. It’s also a huge win for your wallet. Filling a two-foot-deep bed with premium soil can be pricey, but using yard waste for the bottom half significantly cuts your costs. Before you start hauling logs, it’s a good idea to use a Soil Calculator for Raised Beds to figure out exactly how much organic material and topsoil you’ll need to reach the perfect finish line.
When you build with these layers, you’re mimicking the forest floor. The natural gaps between the wood allow excess water to escape into the native ground while the breaking-down fibers provide a slow-release feast for your plants. It’s a low-maintenance, earth-friendly way to ensure your garden stays free-flowing for years to come.
How to Improve Drainage in an Existing Raised Bed
Discovering your raised bed has become a swamp after it’s already full of plants and expensive soil is a total gut-punch. Most professional landscape services might tell you to dig everything out and start over, but that’s not always realistic for a budget-conscious gardener. You can implement effective raised bed drainage solutions without a complete teardown. The goal here is to save your precious organic matter while opening up new paths for air and water to move. By focusing on incremental, low-impact changes, you can turn a soggy box into a thriving environment in a single season.
Step 1: Core Aeration and Vertical Mulching
Core aeration is a simple, no-dig way to breathe life back into compacted soil. Take a sturdy garden fork or a long-handled bulb auger and create deep vertical holes every 6 to 8 inches across the surface of the bed. Instead of leaving these holes empty, fill the channels with coarse horticultural perlite or washed sand. This process, often called vertical mulching, creates permanent bypasses that allow water to escape the “bathtub effect” we discussed earlier. It’s best to perform this maintenance in early spring or late fall when your plants aren’t actively filling every inch of the root zone. This technique follows Penn State Extension’s guidance on raised bed soil structure, which highlights the necessity of maintaining pore space for oxygen exchange and root health.
Step 2: Retrofitting Drainage Holes and Hardware Cloth
If your bed has solid sides made of wood or plastic, the problem might be purely mechanical. Don’t be afraid to pull out the drill. Adding a series of 1/2-inch holes along the bottom two inches of the side walls can provide an emergency exit for trapped water that can’t move downward into the native ground. If you already have drainage holes but they aren’t working, they’re likely clogged with fine silt or decomposed debris. Use a stiff wire or a screwdriver to clear them out. To keep out uninvited guests like voles while letting water flow freely, staple a layer of 1/4-inch galvanized hardware cloth over any new openings. These small structural tweaks are some of the most cost-effective raised bed drainage solutions available for established gardens.
Once you’ve improved the physical flow, you can plan for a healthy top-dressing of compost to replenish nutrients. Using a Soil Calculator for Raised Beds helps you determine exactly how much aeration-focused amendment you need to add to the surface to maintain that vital porosity throughout the next growing season.
Designing New Beds for Perfect Drainage from Day One
Starting a garden from scratch is the absolute best time to implement raised bed drainage solutions. You have a clean slate, which means you aren’t fighting years of compaction or poor soil choices. I’m a firm believer in the “bottomless” bed philosophy. By keeping the base of your garden box open to the native earth, you allow deep-rooted plants to tap into mineral-rich subsoil while letting gravity pull excess water away naturally. Taking an hour to prep your site properly today will save you a whole season of soggy soil stress later.
Selecting the Right Base Material
Before you set your bed in place, you need to think about the ground beneath it. Scalp the grass or weeds as short as possible in the area where your bed will sit. You don’t necessarily need to till the earth; in fact, tilling can sometimes destroy the existing drainage channels created by earthworms and old root systems. Instead, lay down a layer of plain, non-glossy brown cardboard. This acts as a temporary weed barrier that eventually decomposes, allowing water and beneficial microbes to move freely between your new soil and the native ground. If you’re building on a hard surface like a concrete patio, you’ll need an elevated bed on legs or spacers to ensure water has a mechanical way to escape through the bottom.
The Role of Soil Texture: Why Your Mix Matters Most
Your soil mix is the heart of your drainage success. A common mistake is grabbing “topsoil” bags from the local big-box store. These are often filled with heavy silt or clay that turns into a literal brick once it gets wet. For perfect drainage, aim for a balanced ratio of 1/3 organic compost, 1/3 moisture-holding peat moss or coconut coir, and 1/3 aeration material like coarse perlite or vermiculite. This structure ensures that even after a heavy downpour, your soil remains 50% pore space. It’s the difference between a garden that breathes and one that suffocates.
To get these ratios right without the guesswork, use our Soil Calculator for Raised Beds to plan your volume and amendment needs before you buy.
Once your bed is prepped and the drainage is secured, you can shift your focus to garden planning and seed starting. Starting with a solid foundation means your seedlings will have the deep, well-aerated home they need to thrive from the very first day. It’s a much more rewarding process when you know the “bones” of your garden are built for long-term health.
Long-Term Maintenance: Keeping Your Garden Free-Flowing
Even the most perfect soil mix doesn’t stay that way forever. Soil is a living thing, and it naturally settles as organic matter breaks down and gravity does its work. Over a few seasons, you might notice your soil level dropping or the texture becoming a bit more dense. This natural process can slowly undo your hard work if you aren’t careful. Maintaining effective raised bed drainage solutions is an ongoing conversation between you and your garden. It isn’t about constant digging; it’s about observing how water moves after a summer storm and making small, thoughtful adjustments every year.
Avoiding Soil Compaction
The easiest way to keep your soil free-flowing is to follow the “Never Step in the Bed” rule. It sounds simple, but even a single footprint can crush the delicate pore spaces that hold the oxygen your roots crave. If your beds are wide, use a temporary board to distribute your weight when harvesting. You should also keep your soil covered. A thick layer of organic mulch, like straw or shredded leaves, protects the surface from the physical impact of heavy raindrops. Without mulch, rain can actually “seal” the top layer of soil, making it harder for water to penetrate. Let the earthworms and old root systems do the heavy lifting for you. As they tunnel and decay, they create a network of natural drainage pipes that keep the ecosystem healthy.
Using the Michelle In The Meadow Soil Calculator
When it’s time for your annual seasonal top-off, don’t just guess how much material you need. Adding too much of the wrong amendment can throw off your drainage balance. I always recommend using the Soil Calculator for Raised Beds to determine the exact volume of compost and aeration material required to bring your beds back to their ideal height. By calculating the specific volume of your “settled” space, you can ensure you’re adding enough coarse perlite or compost to maintain that vital 50% porosity. Integrating these long-term raised bed drainage solutions into your routine ensures your garden stays productive for years. Start your next season with confidence by giving your plants the airy, well-drained home they deserve. Your garden is a unique ecosystem, and every year you spend observing it makes you a better, more intuitive grower.
Cultivating a Garden That Breathes
Building a garden that thrives starts with a shift in perspective. Instead of seeing drainage as a chore, think of it as creating an environment where roots can truly breathe. We’ve explored how to debunk the perched water table myth and why site preparation is the secret to a successful bottomless bed. Whether you’re retrofitting an old garden box or starting fresh, these raised bed drainage solutions prove that you don’t need a massive budget to achieve professional results.
Success in the garden is rarely about perfection; it’s about the small, earth-friendly choices you make every season. By focusing on soil structure and avoiding compaction, you’re protecting the beneficial microbes that keep your plants vibrant. Ready to get your next project started with confidence? Plan your perfect garden bed with our Soil Calculator! This easy-to-use DIY tool has helped thousands of home gardeners get their organic amendment ratios exactly right. I can’t wait to see what you grow. Keep observing, keep learning, and enjoy the journey of watching your garden flourish.
Frequently Asked Questions
Can I fix drainage without emptying my raised bed?
Yes, you can certainly improve drainage without a total teardown. Use a garden fork or a long auger to create deep vertical channels every few inches. Fill these holes with coarse perlite or washed sand to create permanent bypasses for water. This vertical mulching technique is one of the best raised bed drainage solutions for established gardens. It lets you save your soil while giving roots the air they need to survive.
Is it okay to put rocks at the bottom of a raised garden bed?
It’s actually better to avoid rocks or gravel at the bottom. While it sounds helpful, this often creates a perched water table where water clings to the soil above the rocks until it’s completely saturated. This forces the “wet zone” higher into your plant’s root area. Instead, use organic materials like logs or branches at the base. They provide drainage while slowly breaking down into nutrient-rich compost for your plants.
What is the best soil mix for high-drainage raised beds?
The most effective mix for drainage follows a balanced ratio of organic matter and aeration. Aim for 1/3 compost, 1/3 coconut coir or peat moss, and 1/3 coarse perlite or vermiculite. This structure maintains the 50% pore space needed for healthy roots. Avoid using plain bagged topsoil, as it often contains heavy silt that compacts over time. A light, fluffy mix is the foundation of long-term raised bed drainage solutions.
How do I know if I’m overwatering or if my drainage is just poor?
Start by observing the surface after a heavy rain. If you see puddles lasting more than an hour, your drainage is likely the culprit. You can also perform a “squeeze test” by grabbing a handful of soil from six inches deep. If water drips out easily, the soil is saturated. Overwatering usually affects the top inch, but poor drainage keeps the bottom of the bed soggy even when the top looks dry.
Does the height of a raised bed affect how well it drains?
Height does play a role because gravity helps pull water through the soil column more effectively in deeper beds. A bed that is 18 to 24 inches tall will generally drain faster than a shallow 6-inch frame. However, height can’t fix a bad soil recipe. Even a tall bed will become waterlogged if you fill it with heavy clay or silt. Focus on your soil texture first, then use height as an extra advantage.
Should I use a liner in my raised bed for better drainage?
Most liners actually hinder drainage rather than helping it. Plastic sheeting or woven weed fabrics can trap water or become clogged with fine soil particles over time. If you need a barrier to stop aggressive weeds, use plain brown cardboard. It provides a temporary block and then decomposes, allowing your bed to connect with the native soil. For beds on concrete, use non-woven geotextile fabric which allows water to pass through freely.
What are the best plants for raised beds with slower drainage?
While it’s always best to fix the soil, some plants are more tolerant of damp feet. Leafy greens like kale, Swiss chard, and certain varieties of mint can handle slightly heavier moisture than Mediterranean herbs or root crops. However, even these plants will eventually suffer from root rot if the soil stays anaerobic. Implementing permanent fixes is a better long-term strategy than trying to find plants that can survive a swampy environment.
How often should I check the drainage holes in my garden beds?
You should inspect your drainage holes at least twice a year. Early spring and late fall are the perfect times to make sure silt, decomposed organic matter, or wandering roots haven’t plugged the exits. Use a stiff wire or a screwdriver to clear any blockages in wooden or plastic beds. Keeping these mechanical drains clear is a simple, no-cost maintenance step that prevents water from backing up during the peak growing season.
