
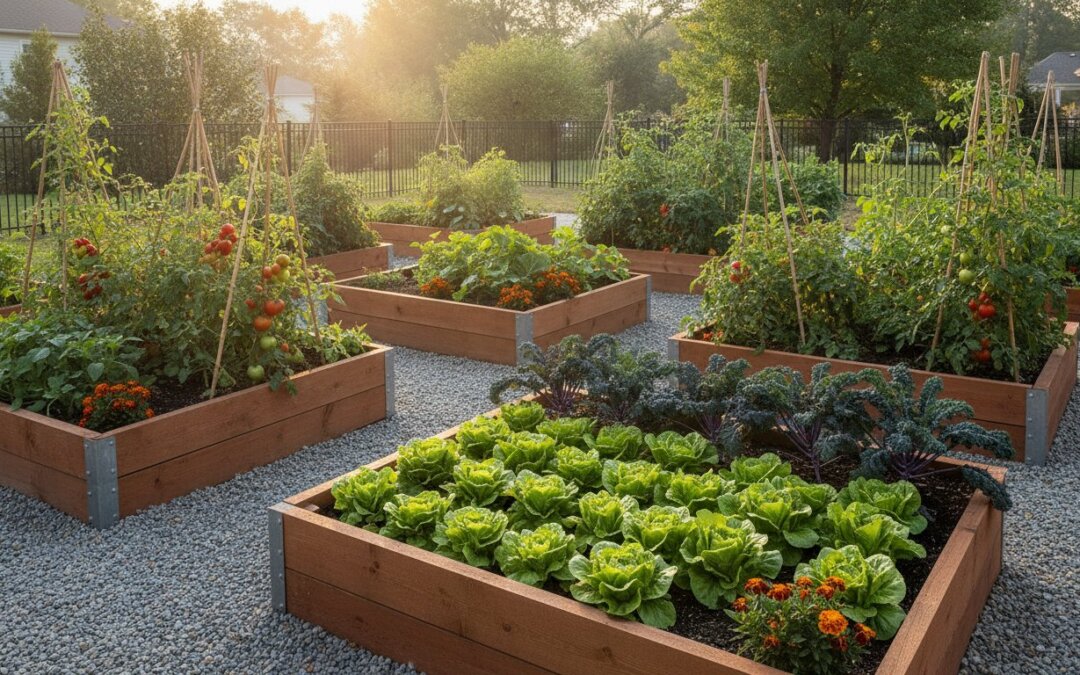
What if your backyard didn’t feel like a chore, but like a partner? For many of us, the dream of a lush harvest is often sidelined by the reality of stubborn, poor-quality soil and the physical toll of bending over ground-level rows. If you’ve ever walked away from a weeding session with aching knees or wondered why your native clay is winning the war, you aren’t alone. Transitioning to a raised garden bed is about more than just aesthetics; it’s about taking total control over your growing environment and your physical comfort.
I know how overwhelming it feels to stare at a sea of lumber, metal, and soil options while worrying about what’s actually safe for your family. You want a garden that lasts for decades, not just a single season. This guide is here to simplify those choices and help you master the essentials of choosing, building, and filling your beds for a successful 2026 harvest. We’ll explore everything from USDA-compliant materials and modular Birdies kits to using a soil calculator for raised beds so you never overspend on dirt. By the end, you’ll have a clear, step-by-step plan for a productive, beautiful space that makes gardening feel like the joy it was meant to be.
Key Takeaways
- Discover how to choose between natural rot-resistant cedar and durable Aluzinc metal kits to ensure your garden structure lasts for decades.
- Master the “Golden Rule” of layout by designing your raised garden bed to be no wider than four feet for easy, pain-free access to every plant.
- Learn how to cut soil costs by up to 50% using sustainable filling techniques like Hugelkultur to build a rich, moisture-wicking ecosystem.
- Avoid the guesswork and expense of over-ordering materials by using a soil calculator to determine the exact volume of organic matter your beds require.
- Keep your garden thriving long-term with simple spring “top-off” strategies and mulching techniques that suppress weeds and protect soil life.
Why Choose a Raised Garden Bed? Solving Common Gardening Challenges
A raised garden bed is essentially a container or mound of soil that sits above the natural ground level, usually held together by a sturdy frame of wood, metal, or stone. Why go through the effort of building up instead of just digging down? For many of us, the native soil in our yards is less than ideal. Whether you’re dealing with heavy clay that turns into bricks in July or rocky ground that breaks your shovel, an elevated bed lets you bypass those frustrations entirely. You get to start with a blank slate of nutrient-dense soil that you control from day one.
The Biological Advantage: Soil Control and Drainage
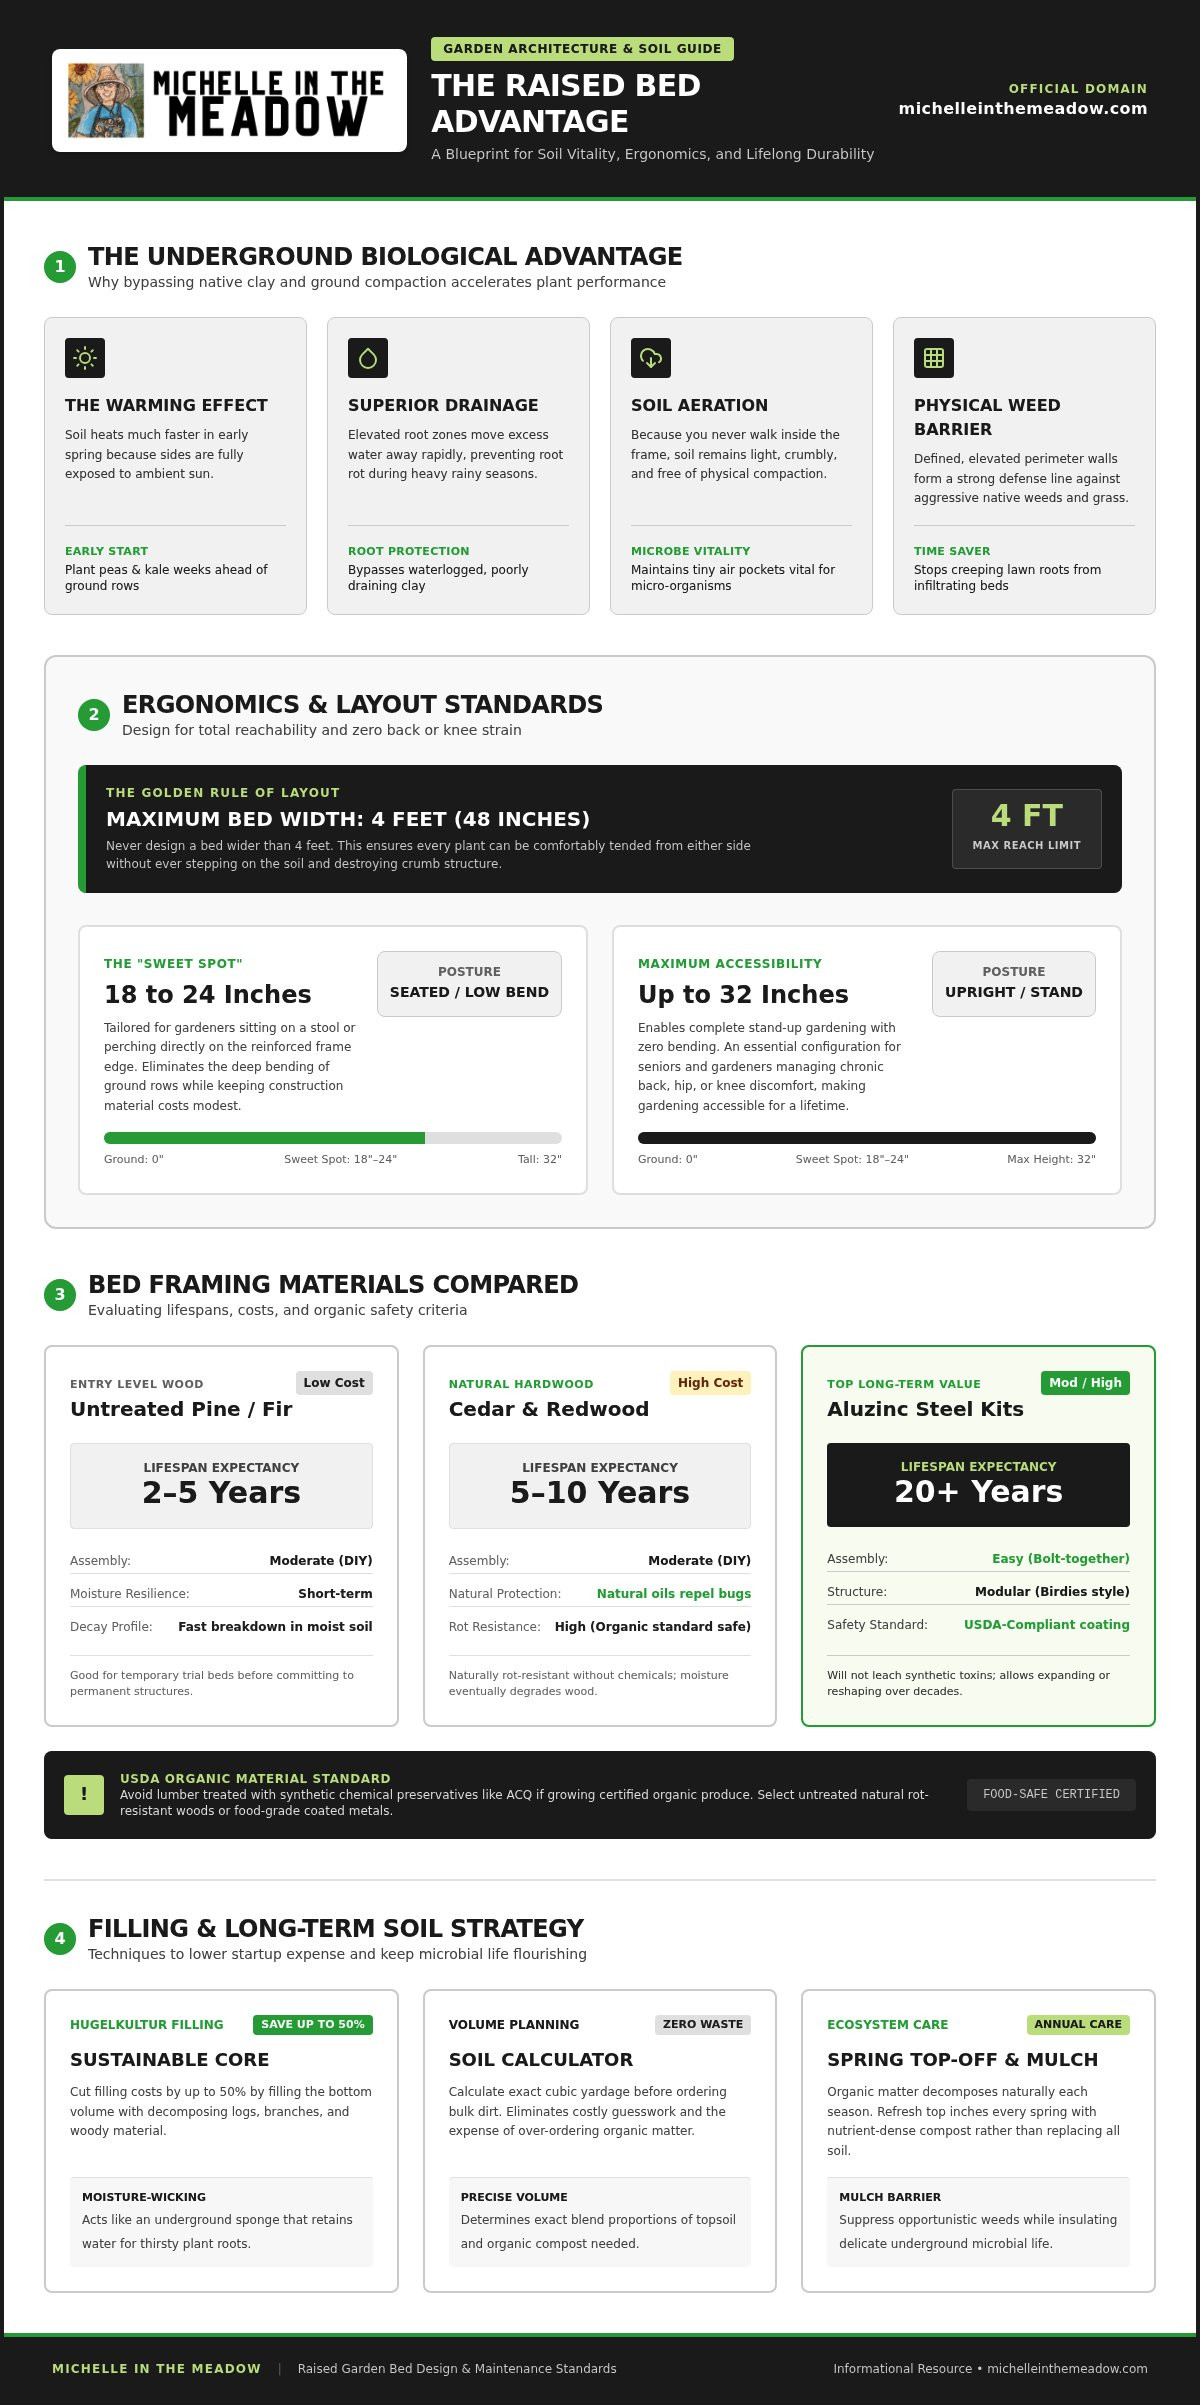
When you stop walking on your growing space, magic happens underground. Because you never step inside the frame, the soil stays loose and crumbly, allowing roots to spread without fighting through compacted dirt. This structure also provides superior drainage; excess water moves away from roots easily, preventing rot during rainy springs. The principles of raised-bed gardening also highlight the “warming effect.” Since the soil is above ground and exposed to the sun on the sides, it heats up much faster in the spring than the cold earth below. This can mean getting your peas and kale in the ground weeks earlier than your neighbors. Soil aeration is the process of maintaining tiny air pockets within the soil structure, which is vital for providing the oxygen that beneficial microbes need to survive and thrive.
Gardening Without the Ache: Ergonomics and Accessibility
Gardening should be a source of peace, not a reason to reach for the heating pad. One of the best things about a raised garden bed is that you can tailor the height to your own body. If you prefer to garden while sitting on a stool or the edge of the bed, a height of 18 to 24 inches is usually the “sweet spot.” For those who want to stand without bending at all, beds can be built up to 32 inches tall. This is a game changer for seniors or anyone managing back and knee pain. It makes the hobby accessible for a lifetime.
Beyond the physical relief, there’s a huge time-saving benefit. Defined borders act as a physical barrier against creeping grass and invasive weeds. It’s much easier to spot a stray dandelion when it’s contained in a neat, tidy space. Psychologically, there’s something incredibly calming about a manageable, organized garden. It feels less like a wild frontier and more like a curated sanctuary where you’re always in charge of the results.
Selecting the Best Materials: Metal, Wood, and Beyond
Choosing the skeleton for your raised garden bed is the biggest decision you’ll make. It determines how much you’ll spend today and how soon you’ll have to do it all over again. Safety is the foundation. Under USDA organic standards, you shouldn’t use lumber treated with synthetic preservatives like ACQ if you’re aiming for certified organic produce. Instead, look for untreated, naturally rot-resistant woods or food-grade coated metals that won’t leach unwanted chemicals into your soil.
Metal vs. Wood: Which Investment Makes Sense?
Traditionalists love wood. Cedar and Redwood contain natural oils that repel bugs and resist rot, making them beautiful, classic choices for any backyard. However, even the best untreated wood usually lasts only 5 to 7 years before constant soil moisture wins the battle. On the other hand, modular metal kits made from Aluzinc or galvanized steel, like Birdies beds, are built to last 20 years or more. These kits are incredibly easy to bolt together and offer a modular design, meaning you can add sections or change the shape as your garden grows. The powder coatings used on high-quality metal beds are also USDA-compliant, so you don’t have to worry about your veggies absorbing anything they shouldn’t.
| Material | Typical Lifespan | Relative Cost | Ease of Assembly |
|---|---|---|---|
| Untreated Pine/Fir | 2-5 Years | Low | Moderate (DIY) |
| Cedar/Redwood | 5-10 Years | High | Moderate (DIY) |
| Aluzinc Steel | 20+ Years | Moderate/High | Easy (Bolt-together) |
Alternative Options: Masonry and Fabric
If you want a garden that outlasts your mortgage, stone or brick masonry is a fantastic path. These materials are perfect for permanent, decorative landscaping, though they require more labor and a level base to install correctly. Just remember that masonry can hold a lot of heat, which might dry out your soil faster during a summer heatwave. For those on a tight budget or who rent their homes, fabric grow bags and beds are the ultimate portable alternative. They provide excellent heat dissipation and promote “air-pruning,” a process that prevents roots from circling and encourages a denser, healthier root system.
When selecting any material, always prioritize food-safe options. If you’re worried about older treated wood already in your yard, using a food-grade liner can provide an extra barrier. For a deeper look at how different materials affect your plants, this Utah State University Extension raised bed guide provides excellent research-backed insights. If you’re feeling stuck on the technical details, you can find more helpful gardening educational content to guide your next steps toward a successful harvest.
Planning Your Layout: Dimensions, Sunlight, and Drainage
Planning a raised garden bed is where the magic starts, but it’s also where a few simple mistakes can lead to backaches later. The most important rule? Never make your bed wider than 4 feet. Since the average human reach is about 24 inches, a 4-foot width allows you to reach the middle from either side without ever stepping on the soil and causing compaction. If your bed is tucked against a fence or a wall, keep it even narrower, around 2 or 3 feet. You also need to think about your pathways. Aim for at least 36 inches of space between beds so you can move a wheelbarrow through without scraping your shins. If you’re designing for wheelchair access or universal navigation, bump that path width up to 48 inches.
Before you set anything down, you’ve got to decide how to handle the grass underneath. You don’t necessarily need to dig it all up. Laying down a thick layer of untreated cardboard is a fantastic way to smother weeds and grass while inviting earthworms to the party. This “sheet mulching” approach saves your back and builds better soil over time. If you’re in an area with gophers or moles, this is also the time to line the bottom with galvanized hardware cloth to keep subterranean pests out of your harvest.
Sizing for Success: Height and Width Matters
For most leafy greens and herbs, a height of 12 to 15 inches is the perfect “sweet spot.” It provides enough depth for healthy roots while keeping your soil costs manageable. However, if you’re planting deep-rooted crops like large heirloom tomatoes, or if you want to avoid bending altogether, look toward beds that are 29 to 32 inches tall. Reach is the physical distance you can comfortably extend your arm to pull a weed or harvest a tomato without losing your balance or stepping into the growing area.
Location and Logistics: Sun, Water, and Leveling
Sun is your garden’s fuel. Most fruiting vegetables, like peppers and melons, need at least 6 to 8 hours of direct sunlight. Orienting your beds North-to-South ensures that taller plants won’t shade out their shorter neighbors as the sun moves across the sky. Don’t forget the water source. Dragging a heavy hose across the yard is the quickest way to lose your gardening motivation, so keep your beds as close to a spigot as possible. If your yard is sloped, you’ll need to dig out the high side to ensure the bed sits level. This prevents water and nutrients from simply washing out of one corner. Following Penn State Extension recommendations on raised bed soil health will help you maintain the right structure and ecosystem once your layout is set.
The Secret to Success: How to Fill Your Raised Bed Correctly
Filling a brand new raised garden bed is the most rewarding part of the setup, but it can also be the most expensive if you aren’t careful. Many beginners make the mistake of digging up native “yard dirt” to fill their containers. While it seems free, native soil is often too heavy and compacted for a raised environment; it lacks the drainage and aeration your plants need to flourish. In a contained bed, you’re essentially creating a custom ecosystem from scratch. To avoid overbuying or underestimating your needs, I always recommend using our Soil Calculator for Raised Beds before you head to the garden center.
Layering for Life: The Hugelkultur Method
If you’ve invested in a tall raised garden bed, like a 32-inch Birdies model, filling the entire thing with premium soil will break the bank. This is where the Hugelkultur method comes in. You can fill the bottom 40 to 50 percent of your bed with bulky organic materials you likely already have in your yard. Start with a base of decomposing logs and large branches, then add a layer of smaller sticks, dry leaves, and untreated grass clippings. As these materials slowly break down over several years, they act like a sponge, retaining moisture and providing a slow-release source of nutrients for your plants. Just be careful with the wood you choose. Avoid Black Walnut logs at all costs, as they produce a chemical called juglone that is toxic to many common vegetables like tomatoes and peppers.
Mixing the Perfect Growing Medium
Once your base layer is set, you need a high-quality growing medium for the top 12 to 18 inches where the roots will actually live. A tried-and-true recipe is the “thirds” mix: one-third finished compost for nutrients, one-third coconut coir or peat moss for moisture retention, and one-third vermiculite or perlite for drainage. This blend is often called a “raised bed mix,” and it differs from standard potting soil because it’s slightly denser to provide better support for larger vegetable plants. Soil structure is the physical arrangement of soil particles and the pore spaces between them, which determines how easily air and water can move through the root zone. When your structure is loose and crumbly, your plants spend less energy fighting the dirt and more energy growing fruit.
Getting your soil right from the start is the best gift you can give your future self. If you’re looking for more ways to garden sustainably, check out our curated gardening product recommendations to find the best organic amendments for your soil.
Long-Term Care: Maintaining Your Raised Bed Ecosystem
Some folks will tell you that a raised garden bed is a “set it and forget it” project. I wish that were true, but like any living ecosystem, your garden needs a little love each season to keep producing those heavy harvests. You’ll likely notice the soil level dropping by a few inches every year. This isn’t a mystery; it’s simply the organic matter you worked so hard to build breaking down and feeding your plants. This natural settling is actually a sign of a healthy, active soil web.
Beyond the soil, you should take a few minutes each spring to inspect your infrastructure. If you’re using modular metal kits like Birdies, check the bolts for any loosening caused by freeze-thaw cycles. For cedar or redwood beds, look for structural stress or signs of unexpected rot. Catching a small wobble now prevents a full blowout when the soil is heavy with mid-summer rain. To keep things manageable, I always suggest mulching the surface with straw or wood chips. This simple step suppresses weeds and keeps the soil moisture consistent, which is vital in elevated beds that tend to dry out faster than the ground.
Annual Soil Refreshment and Nutrition
The “Top-Off” rule is your best friend. Every spring, instead of tilling and disrupting the fungal networks you’ve built, simply layer 1 to 2 inches of fresh, high-quality compost on the surface. Rain and earthworms will carry those nutrients down to the roots for you. It’s also wise to test your pH every couple of years. Because many raised garden bed mixes rely on peat or coir, the environment can become slightly acidic over time. A quick test helps you decide if you need a dusting of garden lime to keep things balanced. Even in a small space, try to practice basic crop rotation. Moving your tomatoes to a different corner each year prevents soil-borne diseases from settling in for the long haul.
Seasonal Protection and Irrigation
As the seasons change, your beds can work even harder for you. In the winter, don’t leave the soil bare. Sowing a cover crop like crimson clover protects the surface from erosion, or you can simply tuck it in under a heavy blanket of shredded leaves. If you want to start earlier in the spring, the modular frames of metal beds make it easy to attach simple PVC hoop houses or bird netting. When it comes to watering, drip irrigation is almost always superior to soaker hoses in a raised layout. Drip lines deliver water with precision, which reduces evaporation and keeps the foliage dry to prevent blight. Gardening is a journey of small, steady steps. Start with one or two beds, learn their rhythm, and grow your sanctuary as your confidence blooms.
Ready to Build Your 2026 Garden Sanctuary?
Transitioning to a raised garden bed is one of the most rewarding shifts you can make for your backyard and your physical health. By choosing durable materials like Aluzinc metal and sticking to the “golden rule” of a four-foot width, you’re setting yourself up for years of easier weeding and better harvests. Success always starts from the bottom up. Whether you’re using the Hugelkultur method to save on costs or refreshing your top layer with organic compost, your soil remains the heart of the operation.
I’ve spent years testing modular kits and refining organic methods to make this hobby affordable for everyone. It’s why thousands of home gardeners trust my hands-on reviews and practical guides. Before you order your supplies, use our Free Soil Calculator to plan your garden beds! and avoid the frustration of overbuying. You don’t need to have a perfect green thumb to get started; you just need a little bit of planning and the right tools. I’m so excited to see your garden bloom this season!
Frequently Asked Questions
Do I need to put a bottom on my raised garden bed?
Generally, no. An open-bottom raised garden bed allows roots to reach deeper and beneficial insects to move freely. If you have burrowing pests like gophers or voles, you should line the bottom with galvanized wire hardware cloth. For beds placed on concrete or rooftops, you’ll need a permeable geotextile liner to prevent soil washout while still allowing water to escape. Most backyard installations flourish best when connected directly to the earth.
What is the best material for a raised garden bed to last 20 years?
Aluzinc and Galvalume corrugated steel are the top choices for longevity. These materials are engineered to resist rot, termites, and rust for over 20 years, far outlasting traditional wood. Modular kits like Birdies use food-safe powder coatings that won’t leach into your vegetables. While natural cedar is beautiful, it typically lasts only 5 to 10 years in wet soil. Investing in high-quality metal ensures your garden infrastructure remains stable for decades.
How deep should a raised garden bed be for vegetables?
Most vegetables thrive in a depth of 12 to 15 inches. This provides enough space for the root systems of leafy greens, herbs, and root crops like carrots. If you’re growing large, heavy feeders like heirloom tomatoes or melons, you might prefer a depth of 18 to 24 inches. Ergonomic beds often reach 32 inches tall, which is perfect for gardening without bending over while still offering ample room for any vegetable root system.
Can I put a raised garden bed on top of grass?
You certainly can. The easiest method is “sheet mulching” by laying down a thick layer of untreated cardboard directly over the grass. This smothers the turf and eventually decomposes into organic matter. Once the cardboard is in place, you can set your raised garden bed on top and fill it with soil. This approach saves you the back-breaking work of digging up sod and helps keep the native soil structure intact underneath.
What is the cheapest way to fill a tall raised garden bed?
The “Hugelkultur” method is the most budget-friendly way to fill deep beds. You fill the bottom 40 to 50 percent with logs, branches, and dry leaves found in your yard. This reduces your initial soil volume requirements and can cut fill costs by up to 50 percent. Over time, these materials break down into rich compost and help retain moisture. It’s a sustainable way to build a healthy ecosystem without buying dozens of expensive soil bags.
Do raised garden beds need drainage holes?
Most ground-based beds have an open bottom, so they drain naturally into the earth. If your bed has a solid base, such as those designed for balconies or patios, drainage is essential to prevent root rot. These units require pre-drilled holes and often a layer of gravel or a geotextile liner to ensure water moves through the soil effectively. Proper drainage keeps the soil aerated and prevents the anaerobic conditions that can kill your plants.
Is pressure-treated wood safe for vegetable garden beds in 2026?
Modern residential pressure-treated lumber using Copper Azole (CA) is considered safe by the EPA for home use. However, current USDA organic standards still prohibit the use of lumber treated with synthetic chemicals for certified organic produce. If you want to follow strict organic principles in 2026, it’s best to use untreated rot-resistant timber like cedar or food-grade coated steel. For those using treated wood, a food-safe plastic liner can provide an extra barrier between the wood and your soil.
How much does it cost to start a raised bed garden?
As of 2026, a standard 4×8 DIY wooden bed costs between $60 and $110 using untreated lumber. If you opt for premium cedar or redwood, that price can jump to $350 or more. High-quality modular metal kits generally range from $110 to $260 depending on the depth and size. Remember to factor in soil costs; bulk soil delivery is usually much cheaper than buying individual bags at a retail store if you’re filling multiple beds.
